This post contains affiliate links. When you purchase through our links, we may earn a commission.
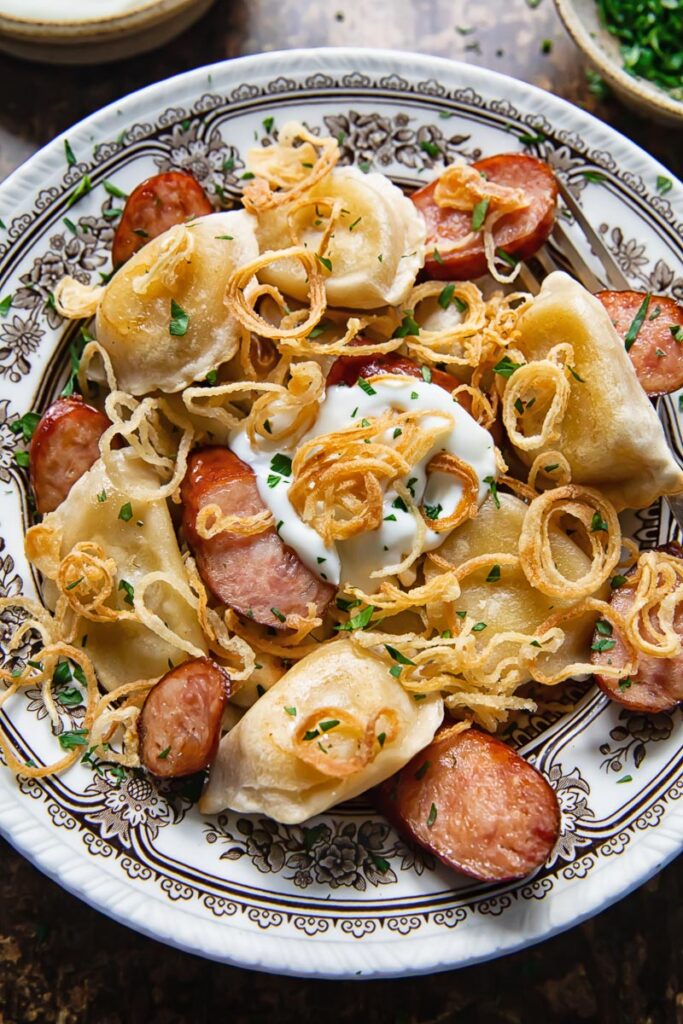
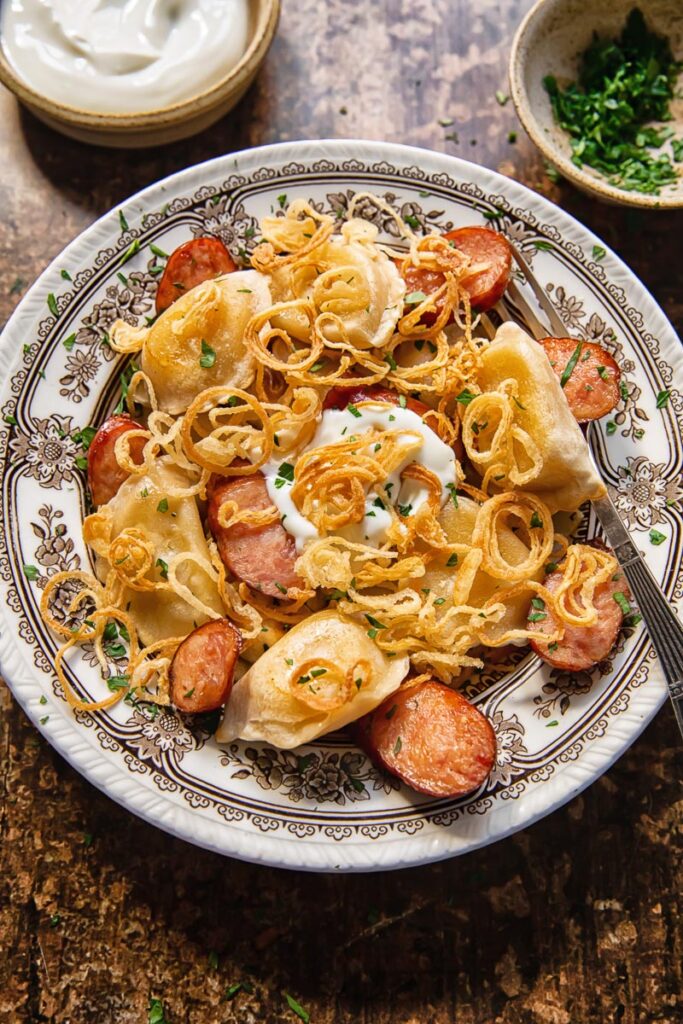
Pierogies and kielbasa are a dish of doughy dumplings with a fluffy potato centre and thick slices of hunky smoked sausage, a tempting dinner-time treat. Top with sweet, crispy fried shallots and a dollop of velvety sour cream and you have an authentically Polish midweek meal. And using store-bought pierogies, rather than homemade, will take your prep time down to around 20 minutes.
Dark days and an extra blanket on the bed really brings out the Eastern European in me. I find myself craving the comfort foods of my childhood like this sweet and sour beef stew (solyanka), which also makes use of kielbasa sausage.
What are pierogi?
These dear little dumplings fill me with nostalgia. Growing up I would have called them vareniki, being further towards Ukraine and the east of Europe. However, they are perhaps better known by their Polish name: pierogi or pieróg.
The grammar gets a little lost in translation, but pierogi (plural) are delightful dough parcels with either a sweet or savoury filling. Mostly they are vegetarian, pelmeni are usually the meat ones, and my favourites are stuffed with sauerkraut and mushroom or potato and caramelised onion with bacon.
For this recipe I have used timesaving, store-bought, potato ones from the freezer aisle, which cuts the kitchen time from down from an hour and forty minutes to around 20! But if you fancy a dumpling making afternoon, I have a step-by-step pierogi recipe for you to follow.
Crispy fried shallots
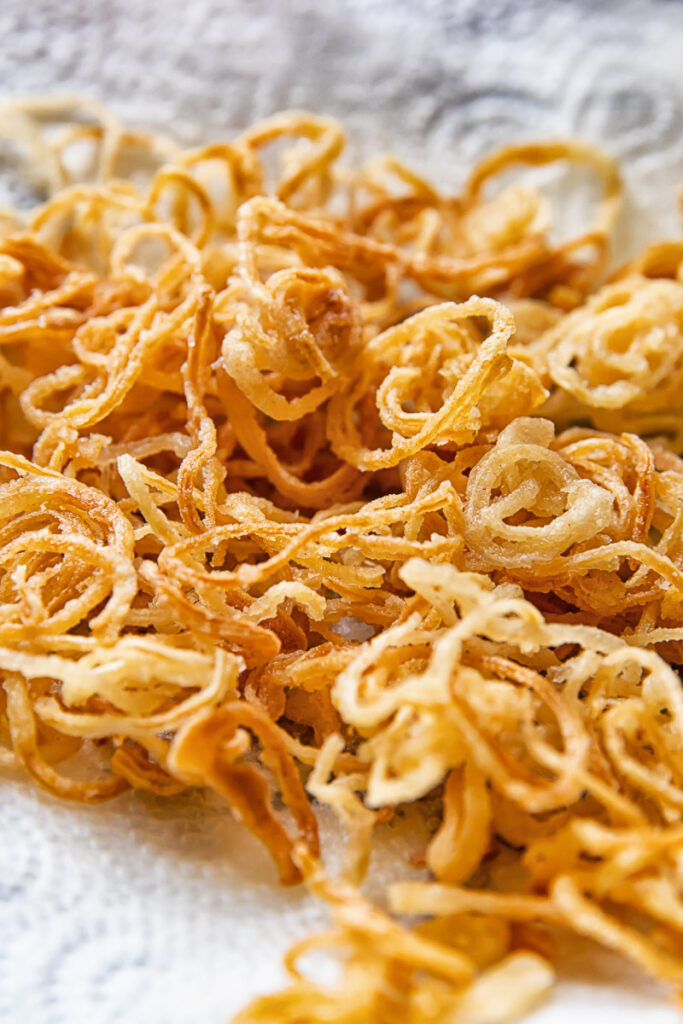
These spiral strands of gold are not just sitting pretty on the plate, and should certainly not be omitted. They add a crunch that contrasts the soft-centred pierogi and a sweetness to balance the smoky kielbasa.
First, I slice them as thinly as I can, so they fry the palest yellow. Then to achieve their fragile wispiness they need a complete coating of flour. Each curl should be well covered before being lowered into the sizzling oil. It won’t take long until they are light fresh straw colour.
On a paper towel on a plate, leave them to rest so the excess oil is absorbed. Skipping this part means oily onions on your delicate pierogi and no crunch. So, give them enough time to dry!
I’ve used shallots as I like their dainty sliced circles and the natural sweetness. But regular onion will do if that’s what’s available.
Recipe Tips and Notes
- For the crispiest shallots, coat them generously in 2 tablespoons of flour.
- And keep an eye on them when frying. Leaving them too long will turn them dark and bitter.
- Remove them from the oil as soon as they turn sunlight golden and place on a paper towel to soak off the excess oil.
- Keep that oil! It will be infused with the sweet-tasting shallots and can be used in other savoury dishes that require cooking oil.
- Most recipes will suggest frying the pierogi in butter to achieve the colour and shimmer and the shell-like exterior. Admittedly, the taste and texture are exquisite, but sometimes you just need an easy way. And I’ve found it! A baking tray, a drizzle of oil and a few minutes under the broiler (grill (UK)).
- It might be tempting to leave the little loves under the broiler a minute more to give them an all-over tan, but don’t! A minute more can take them from shiny and slick to dry, chewy and disappointing.
- It’s worth seeking out an Eastern European shop to get your hands on a decent kielbasa. Look out for an authentic Polish brand.
Serving suggestions
A plate piled with simple and steaming pierogi is a beautiful thing! They are served virtually naked, so they can be enjoyed without interference, and might even come with only a knob of butter dripping as dressing.
A dollop of traditional sour cream, a side of sauerkraut, or a sprinkling of feathery dill are all typical accompaniments. Or in my house, a bit of everything!
If you’re planning a three-course Eastern European inspired meal, I recommend starting with borscht and finishing with a rustic plum cheesecake.
Storage and leftovers
Like pasta or gnocchi, pierogi tend not to chill well. Their doughy nature means time in the fridge can take them from tender to tough. So, if you needed an excuse to polish them all off, I just gave it to you!
Other Russian recipes to try
- Russian Eggplant Caviar (Ikra)
- Russian Potato Salad Recipe (Olivier)
- Russian Frikadellar Soup (Meatball Soup)
- Homemade Russian Sauerkraut
Pierogies and Kielbasa

Ingredients
- 400g / 14 oz frozen potato pierogi
- 1-2 tbsp This is an affiliate link.olive oil
- 4 kielbasa sausages, thickly sliced
- 1 shallot, thinly sliced
- 2 tbsp flour
- 1/2 tsp salt
- 100ml / 3½ oz vegetable oil, for frying (save for later use)
- sour cream, for serving
Instructions
- Set a pot of water boiling for the pierogi. Once the water boils, add the frozen pierogi and boil them until they float to the surface, drain in a colander. Set the oven to broiler/grill mode.
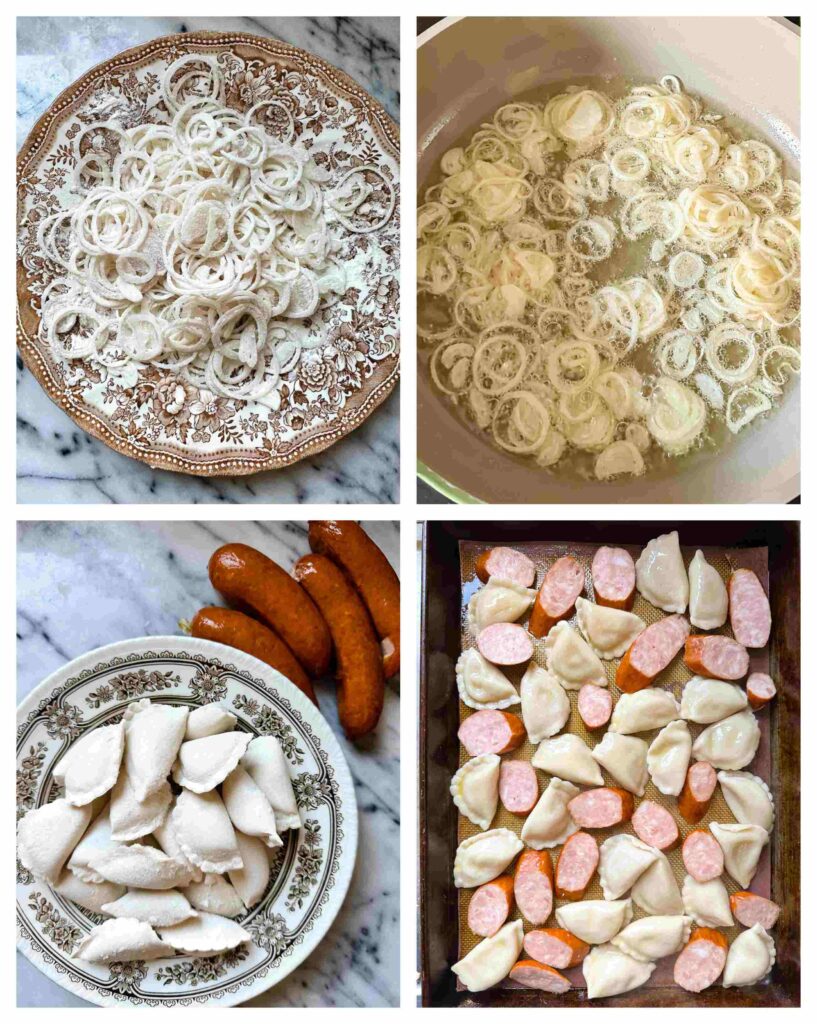
- Meanwhile mix the flour with the salt in a large plate. Slice the shallot thinly, use a mandolin if available. Mix the shallot slices with the flour and set aside.
- Add the vegetable oil to a frying pan, it should be at least an inch deep and turn the heat on medium. Heat the oil until it sizzles if you sprinkle a pinch of flour in. Shake the excess flour off the shallots and add them to the hot oil, spread evenly over the bottom of the pan. Fry until lightly golden, which should take about 3-5 minutes depending on how hot the oil is. Remove with a slotted spoon or a spatula as soon as you see the shallots starting to colour and place on a paper towel lined plate. Set aside till later.
- Line a rimmed cookie sheet with parchment paper and add the pierogi, drizzle with the olive or sunflower oil and toss gently to coat. They should be evenly coated with oil. Then add the sliced kielbasa sausage to the pan. Broil on a baking sheet set on the top rack of the oven for 5 minutes, then flip and broil for 2 minutes on the other side.
- Serve pierogi and kielbasa topped with crispy shallots and a dollop of sour cream or creme fraiche (smetana).
Nutrition
Nutrition information is automatically calculated, so should only be used as an approximation.