This post contains affiliate links. When you purchase through our links, we may earn a commission.
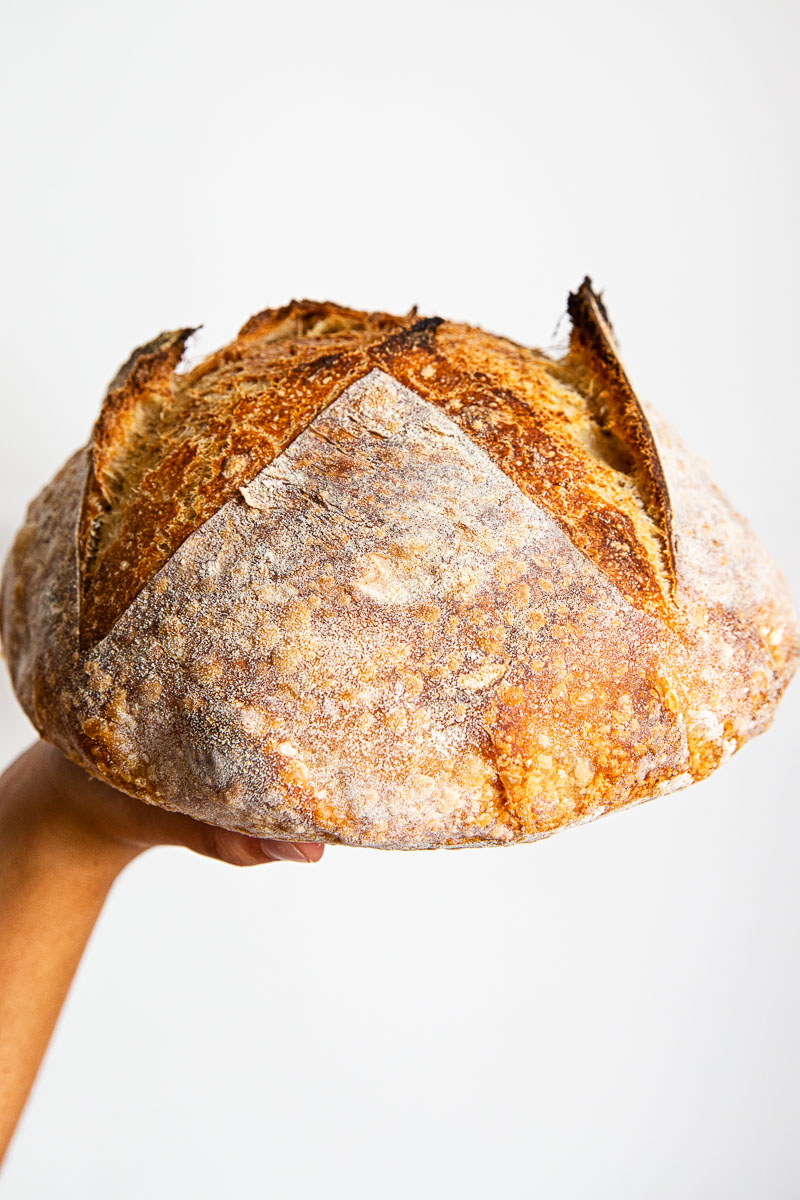
Everything you need to know to start baking delicious sourdough bread. From making the starter to troubleshooting for common issues.
Love baking bread but looking for a classic yeasted bread instead of sourdough? Take a look at out Easy No Knead Farmhouse Bread Recipe.
What is Sourdough Bread?
Chances are you already know the difference between a regular yeasted bread and a sourdough bread but in case it’s still unclear here are the basics.
Sourdough gets its rise from a starter rather than commercial produced yeast. The starter is simply made from a combination of flour and water, that’s been exposed to wild yeast, which naturally occurs in our environment.
It takes anywhere between 7 to 10 days to develop a strong and active sourdough starter but the process is dead easy! Time is what defines sourdough. For the bread to have a proper rise the dough needs to ferment for several hours, so there is no such thing as a quick sourdough bread.
While it’s not particularly difficult to make sourdough bread the process takes significantly longer than bread made with commercially made yeast. There are no shortcuts. You do need to wait for that delicious loaf of sourdough.
Sourdough Starter
When I first began exploring sourdough it was due to a necessity. As many others I have discovered that our stores were without yeast and we were told to stay home, so no fresh bread either. Sounds familiar? Yes, I am talking about the infamous March of 2020!
I asked around about the process of making a sourdough starter and was dissatisfied with the answers. The reason for it was it sounded too simple and I was sure it couldn’t be! All I had to do was to mix equal amounts of flour and water and wait. Well, great news is IT IS this simple.
You can also just ask a friend to share their starter and save yourself some work. Every sourdough baker will be happy to do that as we need to discard regularly, there is much wealth to share!

How to make it
To begin on your sourdough journey mix 50g of whole wheat or rye flour and 50g water in a clean jar with a lid and leave it somewhere warm. Make sure your jar is clean and there are no traces of dish soap left in it. It doesn’t need to be sterilised.
Place your lid on top of the jar, don’t screw it on. This way the wild yeast will work its way in but the lid will prevent from dust getting inside.
The following day scoop out a half of the mixture and discard. Then top up the remaining starter with 50g of whole wheat or rye flour and 50g of water.
Continue this every day for at least 7 days. By then you should see bubbles forming, which means your starter is on its way!
Problem 1:
I don’t have whole grain flours. Can I use all purpose flour/white flour.
Solution 1:
Yes! You can absolutely use white flour for your starter, however it will take longer for it to become fully active. The nutrients, that are more abundant in whole grains, are what give the starter its food. Whole wheat and rye flour are also rich in microorganisms that sourdough starter needs to fully develop.
Problem 2:
My starter separated and there is a clear liquid formed on top.
Solution 2:
Not a problem! Just mix it in and keep going. As long as your starter a regular colour and doesn’t have an offensive smell, it’s all a part of the process.
Problem 3:
My starter turned black on top and smells foul.
Solution 3:
Sadly this means you will have to throw it out and start over. A healthy starter should have bubbles on top and throughout and have a pleasing sour smell.
Fortunately for you, it’s very rare for things to go sideways. Fermentation is a pretty simple and straightforward process.
Basic bread dough recipe
The recipe I use weekly is basic. Just flour, water, sourdough starter and salt. Once you master it, you can play with the recipe and add cheese, herbs, dried fruit, nuts or anything you might think of!
You can also experiment with different flours. My usual mix is white bread flour and whole wheat or rye sourdough starter, which makes 20% wholegrain, 80% white.
How Long to Ferment Sourdough
Once your starter is active, you are ready to begin baking sourdough bread. The process might seem intimidating at first but with this simple guide and some practice you will start producing gorgeous loaves all on your own!
One of the main things to keep in mind. With sourdough you always have to plan at least one day ahead as all sourdoughs require an overnight ferment. So if you want to bake a fresh loaf in the morning, you need to start in the morning of the previous day.
Although it sounds like a lot of work in reality it’s not work, it’s just time. There is a lot of waiting in the sourdough game.
The Main Stages of Fermentation
1. Activate Starter
In the morning discard half of your starter, then mix the remainder with 50g of flour and 50g of water. Mark the line of the mixture to track the progress of fermentation. You want your starter to double in size before you add it to your dough. See the photo of the peaked starter below.
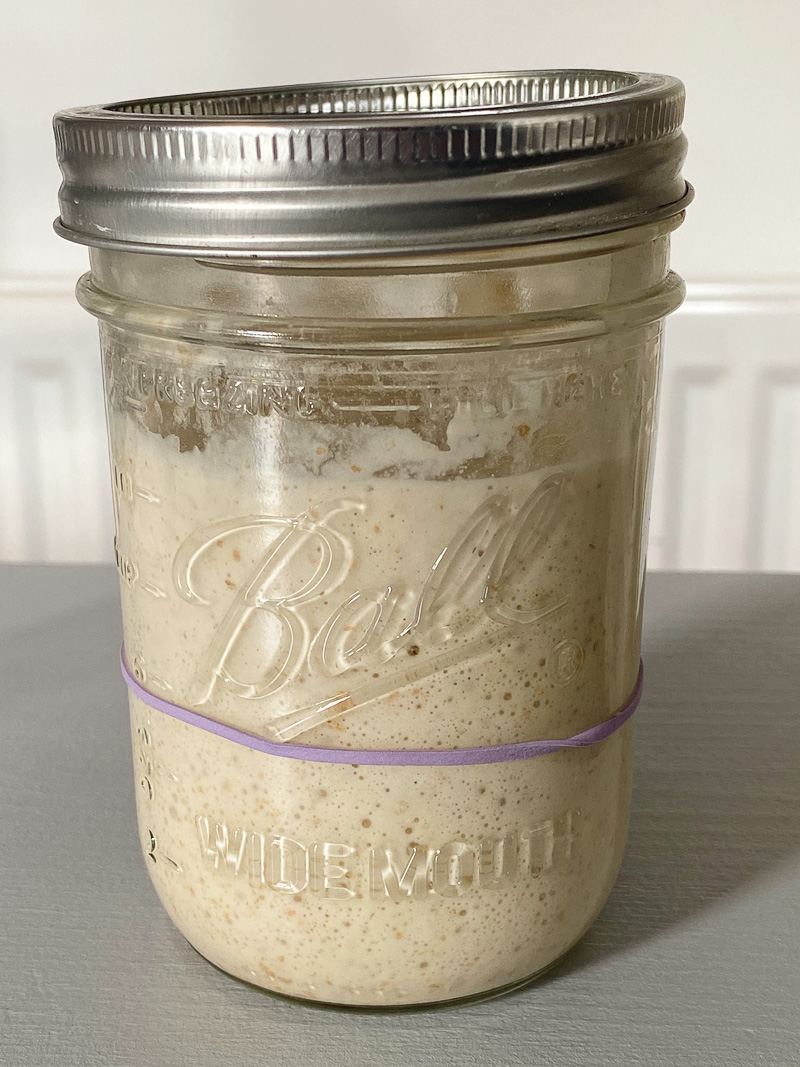
Float Test
One of the way to check if your starter is ready is through a float test. Drop a small amount of your starter into water. If it floats, it means the starter has enough gas for fermentation to take place. It is ready to be added to your dough.
2. Autolyse
It’s recommended to mix the flour and water and let it rest anywhere between 30 minutes to one hour before the starter is added.
This process is called autolyse and is designed to hydrate the flour and to develop gluten. After as little as 30 minutes of autolyse you will see a magical transformation and your clumpy mixture will relax and turn into soft and stretchy substance. Now it’s ready for final two ingredients- sourdough starter and salt.
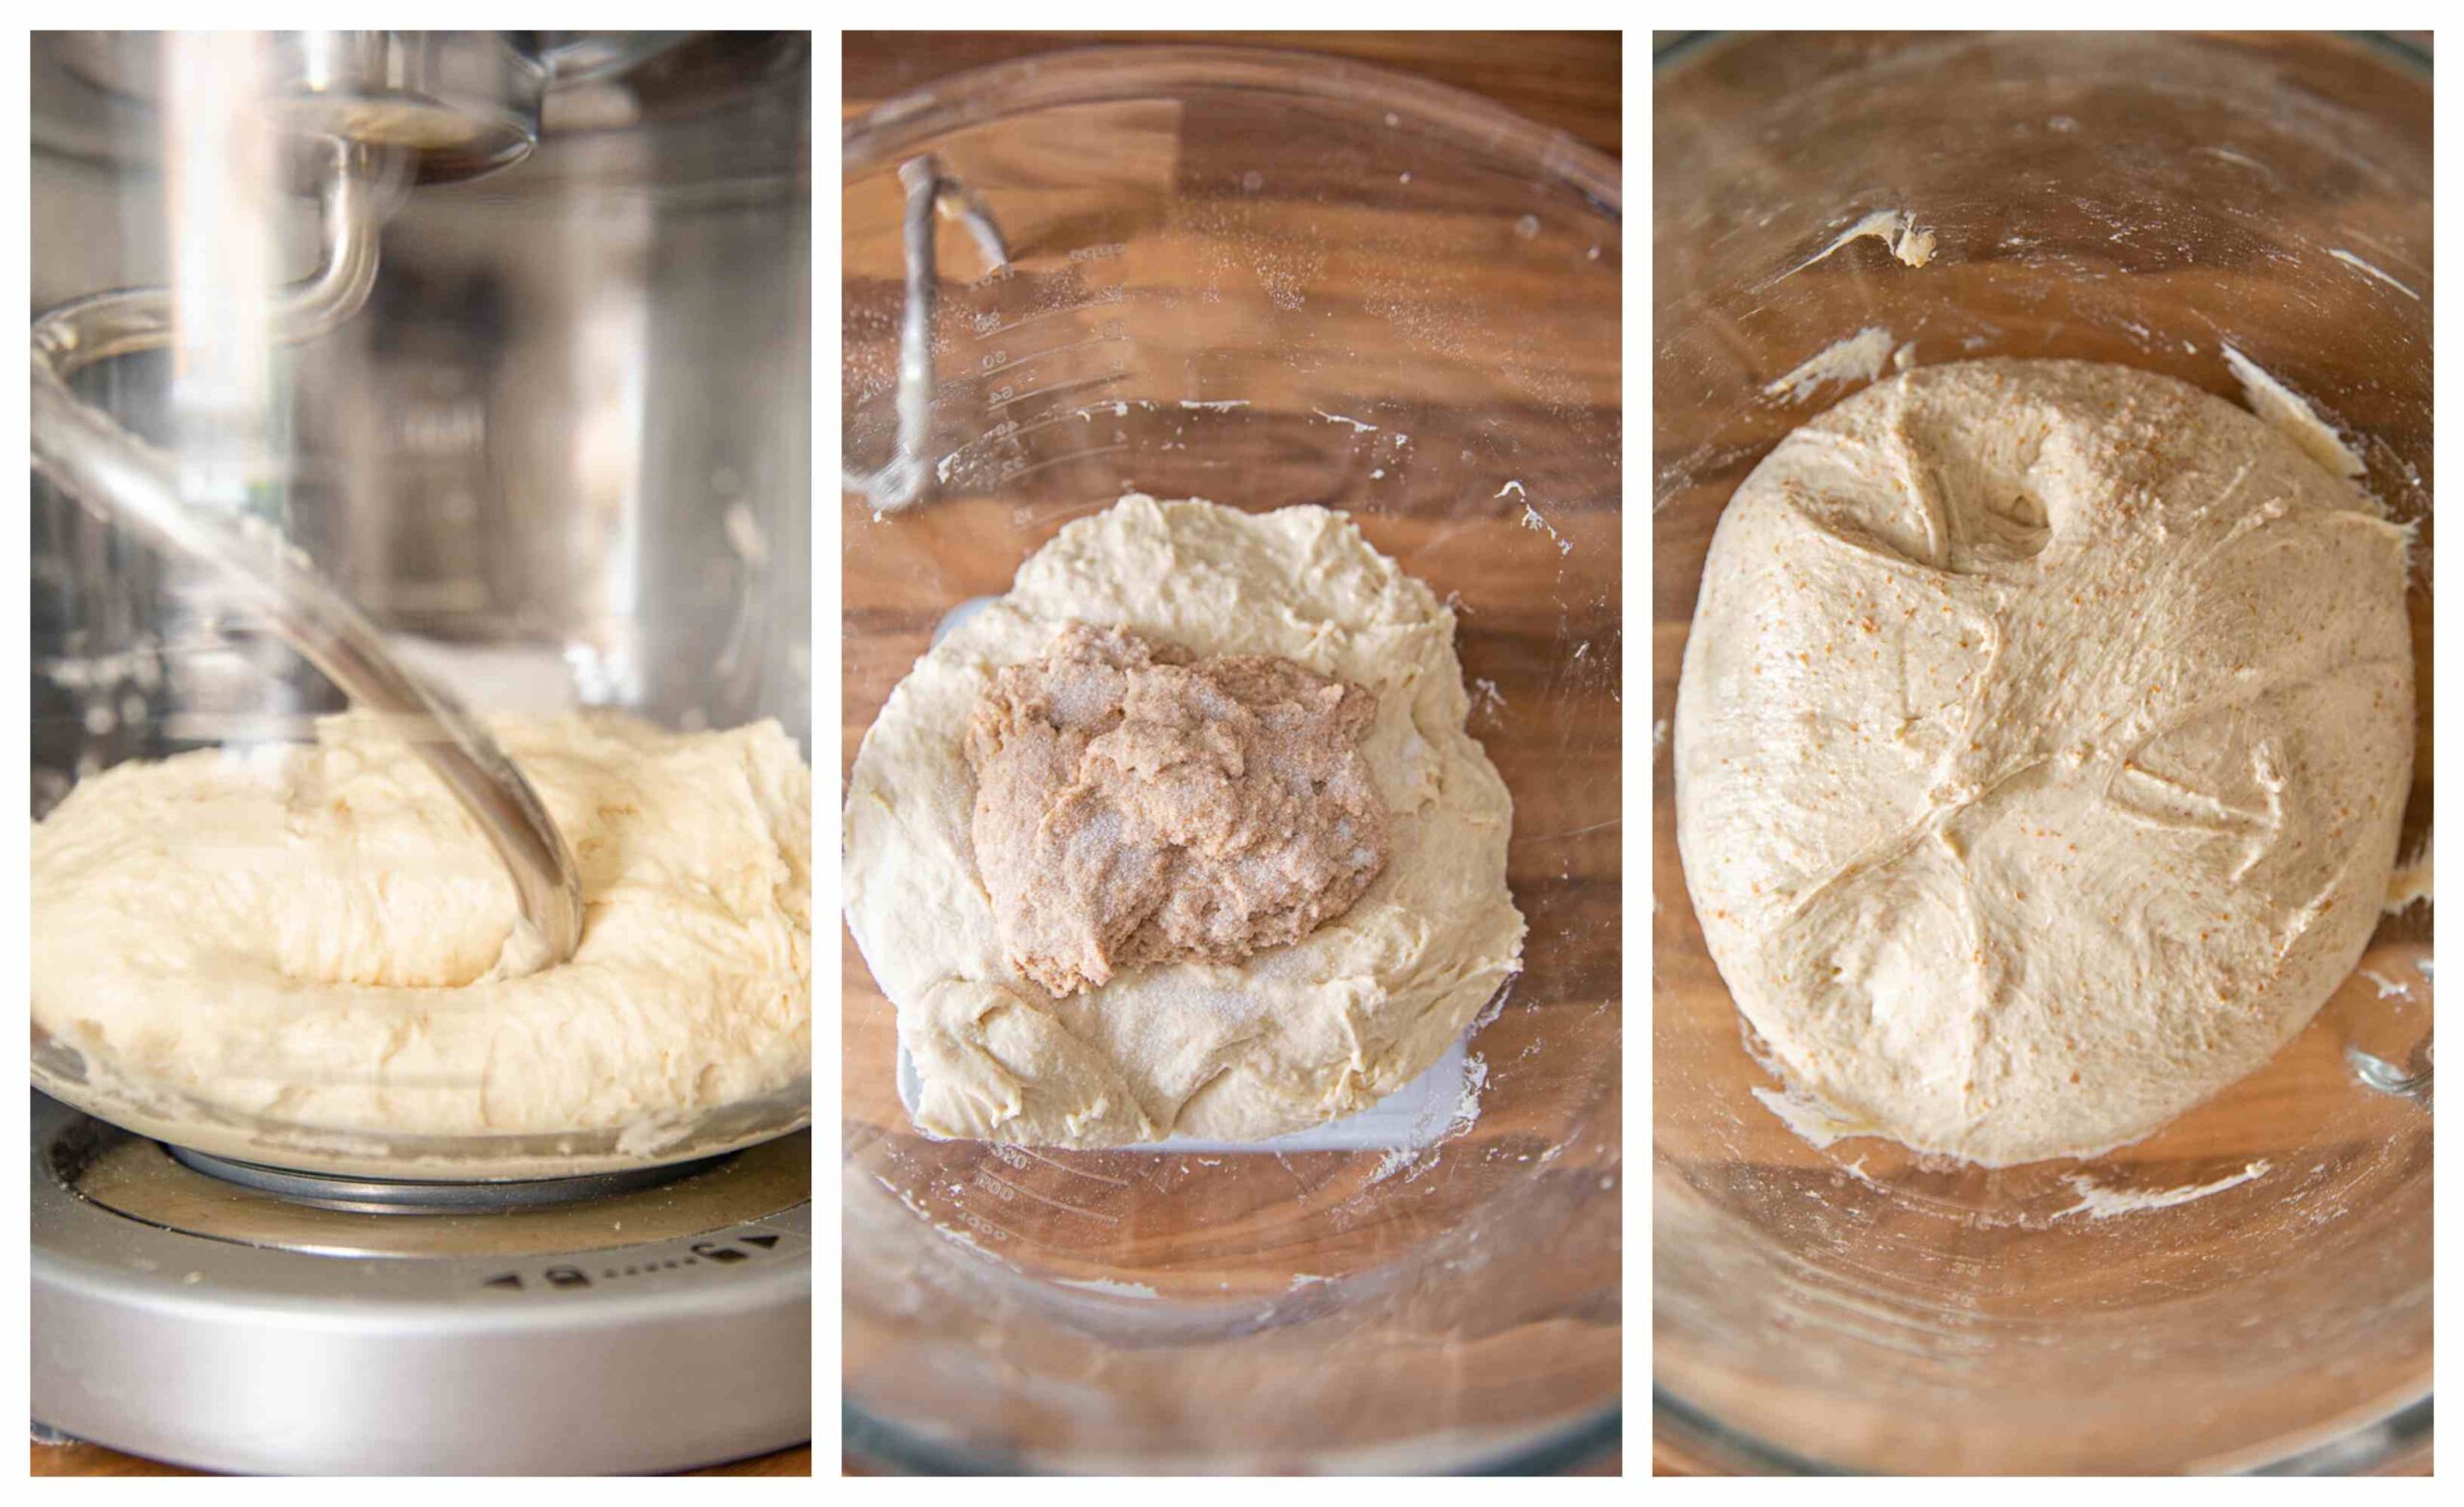
3. Bulk Fermentation
In the first photo of the collage above you can see the flour and water 30 minutes after they have been combined. The beginning stage of the bread dough.
Next I add 100g of my activated starter and 9-10g of salt and knead it for 10 minutes. The last photo shows what the dough looks like at the end of the kneading process. It will be very soft and stretchy and slightly rounded on top, which is a good indicator that some strength has been built into the dough.
At this point I cover the bowl with some plastic wrap and let the dough ferment on my kitchen counter anywhere between 4-5 hours. This stage is called bulk fermentation. At the end of it you should have a dough that jiggles slightly when you shake the bowl. It won’t double in size, in fact it will only change in volume very lightly but it will be bubbly and bouncy.
Stretch and Fold Method
This description of the bulk fermentation stage wouldn’t be complete without mentioning of the stretch and fold method. Full disclosure: I no longer use it.
The method is used to build strength and structure into the dough, which later results in a beautifully shaped and risen sourdough loaf.
The first set of stretch and folds is done 30 minutes to an hour after the dough has been mixed. It’s performed by picking up a handful of the dough, stretching it as far as it can go without tearing, then folding onto itself. That is done four times rotating the bowl with the dough each time and pulling a different side of the dough.
Ideally you want to perform at least 3 sets of stretch and folds in 30 minute intervals. This method does produce great results, however I found it very time consuming as you have to tend to your dough for two hours. Not difficult, just bothersome.
That is why I prefer kneading my dough and then leaving it alone.
4. Overnight Fermentation
I typically leave my sourdough to ferment at room temperature until I am ready to be done with kitchen work for the day. I shape it and put it away in the fridge overnight at around 8pm-9pm. Then I leave it there for up to 16 hours.
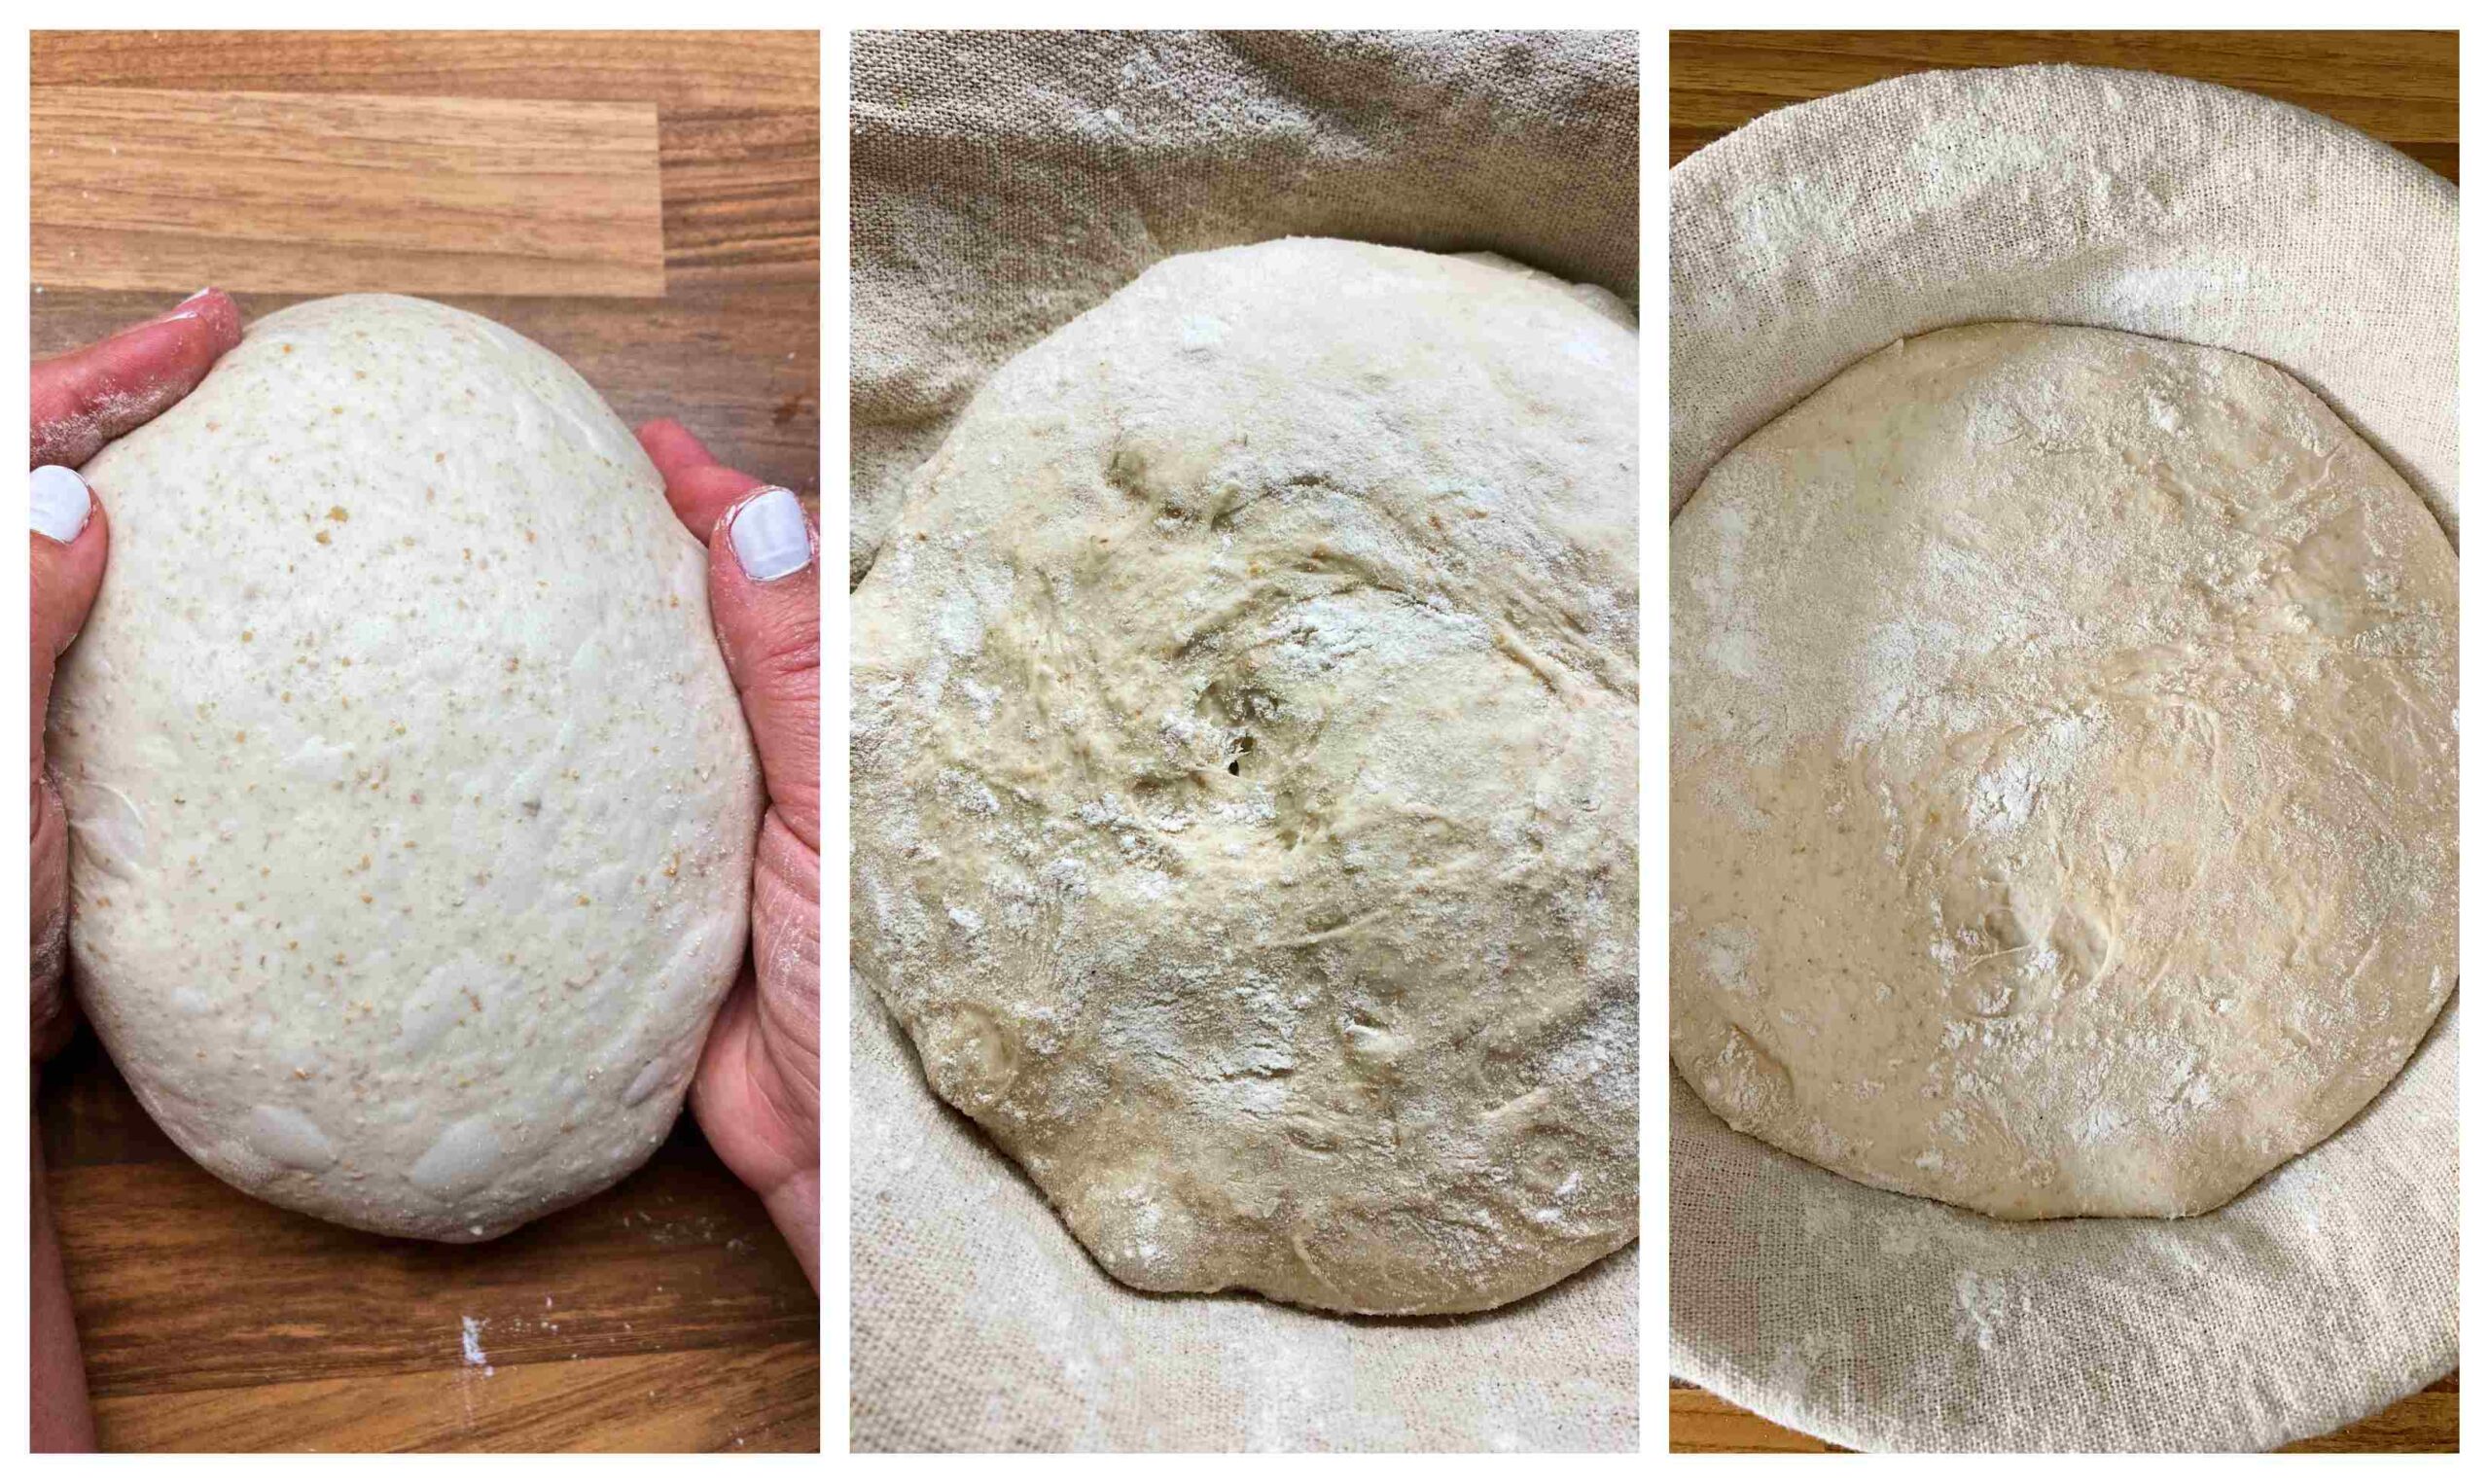
In the photos below you will see the dough shaped and ready to go into a banneton (wicker proofing basket) for an overnight fermentation. You can ferment it in a bowl lined with a kitchen towel if you don’t own a banneton. The dough needs a round bottomed vessel to be shaped.
If you look closely, you will see little bubbles on the surface of the dough, which look like blisters. They are good indicators, that your dough has undergone through an initial stage of fermentation and is ready for the fridge.
Middle photo is the dough before the overnight fermentation and the third photo shows the dough 16 hours later. You will see bubbles on the surface of the dough in all photos.
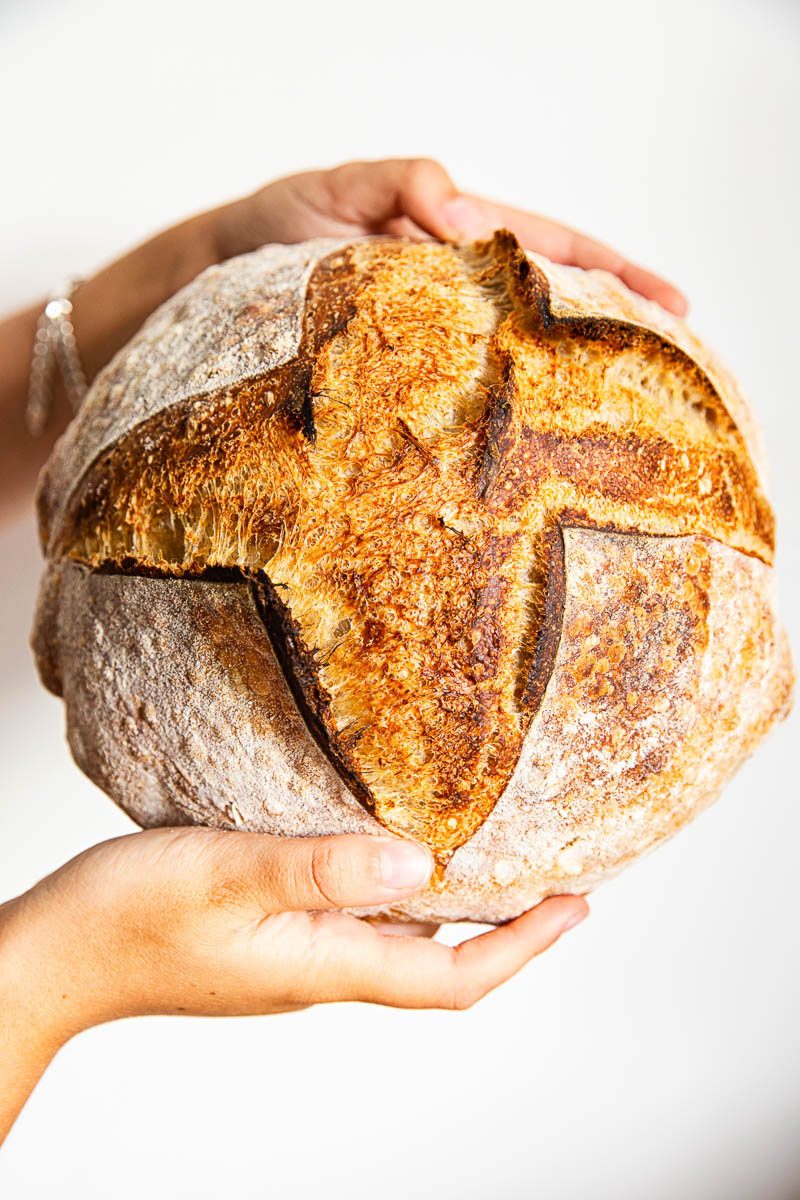
Shaping the Loaf (Boule)
Shaping is one thing that really intimidated me when I first started out. I kept watching various videos and tried to mimic what the pros were doing. The visuals were beneficial but what really helped is practice and a lot of it!
I am by no means a pro but I’ve attached a video in the recipe card to guide you through the process.
Main Pointers
- Gently scrape the dough out of the bowl onto a floured work surface. ‘Gently’ is the keyword here. Sourdough needs a light hand as it doesn’t recover if handled roughly or punched down like yeasted dough.
- With floured hands pull one side of the dough and fold it over itself, repeat the same motion with the other 3 sides. In other words, wrap it like an envelope and pinch at the top, so it stays together. Your dough should be full of bubbles at this point, so make sure to not knock them down.
- Using a bench scraper pick the dough up and flip it over, so the pinched knot is facing the countertop now. Then shape it into a ball by tucking the sides of the dough inwards with your hands. Keep spinning the dough while tucking the sides in at the same time in order to create tension on the surface, so the top is smooth and round. It helps to have very little flour on your work surface, so when you spin the dough it catches and pulls for a taut surface. (The first photo in the collage above.)
- Generously dust your banneton with rice flour (it prevents the dough from sticking!) and put the shaped loaf inside the seam side up. Cover with a tea towel and allow to ferment in a refrigerator for 16-20 hours.
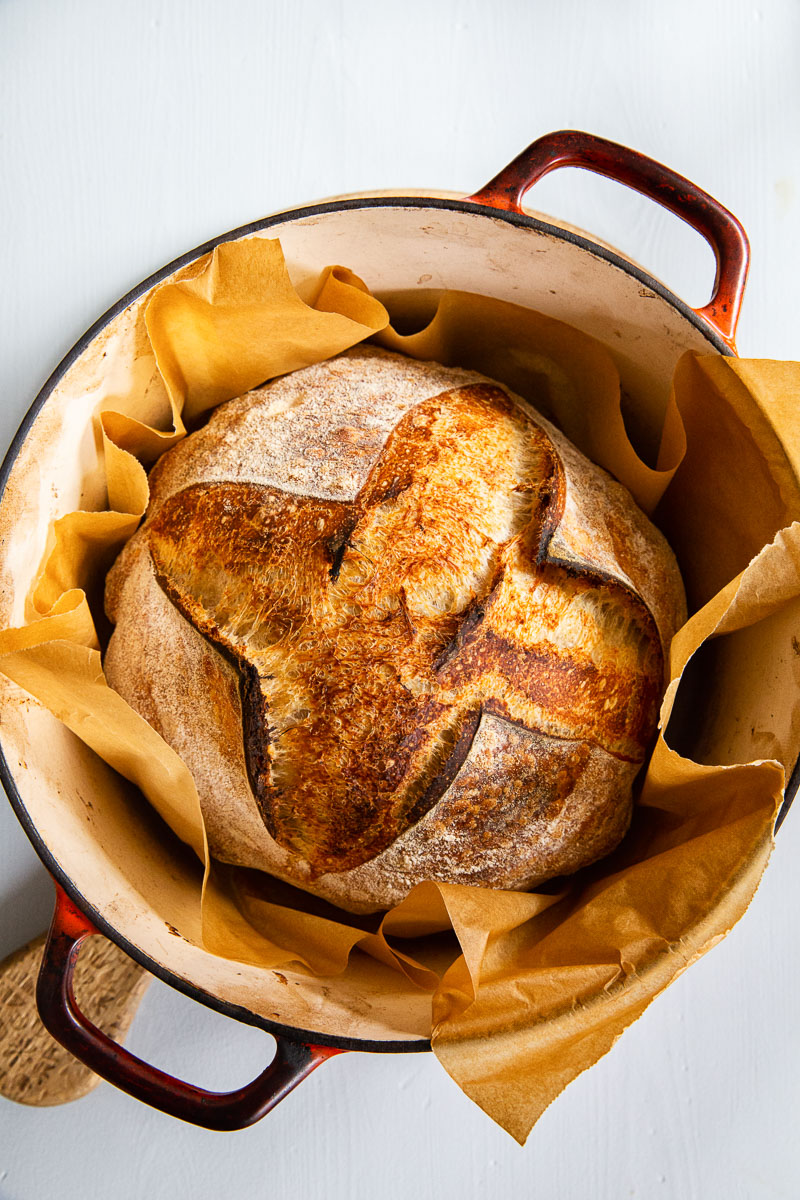
Baking Bread
Once the fermentation process is over, the bread is ready to bake. It’s the easiest part!
- Preheat the oven with your Dutch Oven inside it to the highest temperature 450F/220C or higher and have it on for 1 hour.
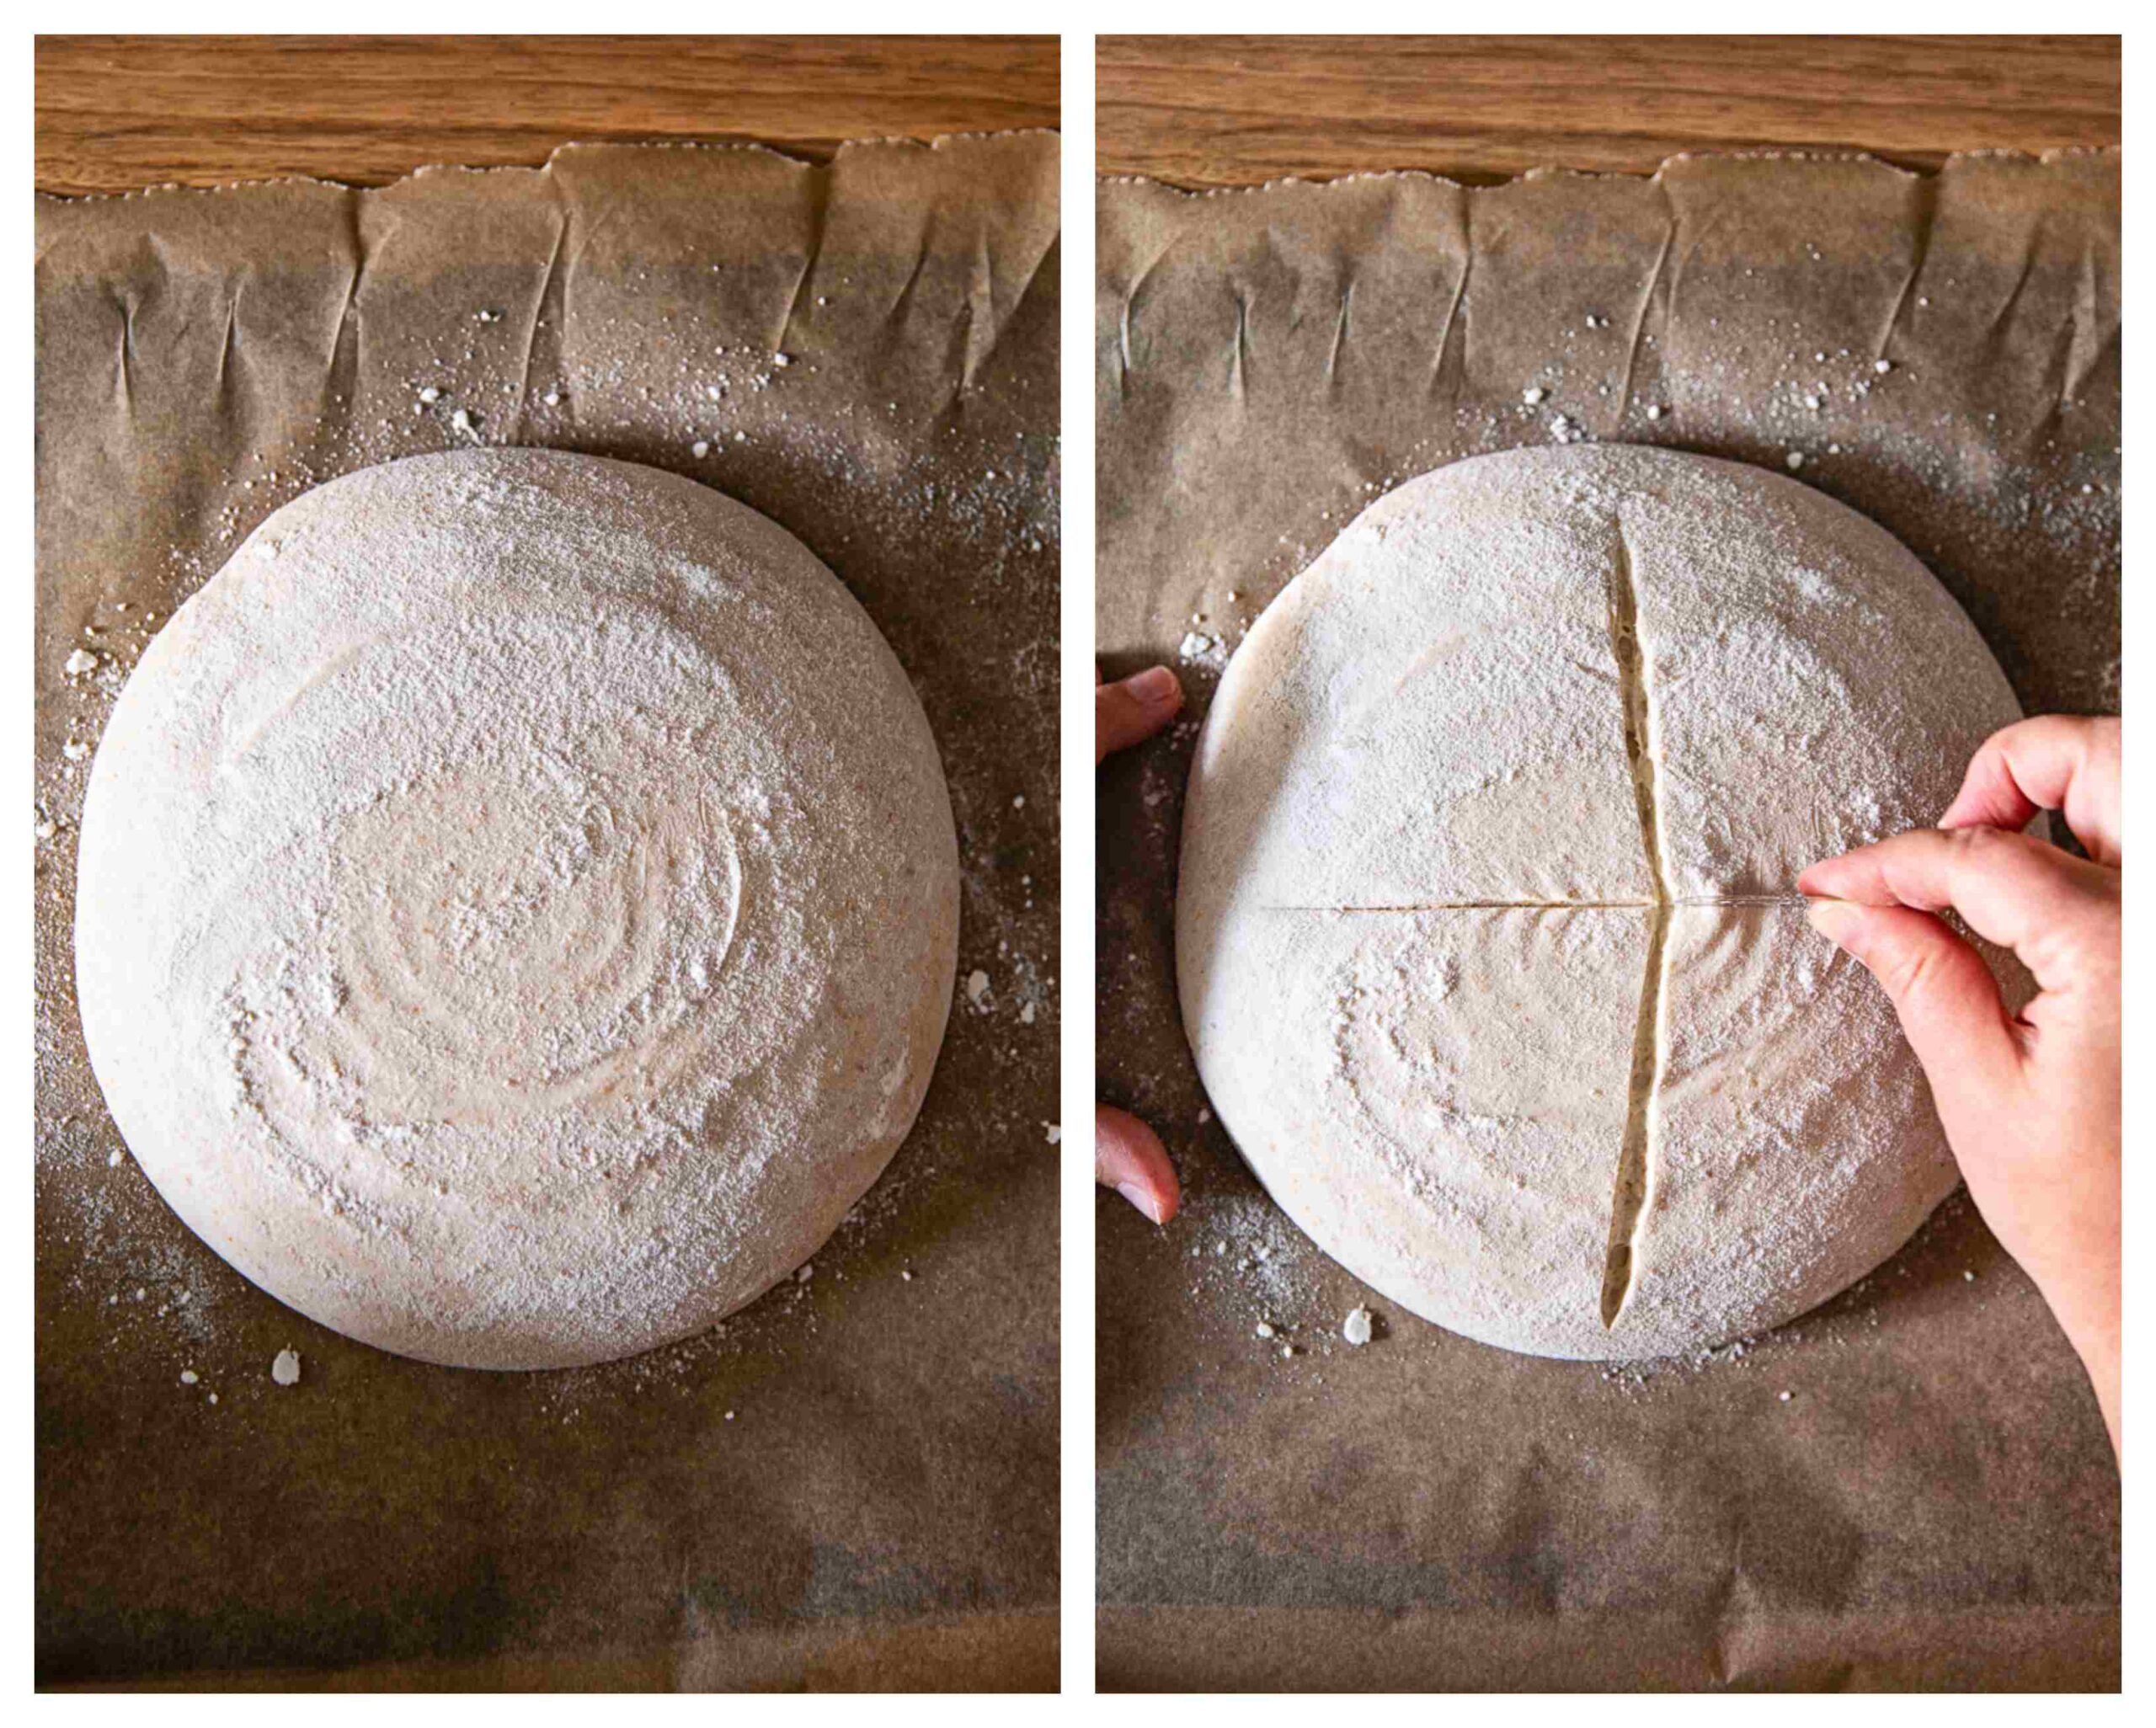
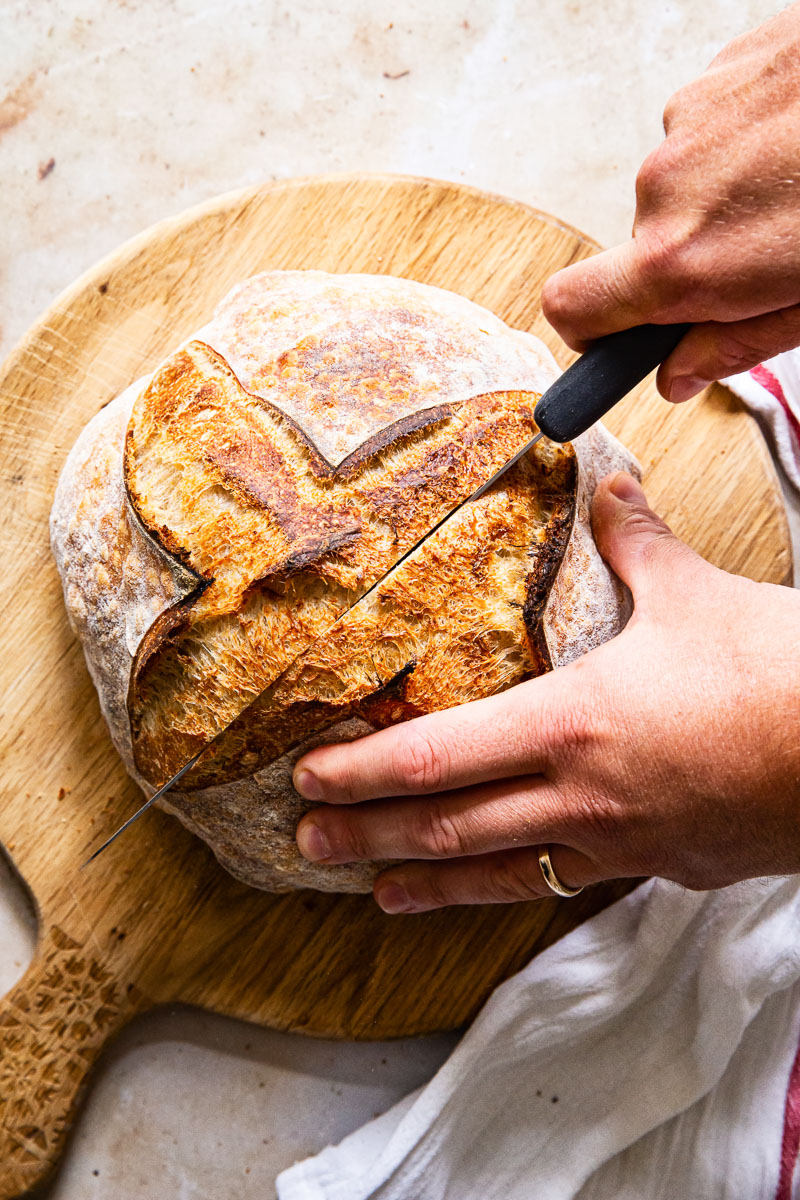
- Then take the dough out and flip it over on a piece of parchment paper. Placing the paper on a flat baking sheet helps with the flipping. Then score the dough in any way you like. Scoring is not just decorative, it also allows for the steam to escape during the baking process.
- Take the Dutch Oven out, pick the shaped loaf by the opposite sides of parchment paper and quickly drop it into the pot, put the lid on, bake for 30 minutes, then take the lid off and bake for 15 minutes longer.
Common Issues
- Problem 1
- My bread didn’t rise in the oven.
- Solution 1
- The main reason for it is the dough was under proofed. Check your dough before it goes in the oven by poking it lightly with a finger.
- If it bounces all the way back, it’s under proofed. Put it back in the fridge.
- If its stays down, it’s over proofed. Bake it as soon as possible and hope for the best!
- If it bounces back but leaves an indentation on the surface, it’s perfect.
- Problem 2
- My dough got stuck in the proofing basket.
- Solution 2
- Instead of using wheat flour to dust your basket go for rice flour. No gluten, no sticky mess!
- Problem 3
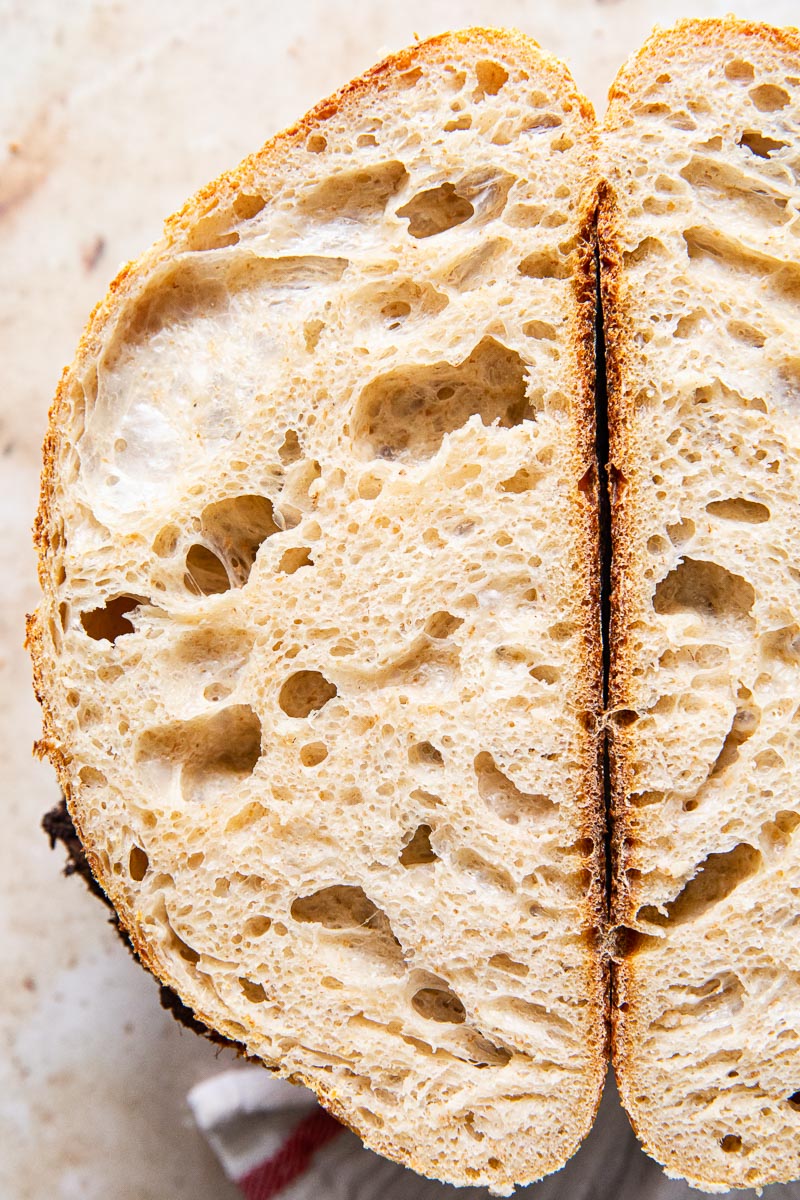
- The crumb is sticky and gummy.
- Solution 3
- You cut into your loaf too early. Sourdough bread needs to cool for at least 3 hours before it’s recommended to slice it open.
- Problem 4
- My crumb is too dense. Large holes at the top and small at the bottom or small holes throughout.
- Solution 4
- You dough was under proofed, which causes uneven crumb and less developed flavour.
I hope this information and the recipe below will help you on your sourdough journey. Remember practice makes perfect!! Once you master the basics, give our Walnut and Raisin Sourdough Bread a try and don’t forget to make our Sourdough Pizza and Sourdough Focaccia!
More Favourite Bread Recipes to Try:
- Dutch Oven Bread (Ready in 2 Hours)
- Rosemary Spelt Bread Recipe
- Rye Bread Recipe
- Sweet Rhubarb Jam Swirled Bread
Sourdough Bread for Beginners
Ingredients
- 100g/1/2 cup sourdough starter
- 500g/4 cups white bread flour
- 350ml/1 1/3 cups + 1 tablespoon water
- 9-10g/ 1/2 tablespoon salt
Instructions
- In the morning discard a half of your active starter, then feed it by adding 50g of flour and 50g of water. Leave to ferment at room temperature. It should double in size after 4-5 hours depending on the strength of your starter and the temperature of your house. (It will rise quicker in the summer but might take 6-7 hours in the winter.)
- When you starter is nearly doubled in size. Start the autolyse by mixing the flour and water. Cover with plastic wrap and set aside until the starter is ready to be used. (It will take anywhere between 30 minutes to 1 hour.)
- Once the starter is at its peak add 100g of it to the flour and water mixture, then add the salt and mix well. You should have some of the starter left over, keep it until the next day, then feed it as usual.
- Knead the dough either in the bowl of a stand mixer using a dough hook or by hand. It takes approximately 10 minutes on low speed (I use speed 1 or 2 out of 7 on the dial) if kneading in a stand mixer. We aim to develop gluten in the dough, so to check is the dough is ready, pull a small amount away and stretch it between your fingers. The dough should stretch easily into a transparent membrane and not tear. This is called a windowpane test and is a good indicator that your dough has been kneaded properly.
- Cover the dough with plastic wrap, so it doesn't dry out and let it ferment for 5-7 hours. Gently scrape the dough out of the bowl onto a floured work surface. With floured hands pull one side of the dough and fold it over itself, repeat the same motion with the other 3 sides. Wrap it like an envelope and pinch at the top, so it stay together. Your dough should be full of bubbles at this point, so make sure to not knock them down.
- Using a bench scraper pick the dough up and flip it over, so the pinched knot is facing the countertop now. Then shape it into a ball by tucking the sides of the dough inwards with your hands. Keep spinning the dough while tucking the sides in at the same time in order to create tension on the surface, so the top is smooth and round. (It helps to have very little flour on your work surface, so when you spin the dough it catches and pulls for a taut surface. Check photos for reference.)
- Generously dust your banneton with rice flour (it prevents the dough from sticking!) and put the shaped loaf in the seam side up. Cover with a tea towel and allow to ferment in a refrigerator for 16-20 hours.
- The following day preheat the oven with your Dutch Oven inside to the highest temperature 450F/220C or higher one hour before you intend to bake. Take the dough out of the proofing basket and flip it over on a piece of parchment paper. Placing the paper on a flat baking sheet helps with the flipping. Then score the dough with a sharp knife or a blade in any way you like. Take the Dutch Oven out of the oven, pick the shaped loaf by the opposite sides of parchment paper and quickly drop it into the pot, put the lid on bake for 30 minutes, then take the lid off and bake for 15 minutes longer.
- Cool your sourdough bread on a wire rack for at least 4-5 hours before slicing it.
Video
Notes
Nutrition
Nutrition information is automatically calculated, so should only be used as an approximation.


Can you ferment this on the countertop instead of the fridge and if so how long it should be fermented?
Hi Gabby, the reason why sourdough is fermented in the fridge is because the cold slows down the process. While it sounds counterproductive there is a reason for it. Slower fermentation is needed for better flavour development. In other words I do not recommend fermenting your sourdough on the counter beyond the bulk fermentation, which I talk about in the post.
I just pulled my very first sourdough boule out of the oven after waiting patiently 14 days for my brand new whole wheat starter to become active enough. This came out perfectly!! I’m writing my review impatiently before I cut into it, so I don’t know how the crumb looks just yet, but it grew much more than I expected it would in the oven, so I’m hopeful it’s fairly loose-ish in the oven. I did it all by hand, no mixer, for the most medieval approach. It seemed like the dough was a little dry during kneading, so I added slightly more water when kneading in the starter after the autolyse process. It proofed in just a quick 4 hours on the counter, springing back almost too slowly at that point and was quite firm so I was concerned I had screwed it up somehow. My only mistake is not scoring it enough–it sprang out so aggressively and my one deep score is now three inches apart–no complaining from me!! I have a black raw iron Dutch oven and a very dry and hot gas oven, so I turned the temp down to 425 after heating at 450 for fear it would burn the bottom (it didn’t). Baked slightly longer with the lid on, and then took the lid off and finished baking until my thermometer read about 205 Fahrenheit. Looking forward to slicing this one and making my second loaf soon. Thanks for the well-explained and easy method! I’m hooked!
It sounds like your attempt was successful, Brittany! Once you are hooked on homemade sourdough it’s hard to go back to regular bread!! 🙂
I am gluten free. Can this be made with one of commercial GF flours? Like King Arthur’s?
Thank you!
Hi Debra, I believe you will need a sourdough recipe written specifically for gluten free flour and not this one.
do I leave the Dutch oven in the oven for 1 hour at 450 degrees before adding the dough?
thank you, Jen
That is correct. It really makes a difference to the rise of the loaf!
First timer here! I am now cold fermenting my second loaf because my first loaf was so good!!! I am an old soul so I don’t use an electric mixer, I use my hands. And I’m still waiting for my baneton in the mail so I used a flour sack rag and colander and it came out delicious and with an incredible rise. Slices and toasts beautifully for eggs and toast! Nice chew and a perfect crumb! You can knock on the outside of the crunchy crust and it’s fluffy yet holds up to cold butter being pressed into it! Love this bread!
Wow I am so happy to hear that, Michelle. I know how tricky sourdough could be and my first few loaves were not that great, which makes your experience so impressive!
Can you use spelt flour for this?
Yes, you can use spelt flour for sourdough bread, Shannon. However, if you are just starting out I wouldn’t rush to substitute anything in a recipe as people tend to produce denser loaves when they are new at sourdough baking and spelt flour will make it even denser.