This post contains affiliate links. When you purchase through our links, we may earn a commission.
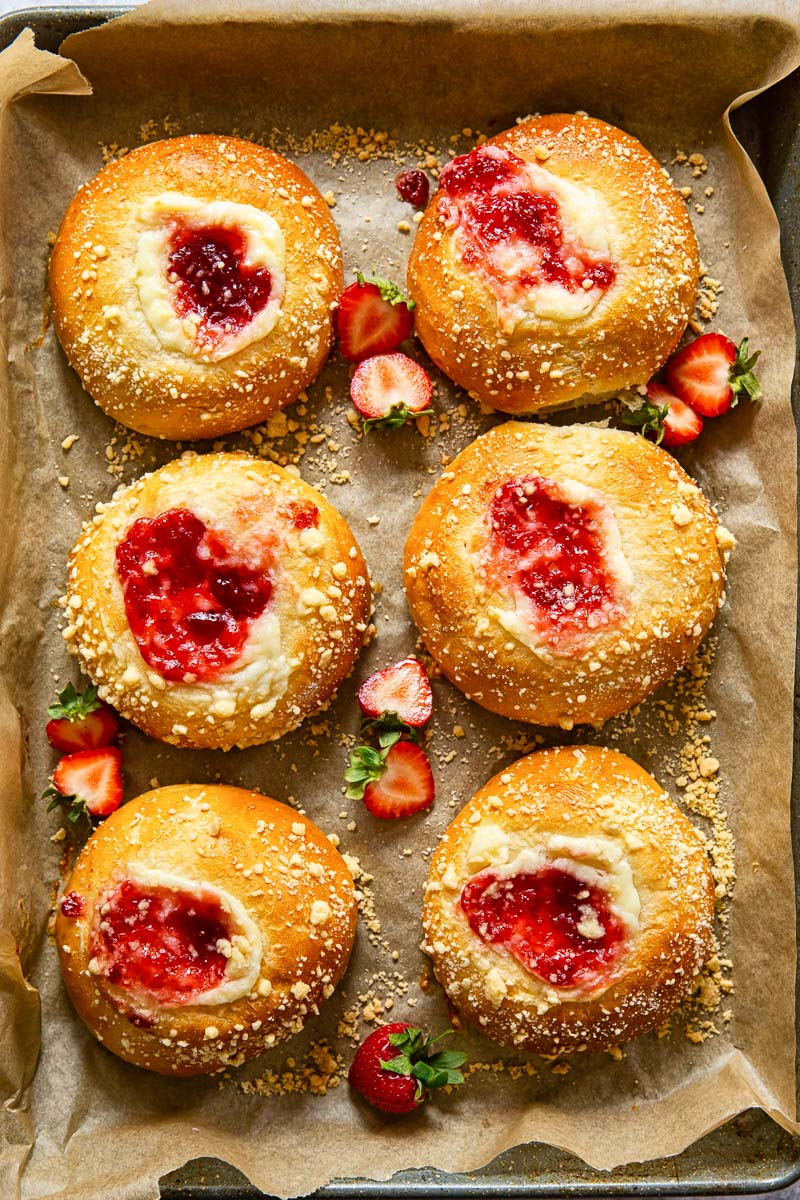
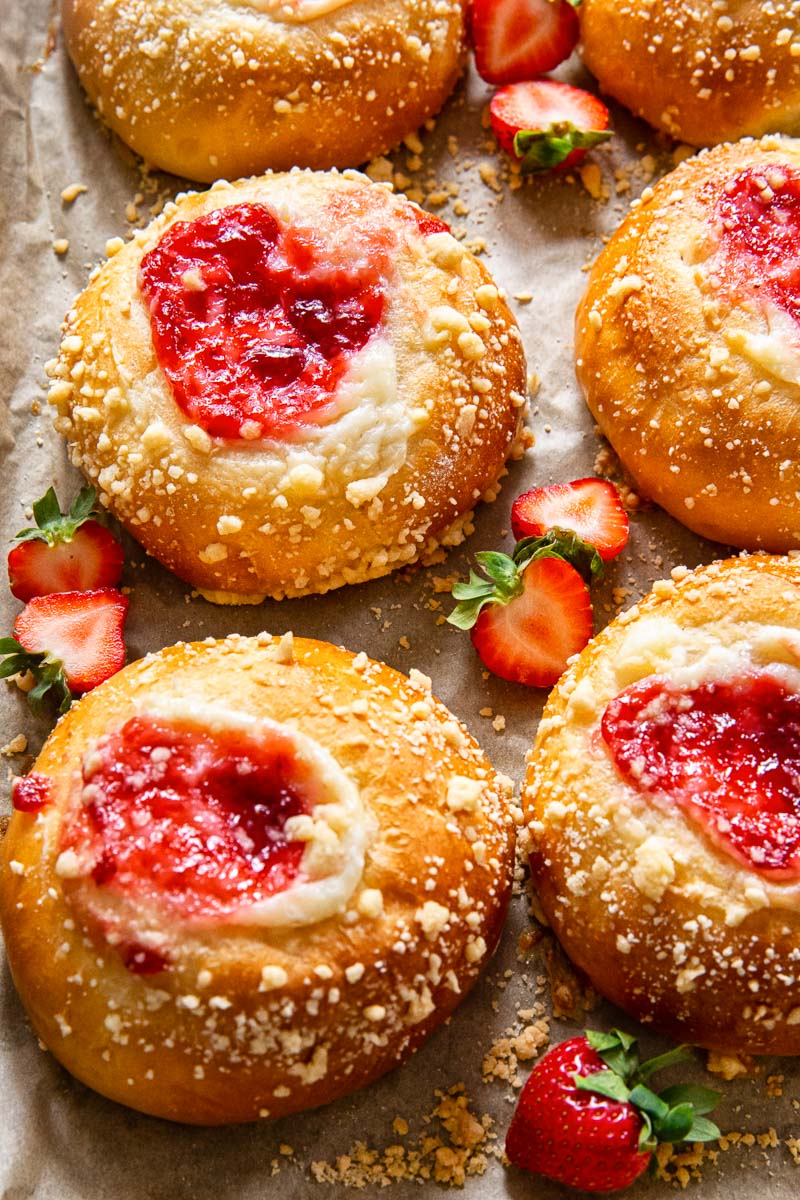
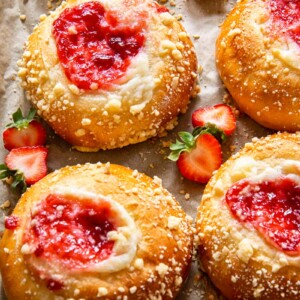
These sweet and pillowy soft Vatrushka buns are filled with the most delicious strawberry cheesecake filling. These are perfect rustic bakes, with buttery dough and a simple yet so satisfying topping that combines creamy and sweet. A coffee time dream come true!
Summer berries and cheesecake are a match made in heaven. If that’s the sort of thing that get’s you excited, try my Almond Raspberry Cheesecake Bars!
Today I am bringing you a sweet bun recipe, which comes straight from my childhood. These sweet cream cheese filled brioche buns have been my favourite treat for ages. I am so thrilled to finally share this recipe with you.
Vatrushka Recipe
Russian vatrushka (pronounced vat-roosh-ka) are buns made with enriched yeasted dough and filled with sweet curd cheese ‘tvorog’ similar to Italian ricotta, sometimes known as farmers cheese.
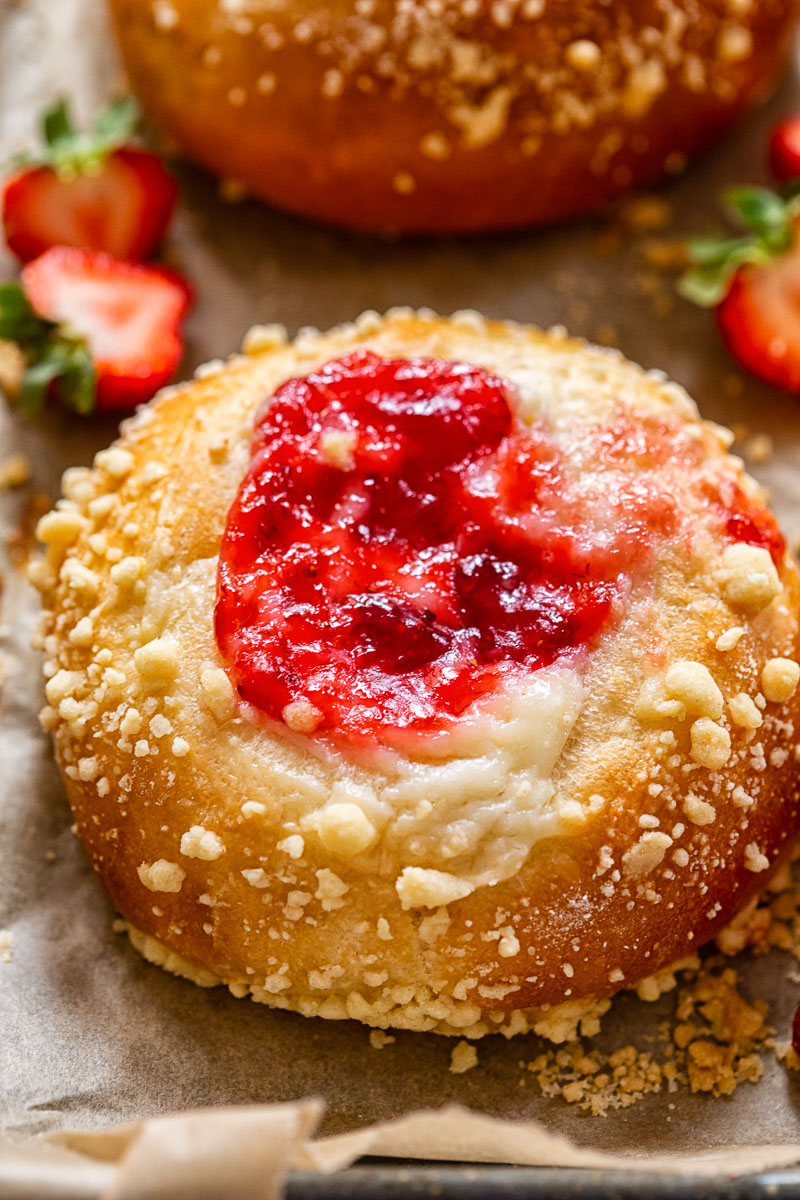
The filling could also be fruit or fruit jam. In my recipe I use cream cheese and top it with strawberry jam.
These buns are not exclusive to Russia, similar pastries are popular in Czechia and are known as kolaches.
Strawberry Jam Filling
The filling for these vatrushka buns combines lovely cream cheese with a dollop of sweet jam. Jam cuts through the creamy cheese and, of course, is right at home on the pillowy soft buns.
Although strawberry jam is my choice, there’s really no limit on the varieties that would work here. Blueberry, blackberry, raspberry or rhubarb, all are going to be great additions to the vatrushka.
The Process
Considering how amazing these buns look they are actually quite simple to make. Even if you are not a pro at yeasted dough bakes, my recipe will set you up for success.
There are three parts to the recipe. The dough. The filling. And the streusel topping.
The dough for the vatrushka buns is my master dough, which I also used in this Cinnamon Bun recipe. It’s soft, slightly sweet and pliable. It rises within an hour making this recipe a relatively quick one for yeasted bakes.
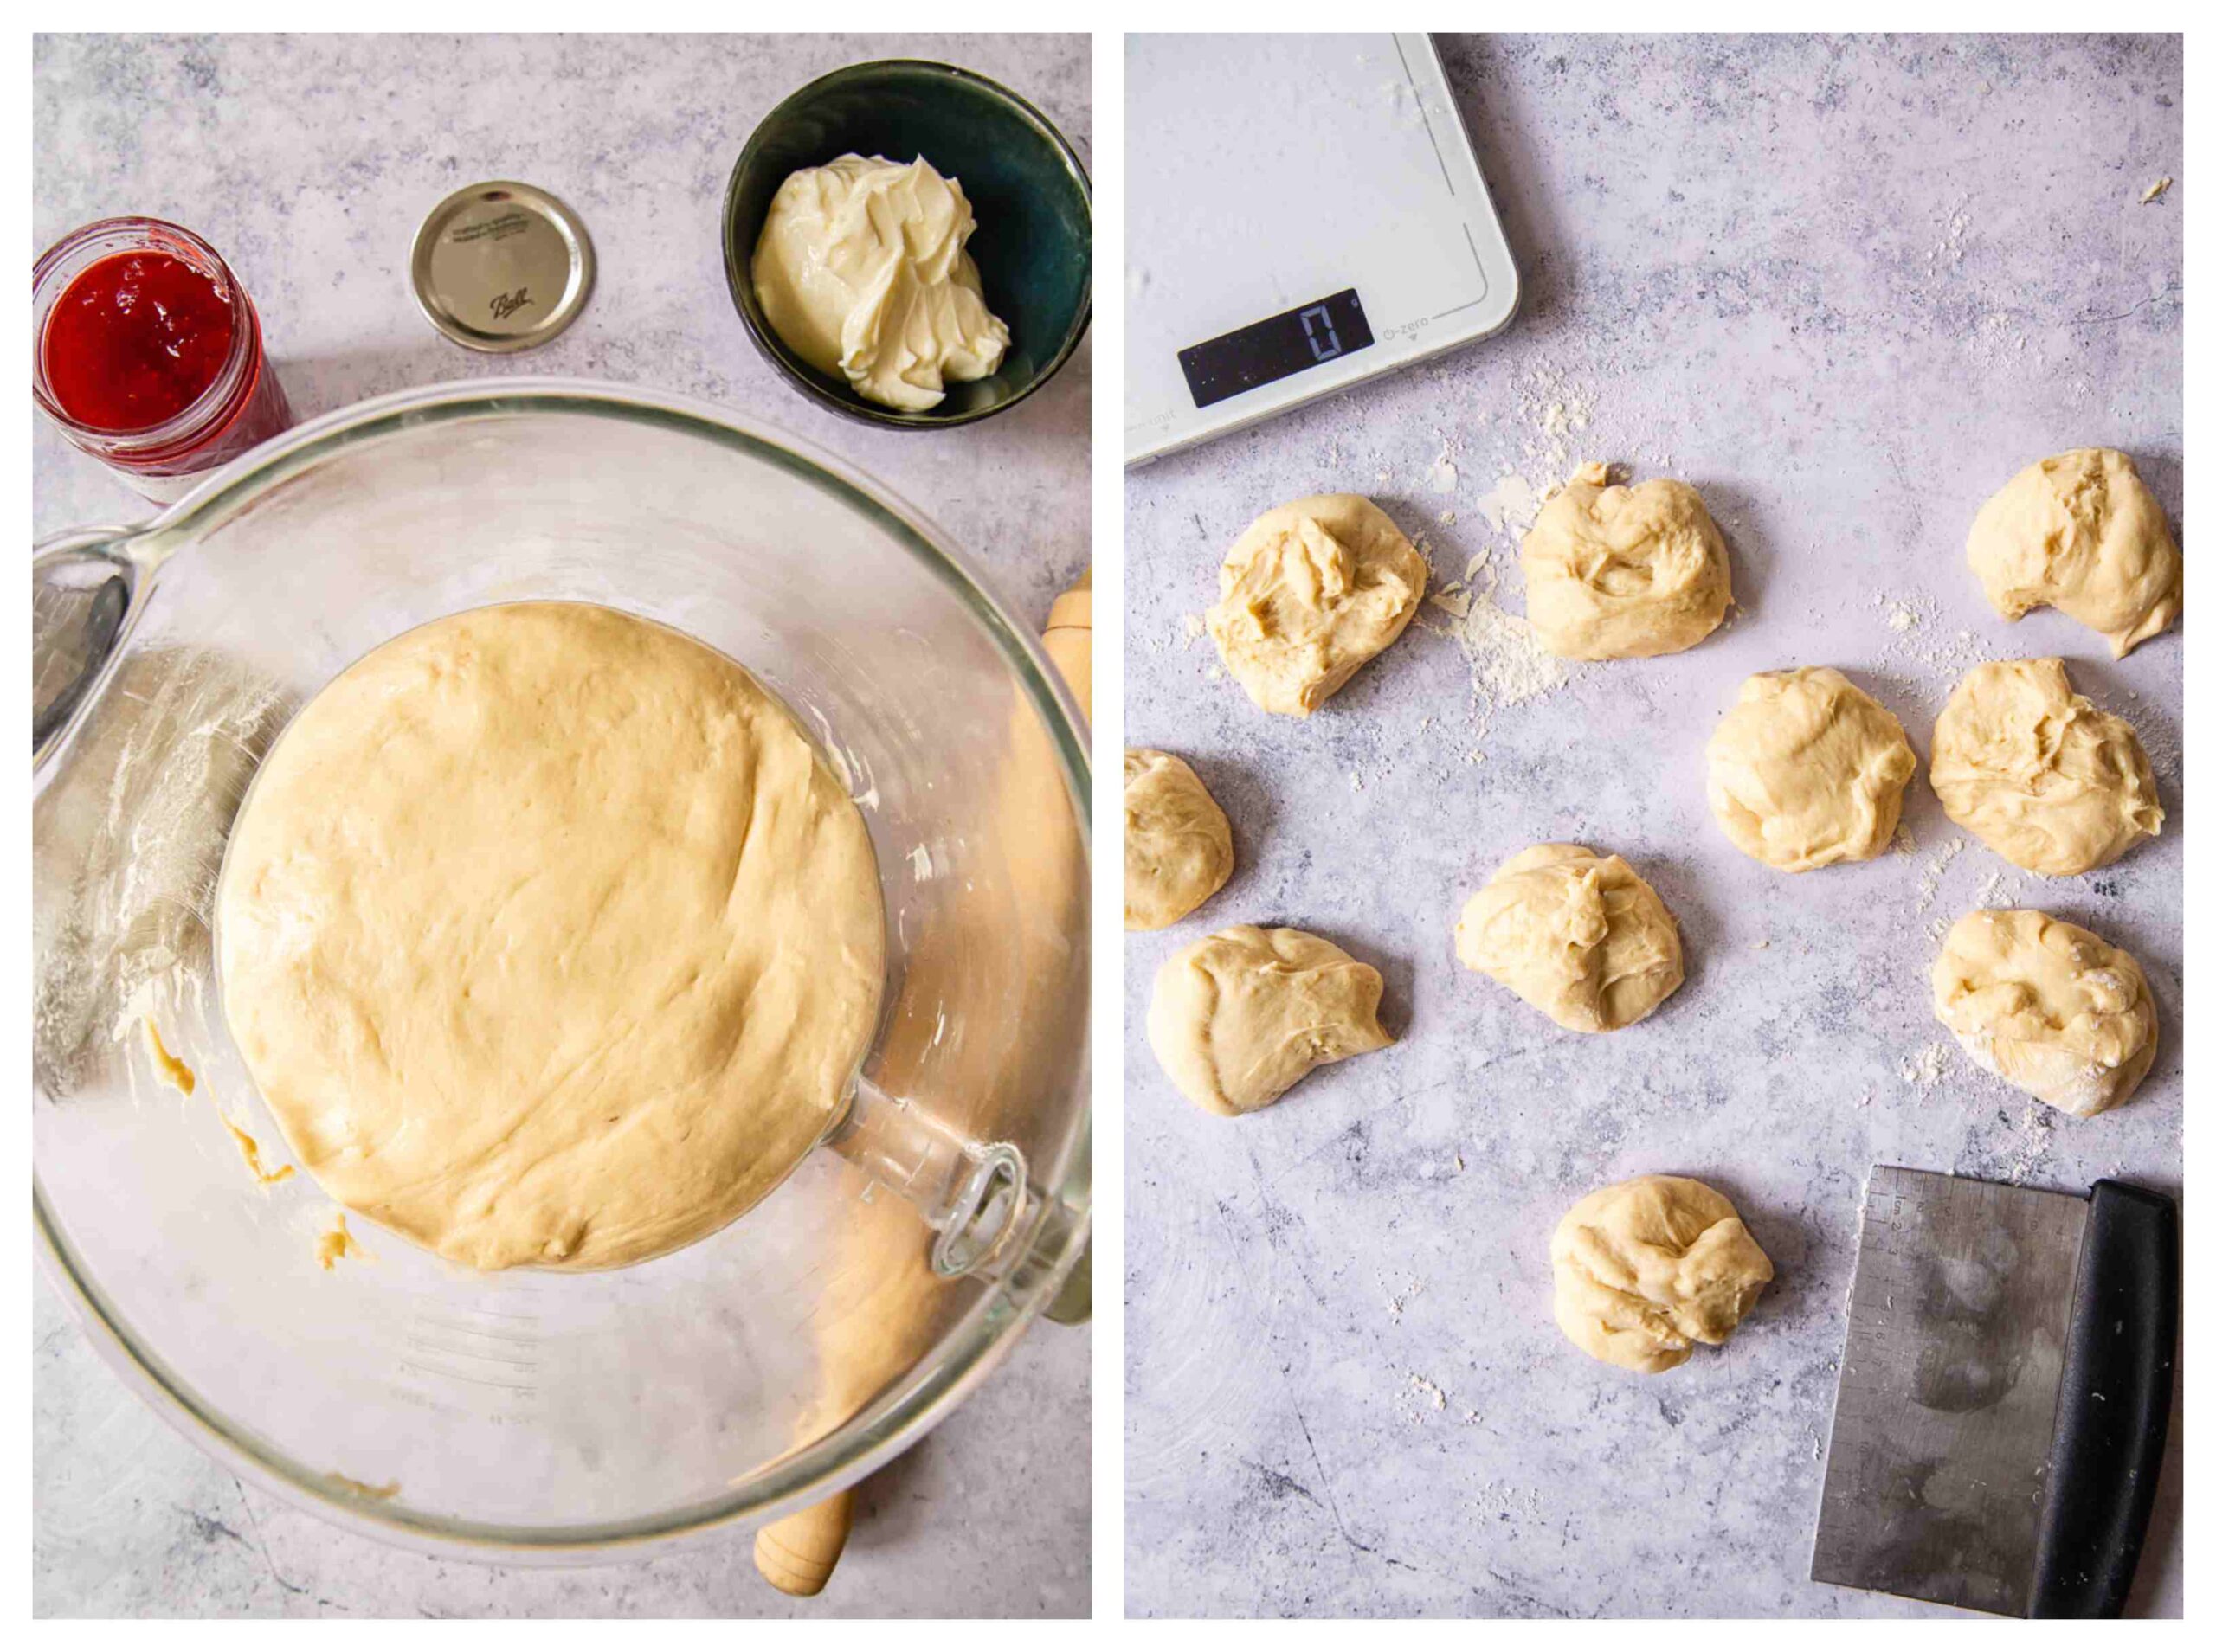
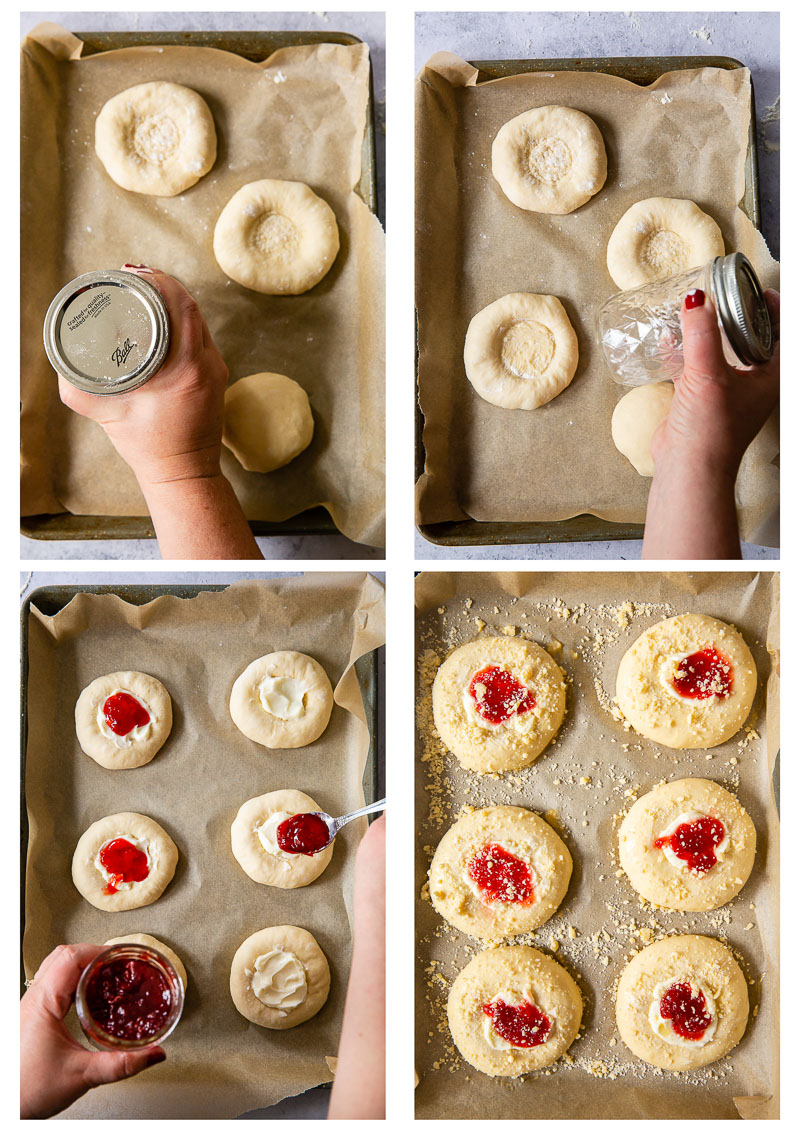
Once the dough is ready, it needs to be divided into 12 equal parts and shaped into balls. I prefer using my scale to make sure the buns are all the same size. After the buns have been shaped, they need to rise for 30 minutes.
After the rising time, make deep wells in the buns by pressing a glass just in the middle of it. This is where your cream cheese and jam filling will go.
Brush the side of the buns with a beaten egg and sprinkle with streusel topping, bake for 20 minutes at 350F/180C and enjoy!
Recipe Tips and Notes
- Making the buns using bread flour will give you the best results due to its higher protein content. This allows the gluten in the dough to develop properly, and will give the buns a fluffy, soft interior and a crust with a lovely chew.
- Traditionally vatrushka buns are perfectly round, so to avoid them merging together and losing their shape, place them at least 3 inches apart in a pan.
- When creating a depression in the pieces of dough, make sure they are deep and wide enough to hold 2 tablespoons of the filling. I used a small jam jar for mine.
- I used cream cheese, but farmers cheese, also known as “tvorog” or “twarog”, is traditional. It has a slightly tangy taste and a firmer texture than cream cheese so will change the taste somewhat.
- Or leave the cream cheese out completely and make with only jam. Or leave the jam out and make with only cream cheese. Either will work!
- Although I used strawberry jam, almost any flavour will be amazing in these buns. Blackberry is one I’m especially fond of!
Serving suggestions
There’s no strict time or place to serve them though. They work just as well for breakfast as they do for a coffee break or with a picnic. Anytime is the right time!
No need to heat them up before serving. They are pretty amazing at room temperature, but give them time to warm up if you are storing them in the fridge.
Storage and leftovers
Vatrushka buns can be made early and kept on hand for whenever a craving strikes. They can be stored in the fridge for up to a week or frozen for two months.
More favourite summer fruit bakes
- Italian Plum Cobbler
- Rhubarb and Redcurrant Jam Swirled Bread
- Victoria Sponge Cake with Blackberry Compote
- Rustic Strawberry and Cream Cheese Galette
Strawberry Cheesecake Vatrushka Buns
Ingredients
For the dough
- 220ml / 1 cup warm milk, full fat or skimmed
- 7g / 1 tbsp active dried yeast
- 1/2 tbsp granulated sugar
- 85ml / 1/3 cup vegetable oil
- 1 egg
- 1/2 tsp salt
- 400g / 3 cups + 2 tbsp bread flour
For the filling
- 125g / 4 oz cream cheese, full fat
- 2 tbsp granulated sugar
- 125ml / 1/2 cup strawberry jam, or any jam of your choice
For the streusel topping
- 2 tbsp flour
- 1 tbsp butter
- 1 tbsp granulated sugar
- 1 egg for brushing
Instructions
For the dough
- In a small jar combine the warm milk, yeast and sugar and let the yeast bloom for 5 minutes. Then add an egg and vegetable oil and mix with a fork.
- In a large bowl of a stand mixer combine the bread flour with the salt. Add the liquid ingredients and starting mixing using the dough hook attachment on slow for 1 minute, then turn up the speed and continue mixing for 10 minutes until you have a very soft and pliable dough. Alternatively, you can mix and knead the dough by hand for about 15 minutes.
- Take the dough out of the bowl and brush the same bowl with a bit of vegetable oil, then put the dough back in, flip it over, so the oily side is on top. Cover with a tea towel and let it proof for 1 hour in a warm spot of the house. At the end of proving time the dough should more than double in bulk.
- When the dough is ready take it out of the bowl and weigh it. This will make it easier to divide the dough into 12 equal parts. You should have 12 pieces approximately 60g each. If no scale is available, simply divide the dough into two equal parts. Then each part into 6 parts.
- Take a dough piece and starting tucking sides of it under itself until you have a rough ball, then roll it in a circular motion on a lightly floured surface until you have a tight ball. Place the ball on parchment paper lined baking pan. Repeat with the rest of the dough. Make sure your dough pieces are at least 3 inches apart. Use two pans if necessary. (The space between them will shrink after they have risen and flattened.) Cover with a clean tea towel and let them rise for 20-30 minutes depending on the temperature of your house. The dough balls won't double in size but will expand.
For the filling
- Meanwhile, in a small bowl combine the cream cheese with granulated sugar and set aside until needed. (The sugar should completely dissolve in the cream cheese by the time it's ready to go inside the buns.)
For the streusel topping
- In another small bowl combine the firm but not fridge cold butter, the flour and sugar with a fork. The streusel should have a sandy texture with a few clumps in.
To shape and fill the vatrushka buns
- Using either the bottom of a jar or your fingers press firmly in the center of each bun to create a well deep and wide enough to hold 2 tablespoon of the filling. Fill each bun with 1 tablespoon of the sweetened cream cheese. Then make an indentation in the middle of the cream cheese filling with the back of a spoon to create space for the jam. Then drop a spoonful of jam on top of it.
- Brush the sides of each buns with a beaten egg, then sprinkle with the streusel topping. Bake in the preheated oven at 180C/350F for 20 minutes or until the buns are golden.
Nutrition
Nutrition information is automatically calculated, so should only be used as an approximation.


I made these as a test run for Pascha as gifts to add into a small basket for friends. They are absolutely stunning, so cute and delicious at the same time. Thank you. Also…The instruction to measure out each one to 60g was soooo helpful. Amazing. Thank you
I am so glad you loved them, Jessica. What a thoughtful gift!
these are delicious! However each time I make them the center of the bun puffs up spilling the filling as they bake. I do press the indent deep, the second time almost too deep, breaking through one. How do I avoid the poof?
Hi Jennifer, I would try not only to make the indent deep but also wider. This should help with the puffing up issue. I am so glad you are enjoying them.
These smell amazing and look just like off a magazine cover, beautiful! However, the only issue I ran into is that the dough turned out too dense. My mother used to make piroshki and the dough was so soft and pillows. The dough in these was a bit chewy. I kneeded for a bit with my hand mixer, but then it broke so I had to kneed with my hands and add some more time since the recipe said hand kneeding takes longer. Then, I let it proof in my warm home for an hour. After that I had to go to work so I refrigerated the dough. Any advice?
Hi Tatjana, my advice would be to use scale to measure out the ingredients. The dough should not be dense, so my guess is too much flour was added. It’s easy to do when using measuring cups instead of a kitchen scale. Also you might’ve needed to proof longer. Yeasted dough is pretty temperamental and wholly dependent on the house environment like temperature and moisture in the air, so if the dough hasn’t more than doubled in bulk, it needs more time proofing regardless of the time. I hope this helps.
I made these for Easter and everyone really enjoyed them. The recipe was just the right amount of sweetness.
Thank you for your review, Liz. I am thrilled my recipe was a part of your Easter celebration.
They are so much easier to make than I expected and I fill them with my own homemade jam because that’s what I had on hand. So good!
I am so glad you found them easier than expected, Kellie!
This is so good! Everyone is so impressed! Thank for the recipe!
I made these for my kids’ first day of school and they were a huge hit! Thank you!