This post contains affiliate links. When you purchase through our links, we may earn a commission.
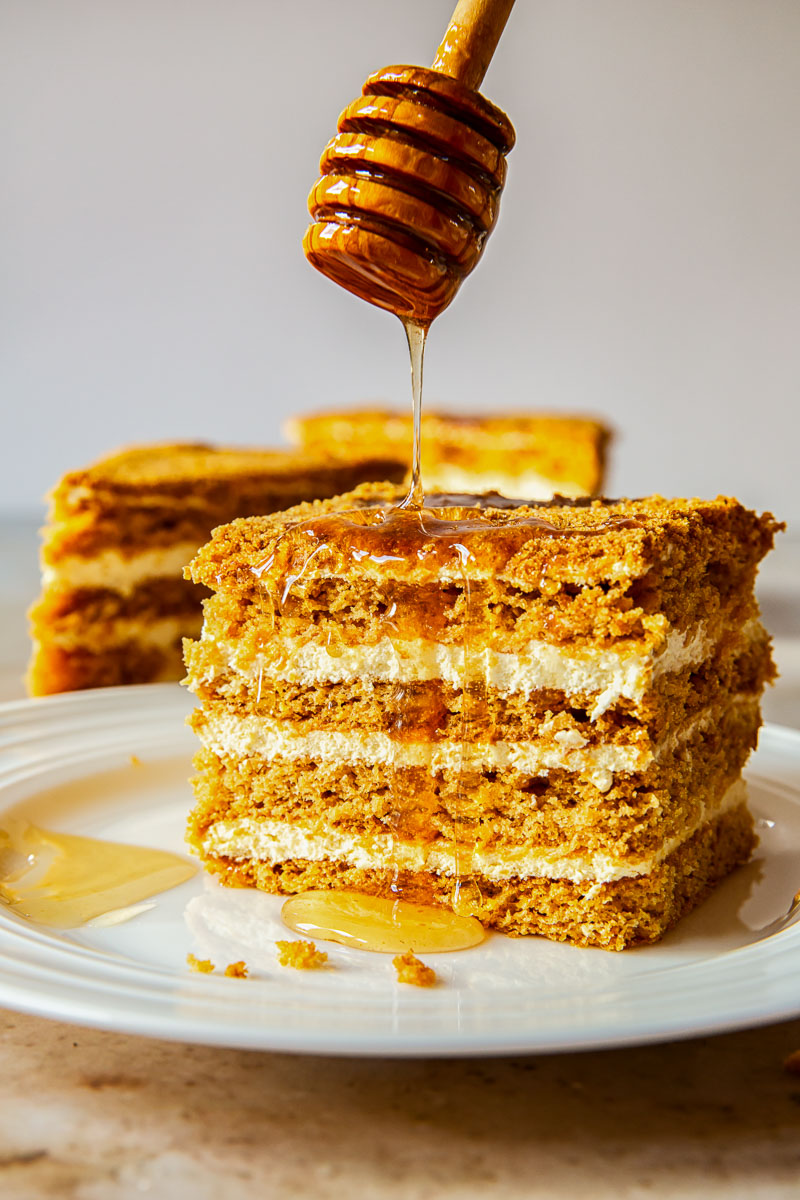
This iconic Russian honey cake aka tort Medovik is something everyone needs to try at least once. Layers upon layers of honey goodness filled with the most delicious cream. It’s quite unforgettable.
Loving this cake recipe? For another classic Russian cake try my Apple Cake Sharlotka.
Honey Cake
The Russian name for this incredible cake is Medovik or Tort Medovik. And the first time I made it I was 13 or 14 when this cake was the “it cake” where I lived.
The recipe was being passed on from one household to another although, of course there wasn’t one ‘master recipe”. Every cook made it her own. It was impossible to have any sort of celebration without Medovik crowning the meal.
It was so common that after a while it didn’t seem special anymore. I am glad I re-discovered this treasure because despite its simplicity of ingredients and the method of preparation the end result is far from plain.
Ingredients
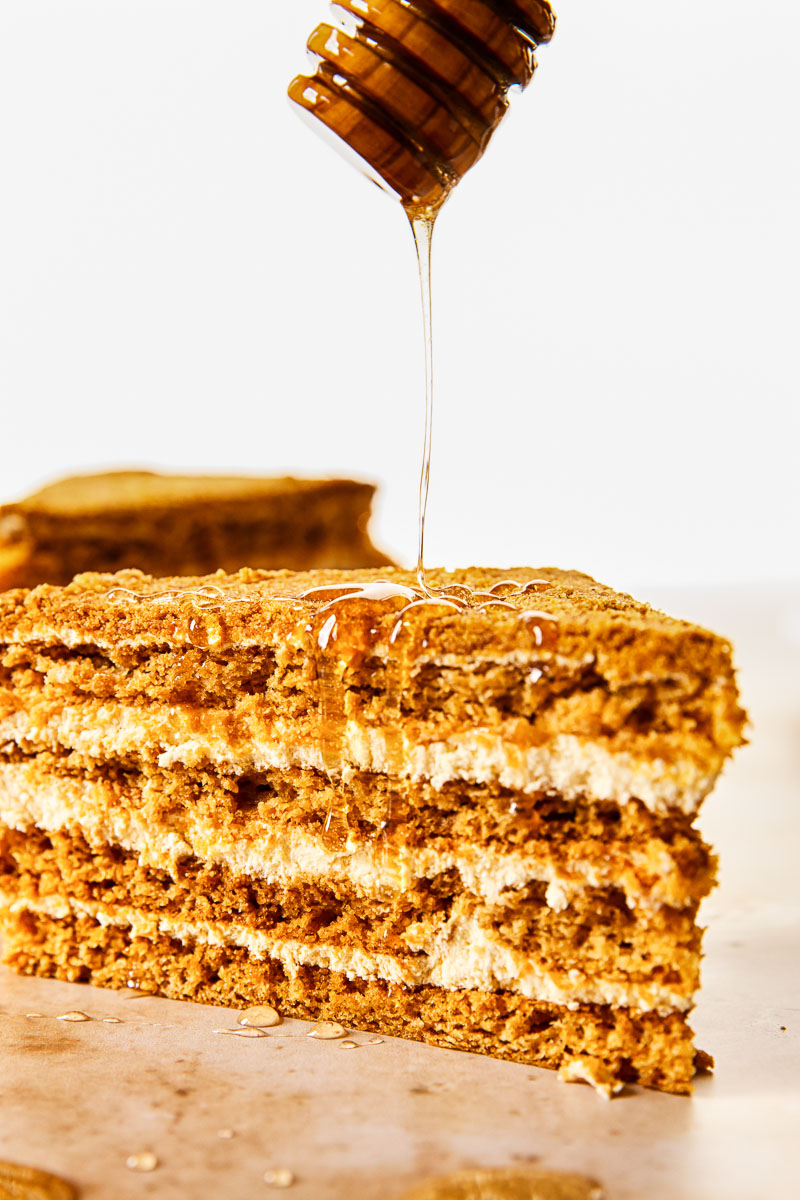
Honey in Russian is med, so you can expect honey to be one of the dominant ingredients in this cake. Although only 4 tablespoons is used, they add a very rich, caramel like flavour to the cake. This is due to a high quality, flavourful honey that’s been traditionally used in Russia.
My grandfather came for a beekeeping family and as a child I always remember seeing a large 3 litre jar of raw honey being stored in a kitchen cupboard. So using great tasting honey is the key to the unforgettable taste of this honey cake.
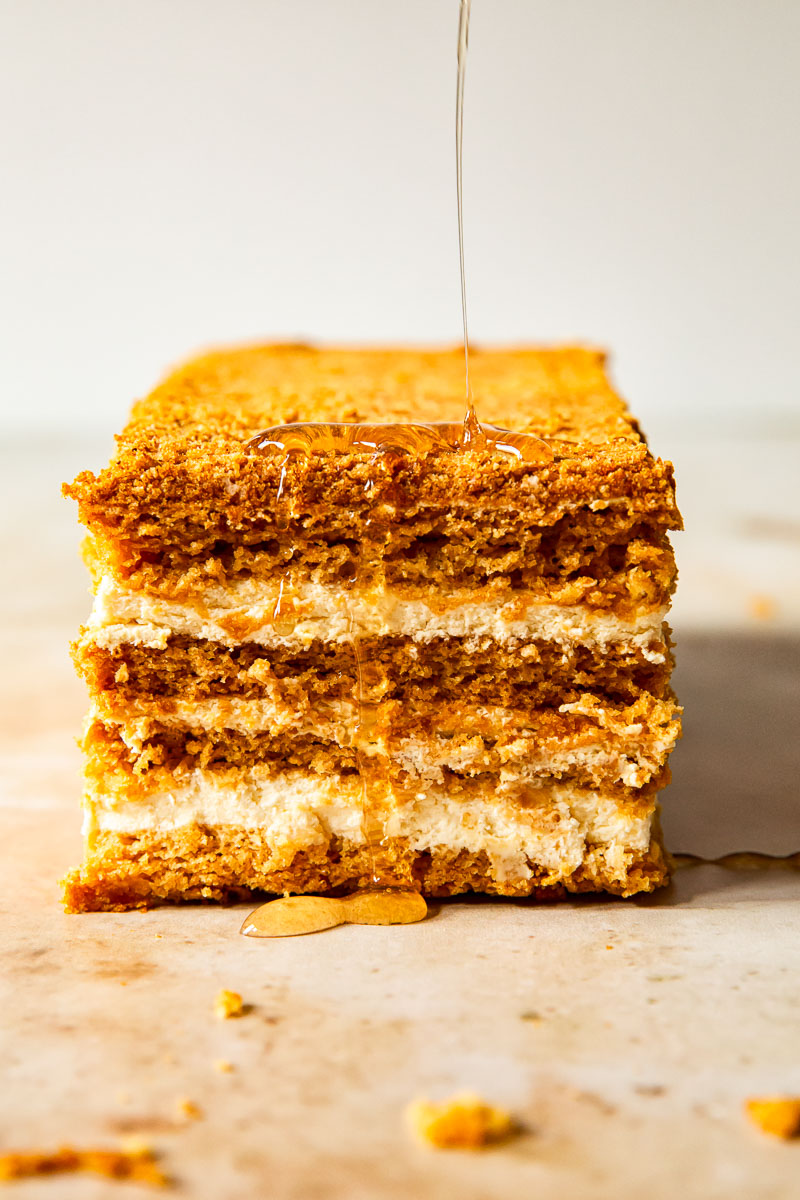
The rest of the ingredients are very common for cakes. Butter, sugar, flour, baking soda and vanilla extract make thin, cookie like layers of Medovik.
They are softened with a cream filling that is one part whipping cream and one part sour cream mixed with sugar and vanilla. Sometimes a filling made with butter and sweetened condensed milk is used. I however, find it too sweet.
How to make Tort Medovik
Although the ingredients for this honey cake are quite common for a cake, the method of preparation is quite unorthodox.
Cake Layers
Instead of making cake batter and baking it in cake pans this honey cake recipe calls for preparing cookie dough, then baking the layers one by one on cookie sheets in a preheated oven.
Baking the thin layers is the lengthiest process according to this method but trust me, it produces the most stellar results. This cake is so impressive that after it got discovered and reproduced by one San Francisco bakery, it developed a cult following!
After the layers are baked they are cut into round circles or rectangles. As you can see in the photos, I went with rectangles.
When Medovik is made for large gatherings it’s not uncommon to make it into a large rectangular 4 layer cake instead of a tall 8 layer one. Both are authentic and equally delicious.
Traditionally Medovik cake is covered with the cake crumbs that are made from the offcuts from the layers.
Honey Cake Filling
Beat sour cream or creme fraiche with whipping cream, sugar and vanilla until sugar is dissolved and it’s doubled in volume. Fill all 8 cake layers except for the top and the sides.
Medovik Frosting
Once again I’ve changed the frosting as in the original Medovik. The filling above is used for the outside of the cake as well and later coated with the cake crumbs. Since I decided to go crumb free, I’ve used a mascarpone frosting similar to the one I’ve used for my Naked Cake.
Recipe Tips and Notes
- You really do want to make this cake a day ahead of when you plan on serving it. The cake needs time to soften and for the honey and frosting to work it’s way through to provide the most flavour.
- Watch the cake layers closely as they bake since they can quickly.
- Honey is not all created equal, especially when it is highly processed. Since so much of this cake is built around honey flavour, you’ll get better results by using the highest quality honey you can find. I prefer to go with dark honey to get the most flavour.
Storage and leftovers
The cake is best served 24 hours after it’s made to allow the crispy layers to soften to a cake texture. A full day in a fridge is perfect for soaking the wonderful flavours from the filling and the frosting.
Store it in an This is an affiliate link.airtight container if you have one so it doesn’t dry out or absorb flavours from your fridge. Plastic wrap can also work.
The time you can store the cake is limited by the mascarpone icing. The cake will keep for 3-4 days when refrigerated. Take it out of the fridge before serving so it can come to room temperature.
More popular cake recipes to try
- Honeycomb Crunch Chocolate Cake
- Victoria Sponge Cake
- Frostbitten Raspberry Cake
- Red Velvet Truffle Cake
Russian Honey Cake Medovik
Equipment
- This is an affiliate link.Hand mixer
- This is an affiliate link.Mixing bowls
- This is an affiliate link.Offset spatula
Ingredients
For the cake
- 70g/5 tbsp unsalted butter
- 100g/1/2cup granulated sugar
- 4 tbsp honey, I prefer dark honey for more flavour
- 3 eggs, large
- 1 tsp This is an affiliate link.vanilla
- 1 tsp baking soda
- 1/2 tsp salt
- 330g/3 cups all purpose flour
For the filling
- 500ml/2 cups creme fraiche or sour cream
- 500ml/2 cups double cream/whipping cream
- 50g/1/2 cup icing sugar/powdered sugar
- 1 vanilla bean, or 1 tsp vanilla
For the frosting
- 250g/1 cup mascarpone, chilled
- 125ml/1/2 cup double cream/whipping cream
- 100g/1 cup icing sugar
- 1 vanilla bean, or 1 tsp vanilla
Instructions
For the cake
- Preheat your oven to 400F/200C and line two baking trays with parchment paper. Set a double boiler or a large pot filled 2/3 with water and a glass or metal bowl over it on the medium heat. Melt butter, sugar and honey in the bowl. In a separate bowl beat eggs and vanilla and pour the mixture in the double boiler while mixing the whole time (I use electric mixer) to avoid ending up with scrambled egg.
- Then add baking soda, salt and 2 cups of flour, continue mixing for a few minutes until the dough starts to thicken and come away from the edges of the bowl. Take it off the heat and add the last cup of flour, mix well. Be careful as the dough will be hot.
- Allow it to cool for a couple of minutes and then knead it with your hands until your get smooth, pasta like dough. What you are looking for is a cookie dough rather than a cake batter. Divide into 8 equal parts and cover with a kitchen towel to avoid drying out. The cake layers will be baked separately on baking trays and then cut into neat circles using a 7″ cake pan, tart pan or, in my case, a pan lid as a template.
- Dust your work surface with flour and roll out a thin circle slightly larger than 7″, transfer on a parchment lined baking tray and bake for 4-5 min. Watch closely as the cake layers burn quickly. Roll out the next layer while the previous one is baking. That is why you need to have 2 baking trays on the go. Remove from the over when golden brown and cut out a circle while still hot as the layers will turn into crisp biscuits in a couple of minutes.
For the filling
- Beat creme fraiche or sour cream with whipping cream, sugar and vanilla until sugar is dissolved and it’s doubled in volume. Fill all 8 cake layers except for the top and the sides.
For the frosting
- Beat cold mascarpone with icing sugar, vanilla and whip cream until stiff. For the US users whip the whipping cream first with icing sugar then fold into slightly whipping mascarpone. Cover the sides and the top of the cake with mascarpone frosting.
Notes
- It needs to be noted that the cake is best served 24 hours after it’s made. A full day in the fridge allows crisp layers to soften and soak all the wonderful flavours from the filling and the frosting.
- You can cut your layers into large rectangles and make your Medovik into a 4 layer cake.
- Keep an eye on the cake layers as they bake since this can happen quickly.
- Not all honey is the same, especially if it is highly processed. Since so much of what makes this cake great is the honey flavour, you will get better results by using the best quality honey you can find. I prefer to use dark honey because it has the most taste.
Nutrition
Nutrition information is automatically calculated, so should only be used as an approximation.


hi. can i swapped the sour cream to crean cheese frosting? will it affect the “dampness” of the filling and make the cake not as soft? it’s hard to find sour cream in my area
You do need the filling to be a bit runny as this will re-hydrate the layers and make them soft. You can use creme fraiche instead of sour cream or try full fat yogurt.
Amazing! I put a twist from the Caucasus like Baba did and added crushed walnuts on the sides instead of cake bits, and a layer of apricot preserve in between every couple layers. Turned out wonderful, thank you!
Sounds absolutely delicious, Karine!