This post contains affiliate links. When you purchase through our links, we may earn a commission.
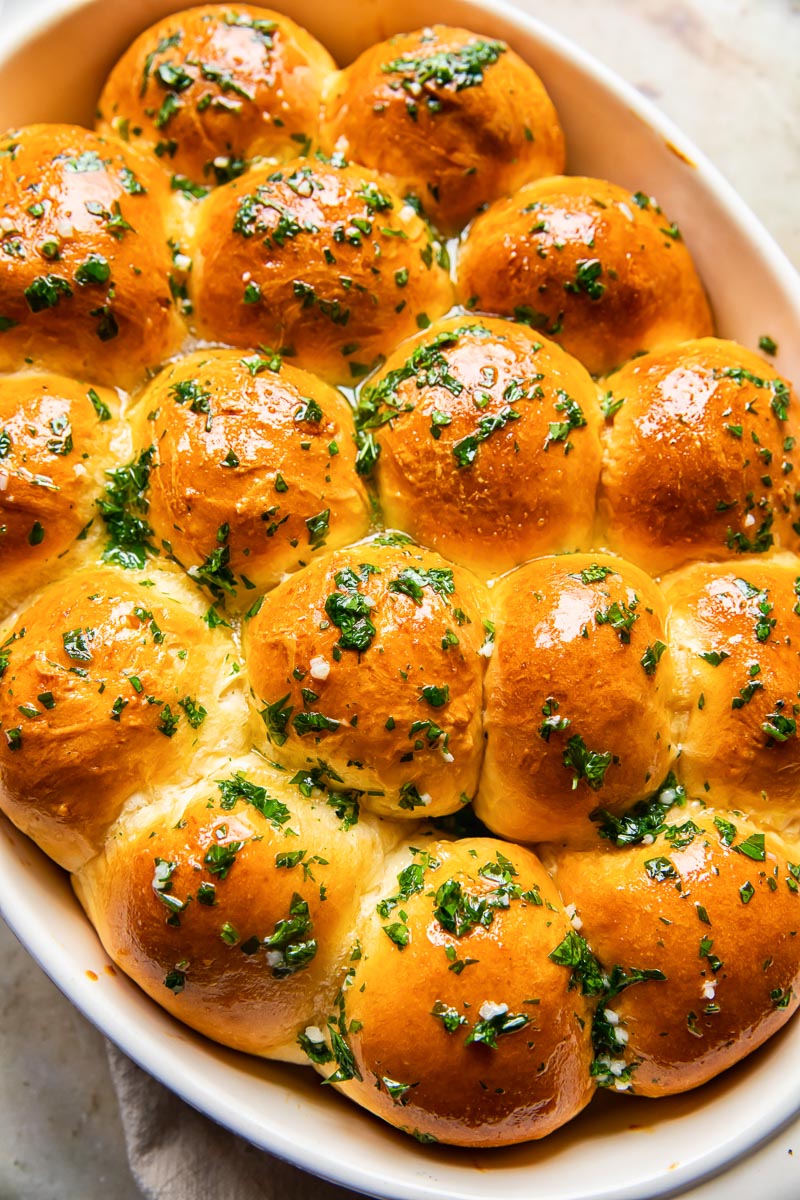
These dinner rolls brushed with herb and garlic butter fresh out of the oven are what you want to serve with your meals. Soft, enriched dough produces the fluffiest rolls, which happen to be so easy to make!
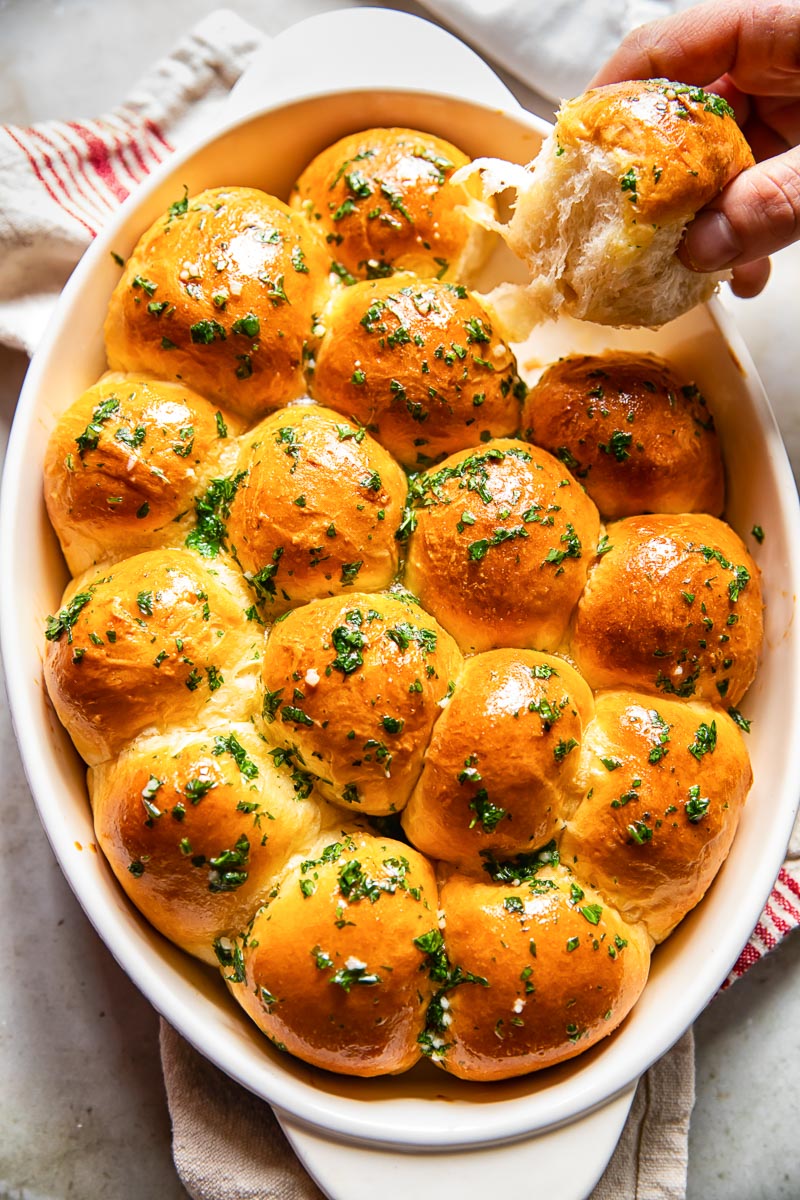
These rolls are a must for holiday and special occasion dinners! Add this recipe to your Thanksgiving or Easter table to round off your festive meal.
Do you love a buttery roll with your dinner?! If you are that person, who doesn’t feel like their meal is complete without a healthy serving of carbs, this recipe is for you.
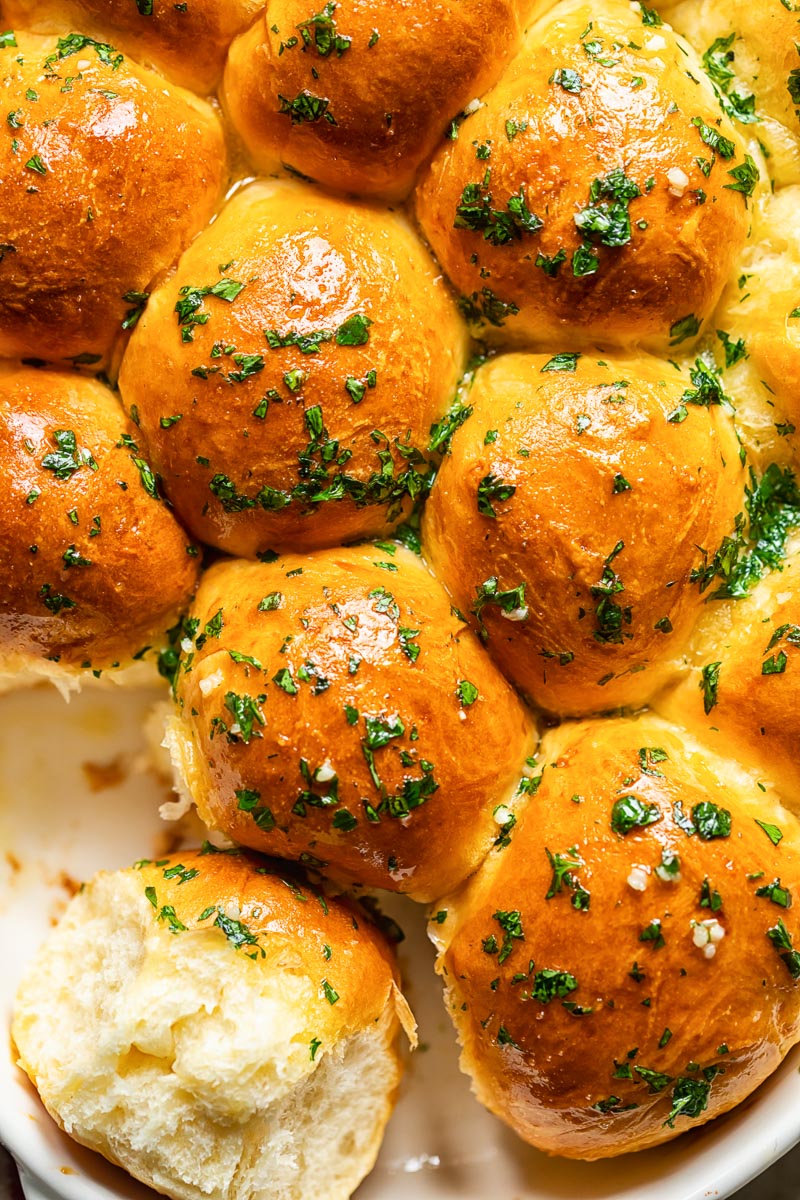
These garlic butter rolls are absolutely incredible. What do they taste like? Like garlic bread and brioche buns rolled into one.
Easy Bread Baking
If you always wanted to start making your own bread rolls but felt intimidated I promise I am with you. I felt that way for many years.
I watched my grandmother and mother bake through my childhood and always assumed you need special skills, lots of knowledge and years of experience to get there.
Some of it is true but you have to remember people baked without recipes and clear instructions for centuries, which left much room for error. This is not the case anymore. I will provide you with all essential information needed to succeed.
Dinner Rolls vs Bread Recipe
Over the years I shared many bread recipes. This No-Knead Dutch Oven bread is particularly popular because of its ease of preparation. My Sourdough Bread takes a bit of commitment but my guide and the bread shaping video will help you along the way.
You can also try my flatbread recipe. No yeast, just 4 ingredients and 30 minutes of your time.
If you tried making bread, you will know that dinner rolls are not very different in the method of preparations. The main difference is in the dough itself.
Ingredients
Bread dough only needs water, flour and yeast. These ingredients produce plain, crusty bread while dinner rolls come from enriched dough, which makes them soft, buttery and fluffy.
All we need to do is to add fat and eggs to the basic bread dough to achieve that. The usual ingredients used for that purpose are butter or oil, milk or water, eggs.
Once you master a basic dinner roll recipe you can make your own Hamburger Buns, European Style Cinnamon Buns or luxurious Nutella Rolls.
You can also mix in 80g/1 cup of grated cheese into these rolls for a fun cheesy twist on the classic!
Recipe Tips and Notes
- It’s important to follow the recipe and measure all ingredients accurately.
- Use a This is an affiliate link.stand mixer and a dough hook for easy kneading. However, it’s also very easy to mix this bread roll dough by hand as the recipe produces very soft dough.
- At the end of kneading your dough should be soft and not sticky when touched with clean hands.
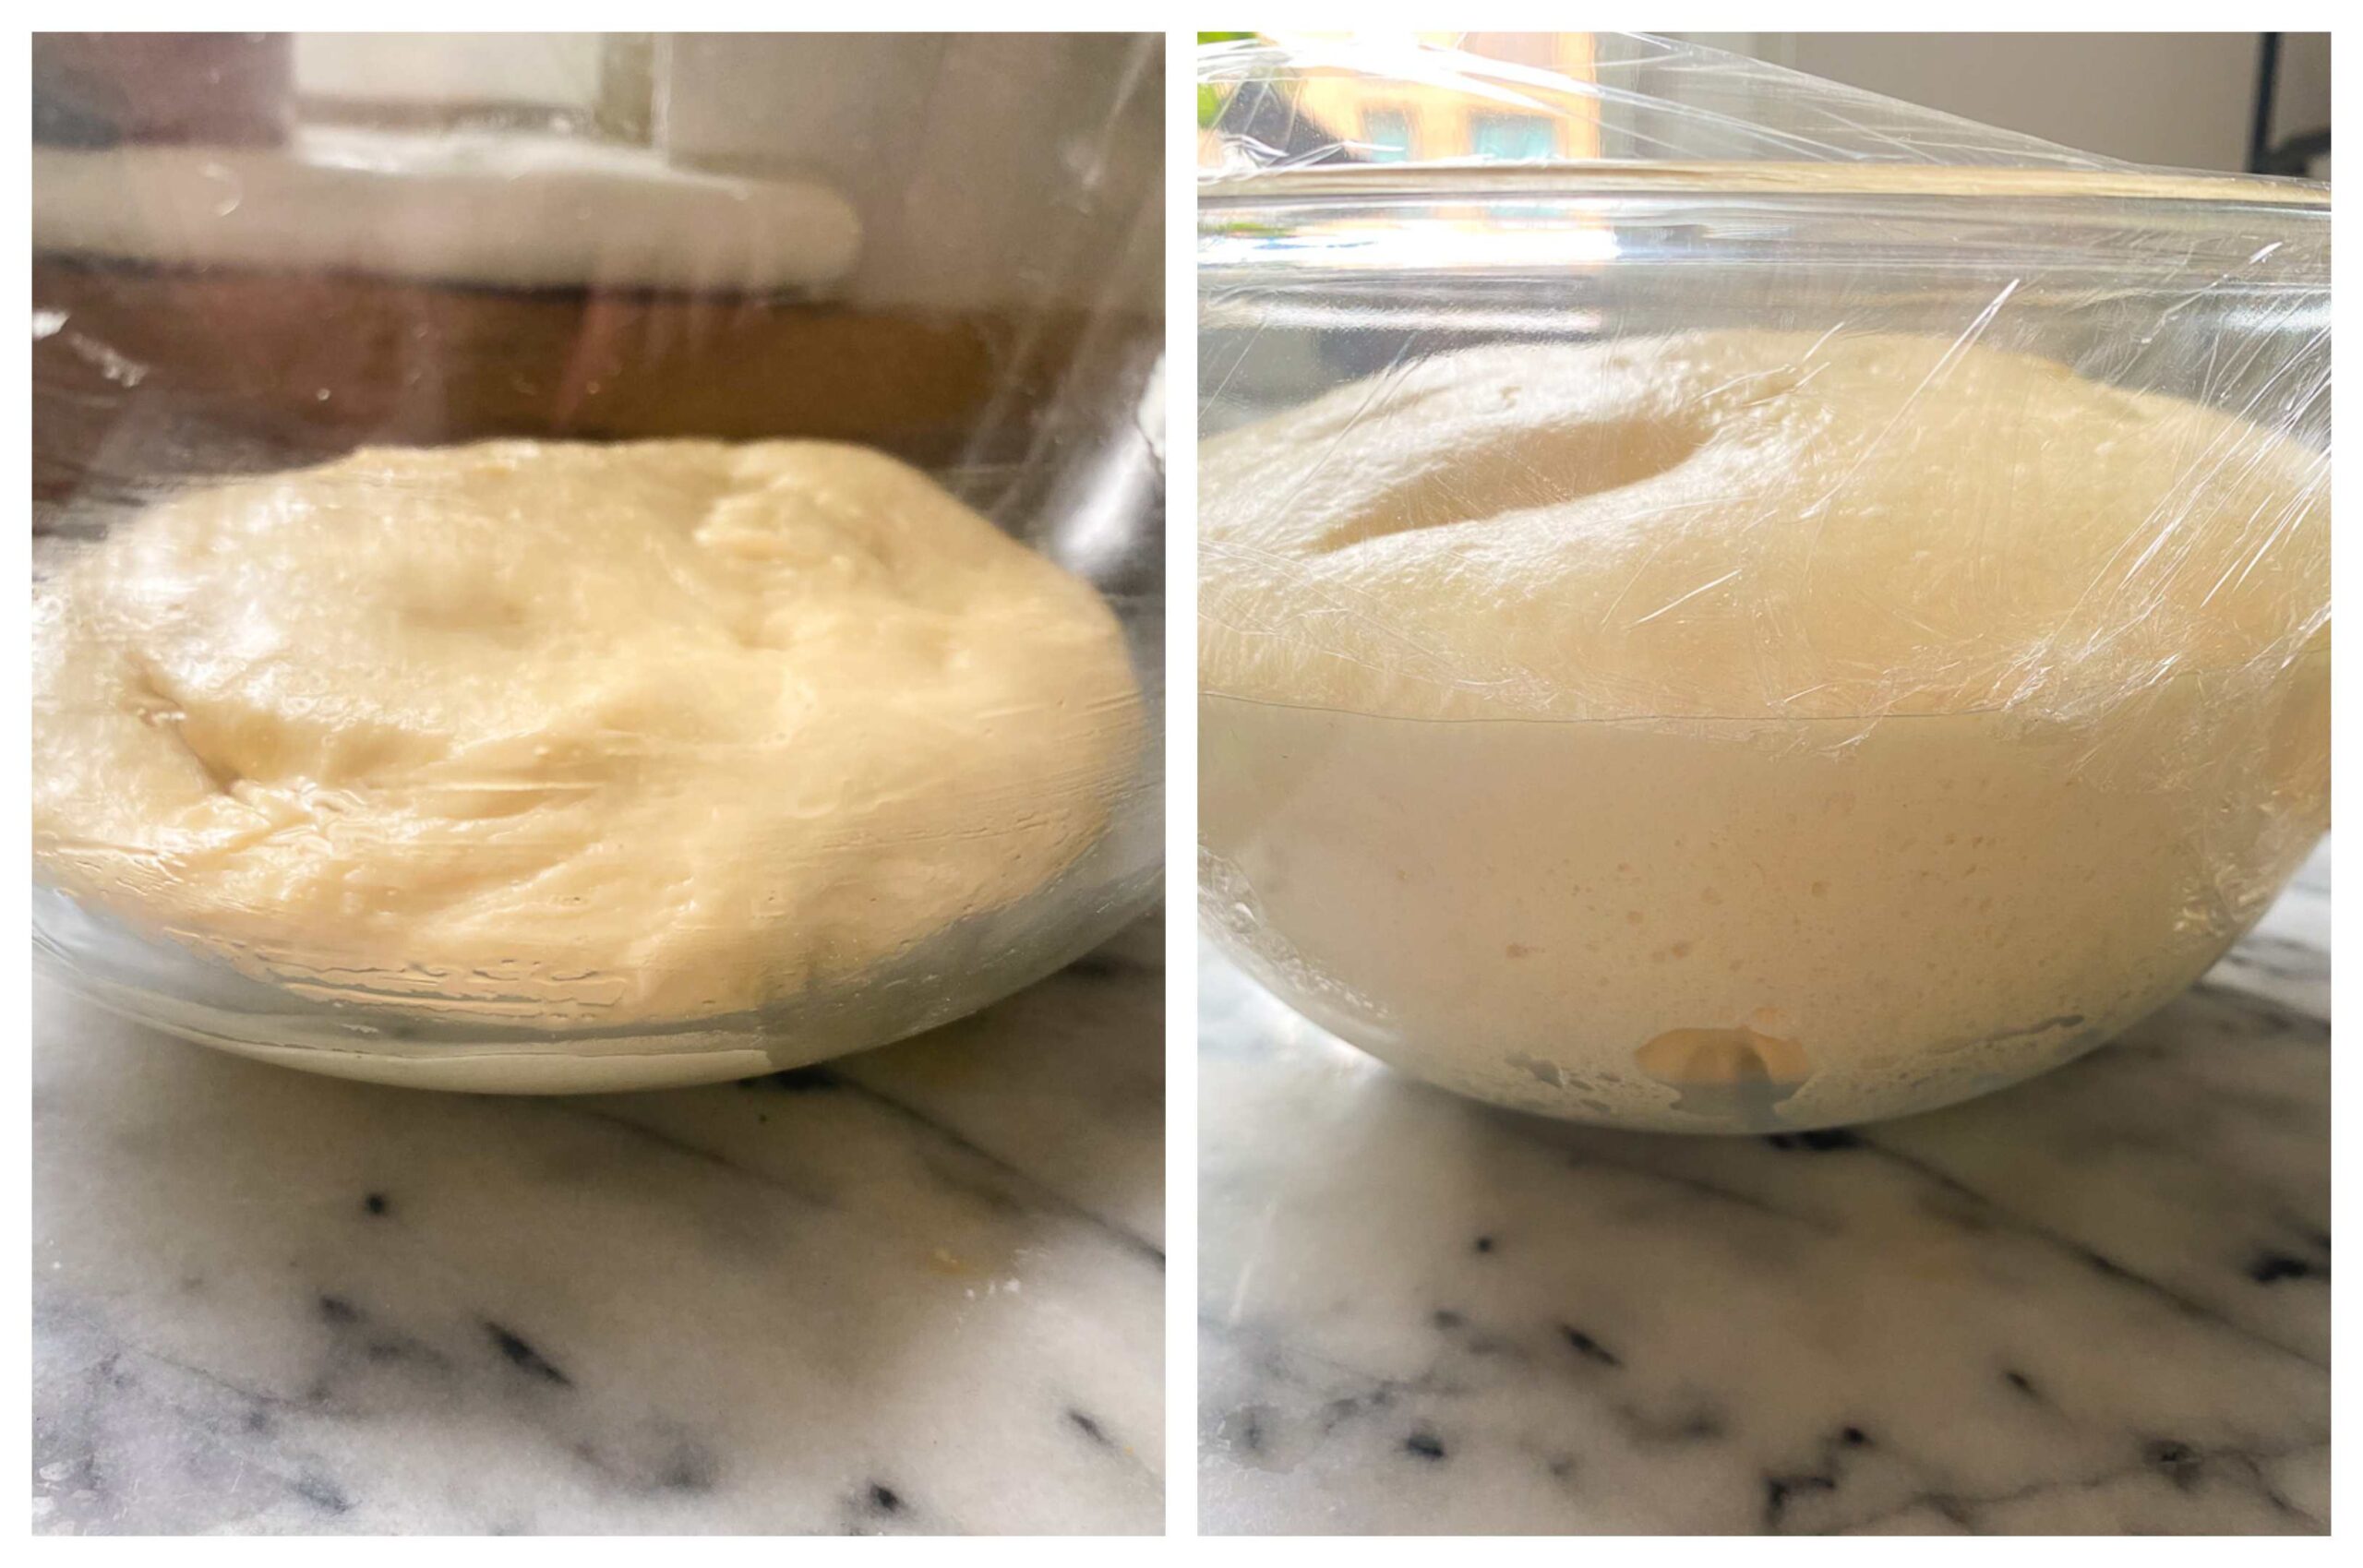
- It’s also important to use your own judgement when needed. It takes anywhere between 1 hour and 1.5 hours for the dough to proof. However, the exact time depends on how warm your house is. Watch your dough. It needs to triple in volume. That’s your main marker not the minutes passed.
- Use bread flour for best results. However all purpose flour will also work.
- You can also use whole wheat flour if that is your preference.
- Brush the rolls with melted garlic butter straight out of the oven. That will allow them to get fully infused with the flavours and for the butter to soften the crust creating very soft rolls. The flavour combination is similar to classic garlic bread, so you know you’ll love it!
Serving suggestions
The list of ways you can serve these dinner rolls is pretty endless, but my favourites will always be to serve them as part of a holiday spread. Whether you are serving turkey, beef or ham, they will work pretty much anywhere. Especially if you have gravy to soak up.
They are also a great way to turn leftovers into sandwiches. Lots of room to get creative here! Mini French Dip Sandwiches, perhaps?
But there is really no limit to how these can be served. Try them with soups, stews or all sorts of creamy dishes or anytime a warm, fluffy bun will bring a smile to your face!
Storage and leftovers
These buns freeze beautifully! Cool them completely and remove from the pan. Freeze in an airtight container until needed. They should keep in a freezer for up to 2-3 months.
They can also be stored in a sealed container or bag for up to a week. Obviously they are best when fresh, but you’ll still enjoy them after a few days.
More bread recipes
Garlic Butter Dinner Rolls

Equipment
- This is an affiliate link.Stand mixer
- This is an affiliate link.Pastry brush
Ingredients
- 220ml / 1 cup warm milk, whole or skimmed
- 1½ tsp sugar
- 7g / 1 tbsp This is an affiliate link.active dry yeast
- 3 tbsp vegetable oil
- 1 egg, large
- 1 tsp salt
- 400g / 3 cups bread flour, or all purpose flour
- 1 egg for brushing
- 1 tbsp butter, melted
- 1 clove garlic
- 1 tbsp fresh parsley, chopped
Instructions
- In a small bowl combine the warm milk, yeast and sugar and let it stand for 5 minutes until you see the yeast bloom. Then add the oil, salt and 1 egg. Mix with a fork.
- Add the liquid to the flour, mix until rough dough forms, then take it out of the bowl onto a floured surface and start kneading until smooth and elastic dough is formed for approximately 8-10 minutes. If using a stand mixer, knead using a dough hook attachment for 1 minute on low speed, then switch to medium and kneed for 4 minutes longer.
- Take the dough out of the bowl and rub the bowl with vegetable oil, then return the dough to the bowl, cover with plastic wrap and a towel and let it rise for 1 hour to 1.5 hours in a warm place until it triples in volume. Preheat the oven to 180C/350F.
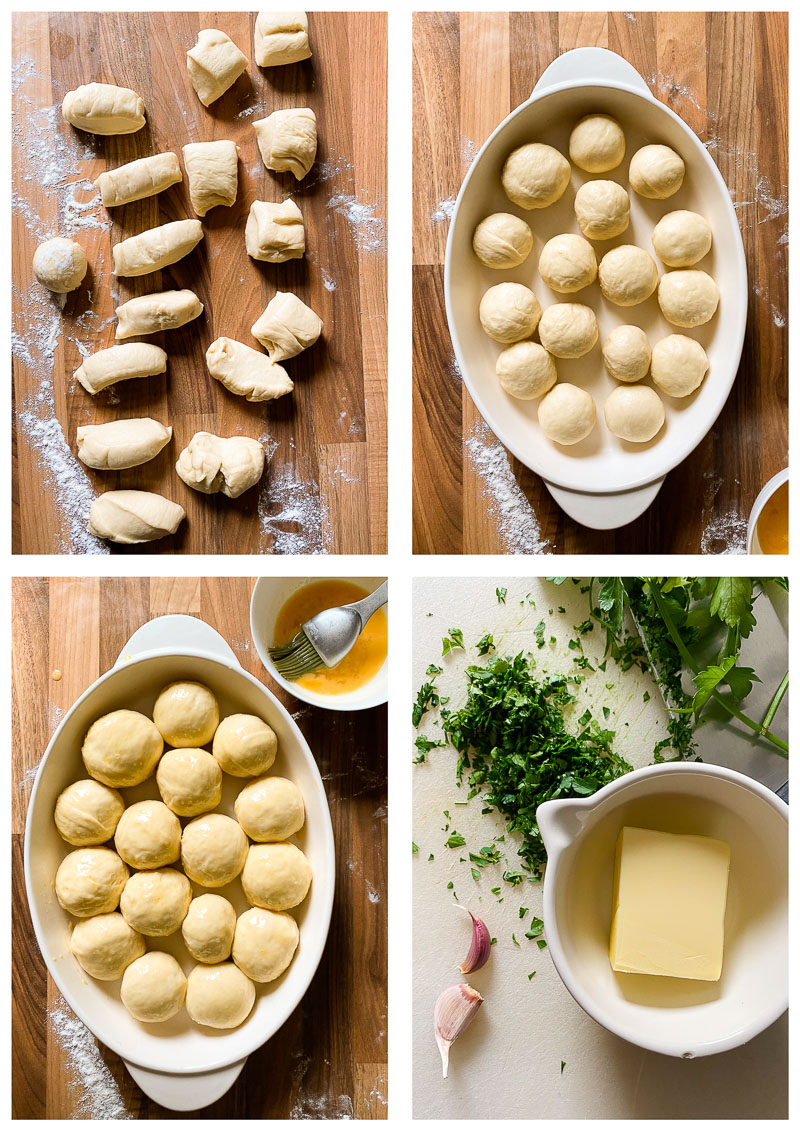
- Take the dough out of the bowl onto a floured surface and divide into 16 equal parts. (You might want to weigh them to ensure they are all the same but eyeballing is also fine.) Roll into balls and place into a well-buttered 9×13 inch baking pan 1 inch apart from each other. Cover with a tea towel and let them rise one more time for 30 minutes.
- Brush with a beaten egg and bake for 20-25 minutes or until golden. Meanwhile melt 1 tbsp of butter together with pressed garlic, then add fresh chopped parsley to the mix.
- Once the rolls are done, brush them with the garlic butter mixture.
Notes
- Be careful to follow the recipe and measure all ingredients accurately.
- Use a This is an affiliate link.stand mixer and a dough hook for easy kneading. However, mixing this bread dough roll by hand is very easy as the recipe produces very soft dough.
- When you finish kneading your dough, it should be soft and not sticky when touched with clean hands.
- Use your own judgement when proofing the dough. It will take anywhere between 1 hour and 1.5 hours but the exact time depends on how warm your house is. Keep an eye on it. It needs to triple in volume. Let the size, rather than time, be your main marker.
- Use bread flour for best results, but all purpose flour will also work. Or whole wheat flour if that is your preference.
- Brush the rolls with melted garlic butter straight out of the oven to allow them to be fully infused with the flavours and for the butter to soften the crust.
Nutrition
Nutrition information is automatically calculated, so should only be used as an approximation.


220ml to 400g of flour is nowhere near enough hydration and the oil/egg couldn’t get it there either. The dough was so dry it wouldn’t even come together cohesively when attempting to knead it. After several minutes of trying, hoping against hope that gluten content would help get everything together I gave up using the original recipe.
At this point I added just barely enough milk, against the recommendation to not deviate, to allow a dough to form. I kneaded it and then dough did not rise in any regard. I know my yeast was fine because the original bloom worked as expected.
I think something went haywire in this recipe; as it stands it is simply a waste of ingredients.
So many words just to say you made a mistake measuring the ingredients. There is no easy way of saying it but anyone who bakes bread more than once a year will tell you that there is nothing wrong with these ratios. This recipe produces a VERY soft dough and if yours was as dry as you describe, you mismeasured. Sometimes it’s okay to step back, evaluate and try again instead of delivering a long rant.
I believe this was a mistake on your end as my dough was so soft and wet I had to use a bench scraper to knead it on my counter. After 8 minutes or so, the gluten built up enough for me to handle it. I’m enjoying pillowy, garlicy rolls thanks to the hard work that went into perfecting this recipe. Thank you, Julia! Better luck next time, Calvin.
my partner and i are absolutely hopeless when it comes to cooking but we wanted to contribute to thanksgiving dinner! 🙂 we decided to make these together! it took us 3 tries to activate the yeast (i don’t think the milk was warm enough the first two tries) but once that worked we felt more confident in everything else! it was honestly so much fun following this recipe, especially kneading the dough!
I absolutely LOVED reading your comment, Auden. It’s amazing to see people try new things in the kitchen and succeeding!
I’d love to try this, but I’m a busy mum. I do have a breadmaker with a “dough” setting. Could I use that for the mixing/kneading of the dough?
I haven’t tested this recipe using a breadmaker, so can’t be certain but I can’t see why it wouldn’t work.
Hey, I loved this recipe! I think I did something wrong though because mine came out a bit dense. I hand kneaded and I used all purpose flour. I’m wondering i didn’t knead the dough enough or maybe it didn’t rise enough? Let me know what you think, thanks!
I recommend using bread flour for best results. The reason for dense bread is usually underproofing, so yes, it probably didn’t rise enough. You want to let it rise until the dough doubles in volume and the timing for it may vary depending on the temperature of your house. It will take longer in a colder house.
hi miss Julia Frey I’m shout-out I’m from the Philippines. ask my questions for the yeast. If I don’t have the active dry yeast. I can also use instant yeast. thank you
You can use instant yeast!
Can you please tell me if I can mix these up a day in advance and place the shaped rolls in freezer to take out and bake the next day? I am bringing dinner to a friend who had a baby and I’d like to bring these rolls fresh.
Hi Jojo, I have already replied to your earlier comment that I am not able to give you this information without testing fist, which I haven’t done. What you can do however, is bake them fully but leave them a little pale, then warm up in the oven for a few minutes before you see your friend. It’s what supermarkets do when they sell you “bake at home” bread.
These rolls look amazing!😋 I’d like to make them to serve with chicken pot pie, and a cucumber dill lettuce salad I’m making for a friend who had a baby. Could I mix up the dough ahead and let it rise once and then either refrigerate or freeze in balls, to take out and defrost and bake on the day? I would love to take them over to her house still warm and fresh from the oven. 🤤I’d appreciate any help! Also do you serve with softened butter or just plain?
Hi Jojo, this could work however it needs to be tested, which I haven’t done personally. I’d love to hear your experience!
These came out perfect using regular yeast. BUT, can they be made using instant yeast?
Hi Brian, I haven’t tested these rolls with instant yeast but I don’t see a problem here. They are very similar but used slightly differently. Instant yeast doesn’t need the rehydration time, so can be added straight to the dry ingredients and the dough that is made with instant yeast takes less time to rise.
A couple of readers have commented that the rolls need more salt. The nutrition label says the sodium content is 94 mg per roll. That reflects more than the 1/2 tsp called for in the recipe. 1/2 tsp salt would give about 72 mg sodium per roll. 94 mg per roll is more like 3/4 tsp salt in the entire recipe.
Hi Brian, the nutritional label is automated and simply calculates each nutrient from the data that is stored within the plugin. Additional sodium comes from the salted butter the rolls are brushed with. If you use unsalted butter, the sodium level will be lower. My guess is that the plugin only has data for salted butter. Having said this, the nutritional information provided is an estimate only. If you have strict dietary needs I recommend consulting your dietitian.
PS. You are welcome to add more salt to the dough. Everybody’s taste is different. The amount of salt listed is plenty for me.