This post contains affiliate links. When you purchase through our links, we may earn a commission.
The recipe for this Earl Grey Meringue Cake is something you need to have for a special occasion. Just imagine baking this beauty for someone’s birthday or anniversary!
Manage your baking fix at our hub for beautiful cake recipes!
I think every artist knows when he or she created something special, and that is precisely how I feel about this Earl Grey Meringue Cake.
It took two days, two meringue trials, two frosting recipes, and many of hours to develop this cake recipe. But at the end of the day when all is said and done and the cake eaten, who is counting?!
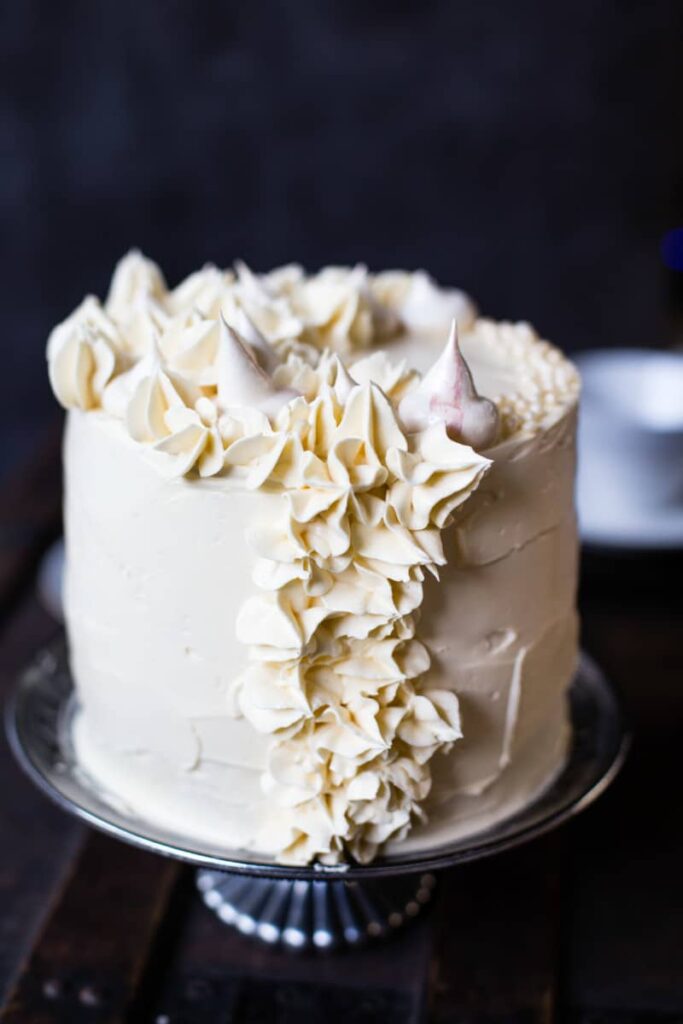
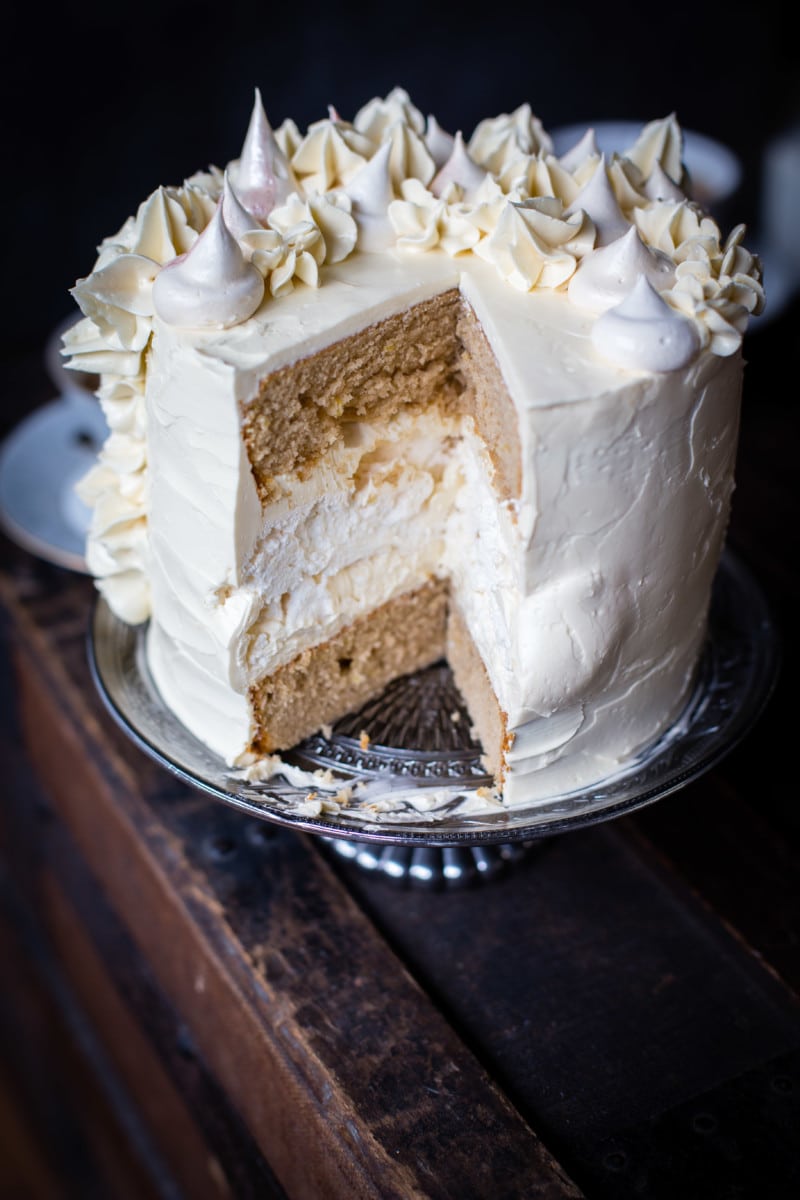
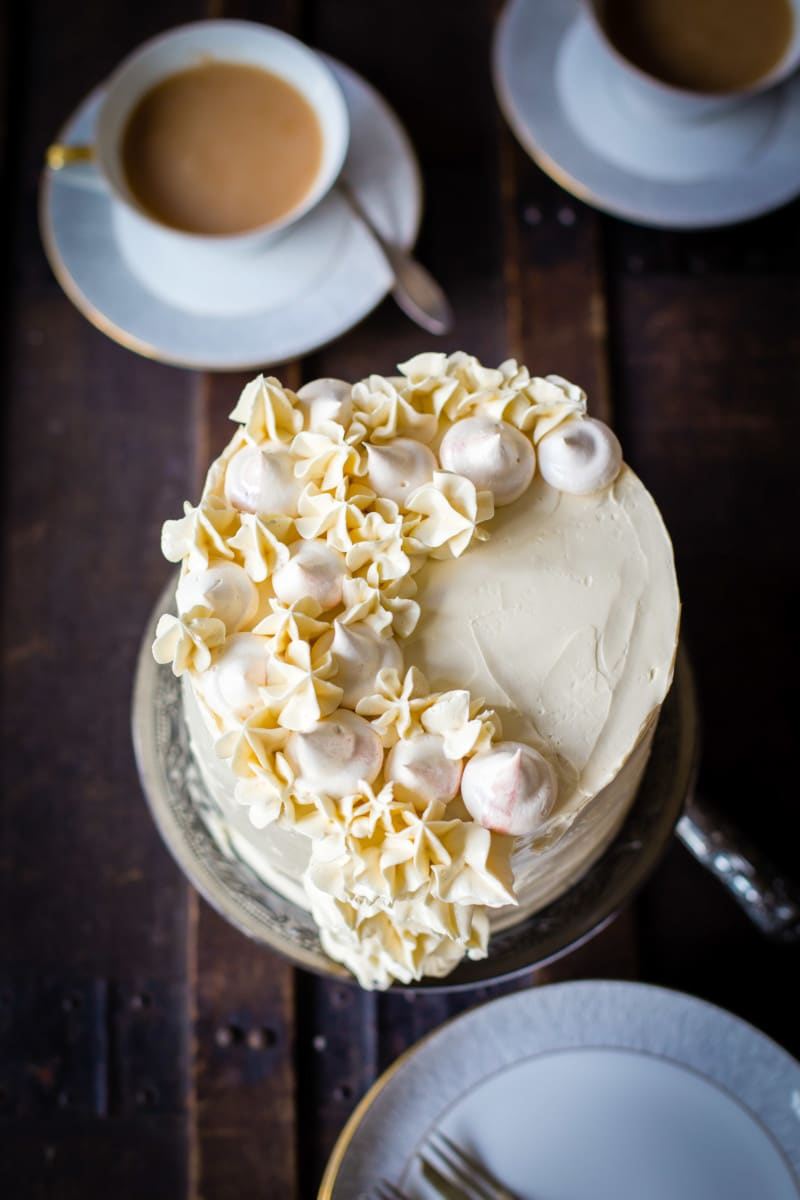
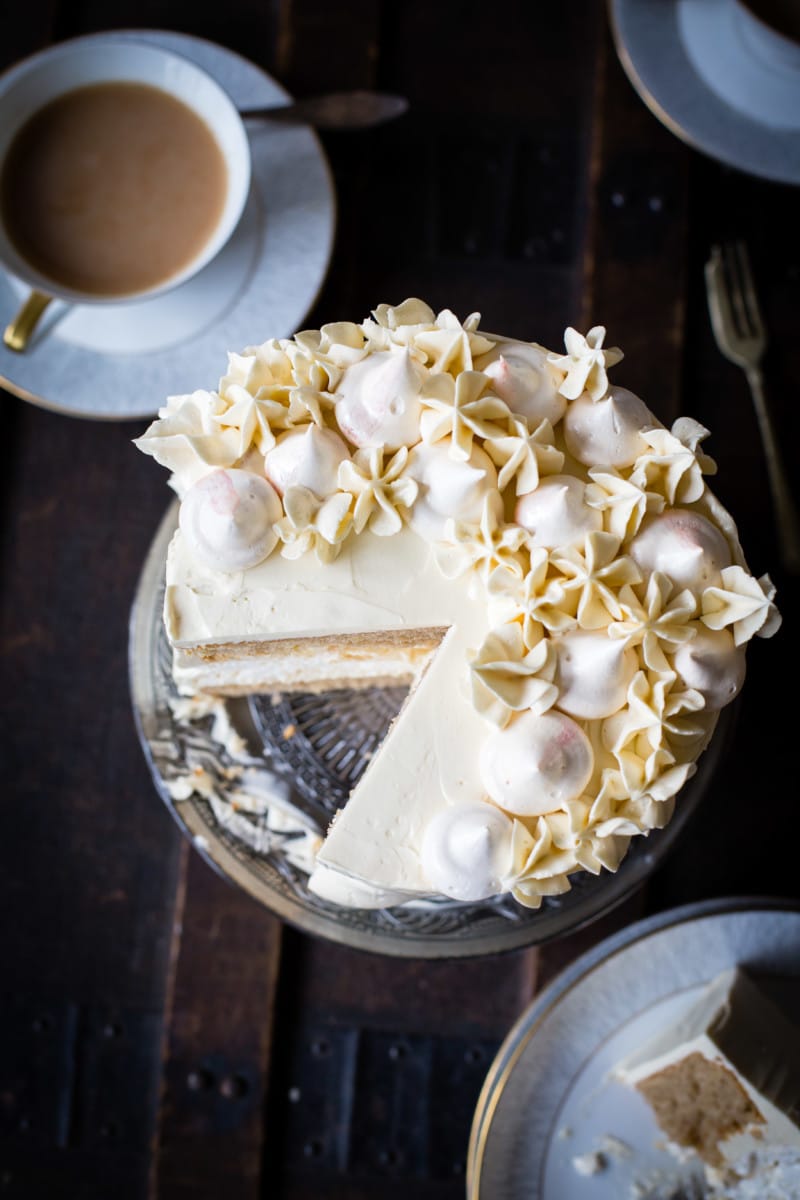
I love the combinations of textures in this cake. The light and flavourful sponge sandwiches the crunchy meringue, all covered with a decadent Swiss meringue buttercream.
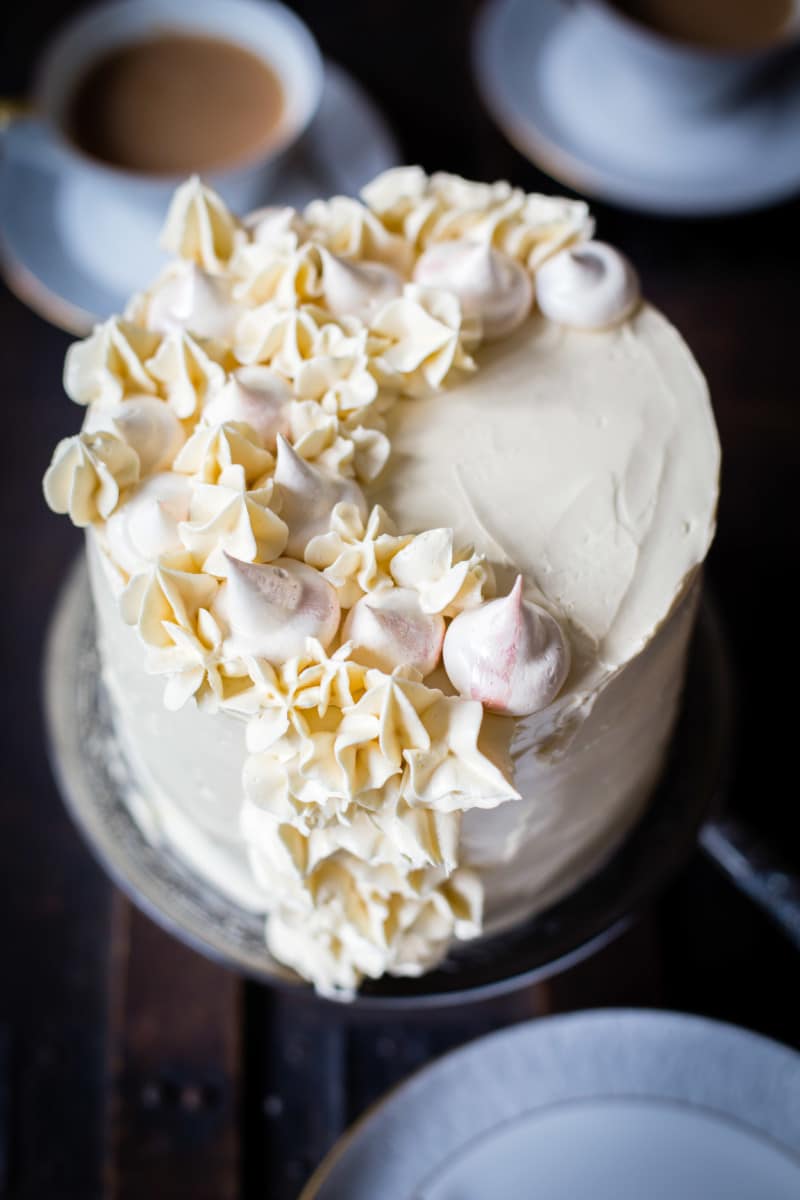
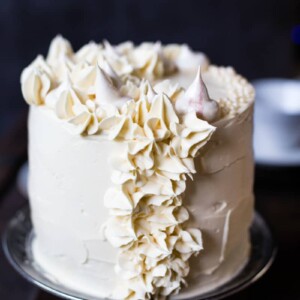
To top it off I added a few meringue dollops to the top of the cake. Even if they aren’t essential, they match the vibe of this cake so well!
Earl Grey Meringue Cake
For years my personal favourite tea has been Earl Grey. Earl Grey tea lends itself beautifully to baking. It has a delicate flavour that doesn’t overpower but beautifully perfumes delicious cakes and biscuits.
Other types of black tea can have a deeper and occasionally bitter flavour, and will bring something completely different to baking. Earl Grey is much more nuanced the classic blend of spice, which makes it a great addition to baked goods.
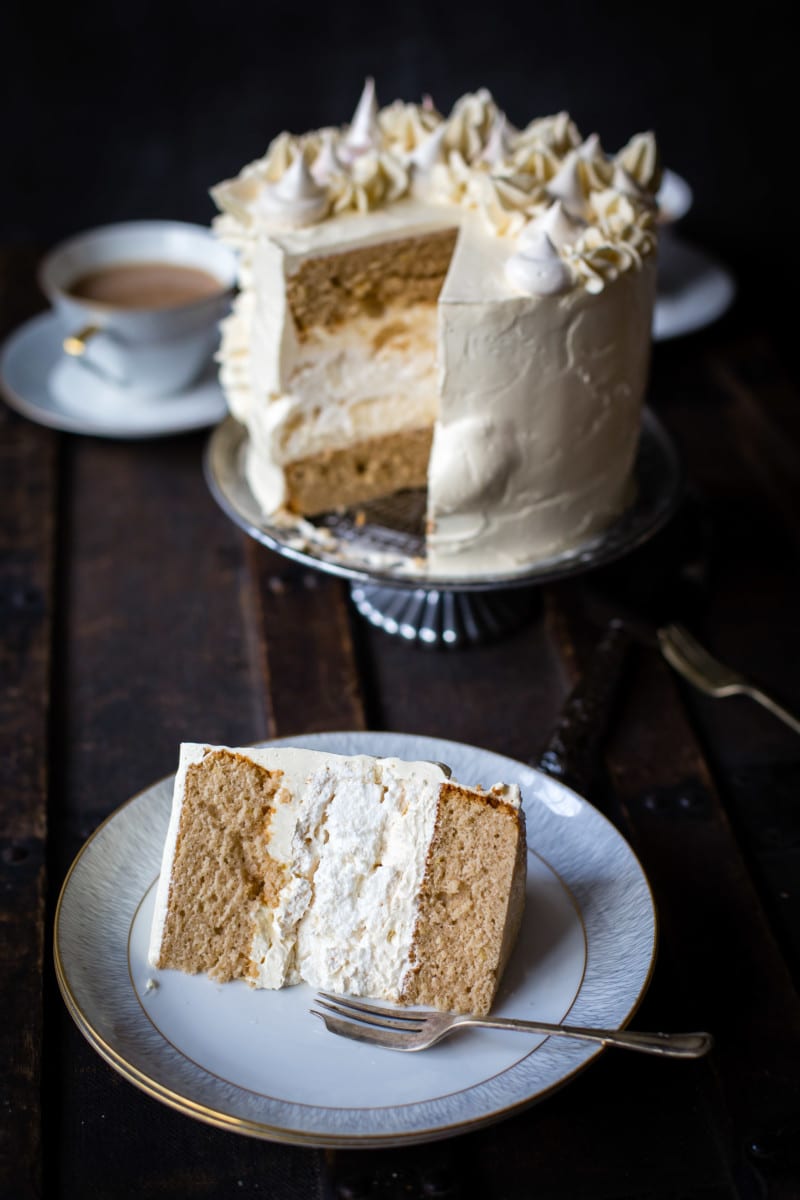
Earl Grey has a hint of citrus to it, which I enhanced in the sponge with lemon zest. But the taste of the tea is not overpowering. It is subtle and sophisticated and absolutely beautiful!
Remember that tea leaves do not remain fresh forever, so avoid using tea bags that have been stuck in the back of your cupboard for years. And while there is no need to break the bank to buy fancy tea for this recipe, higher quality teas will have a better blend of spices so avoid the cheapest teas on the grocery shelf.
Making this cake
This cake is a bit more complex than many others so I recommend making it in stages. You can make the meringue and sponge in advance. That way you can focus on making the frosting and assembling the cake without the same pressure.
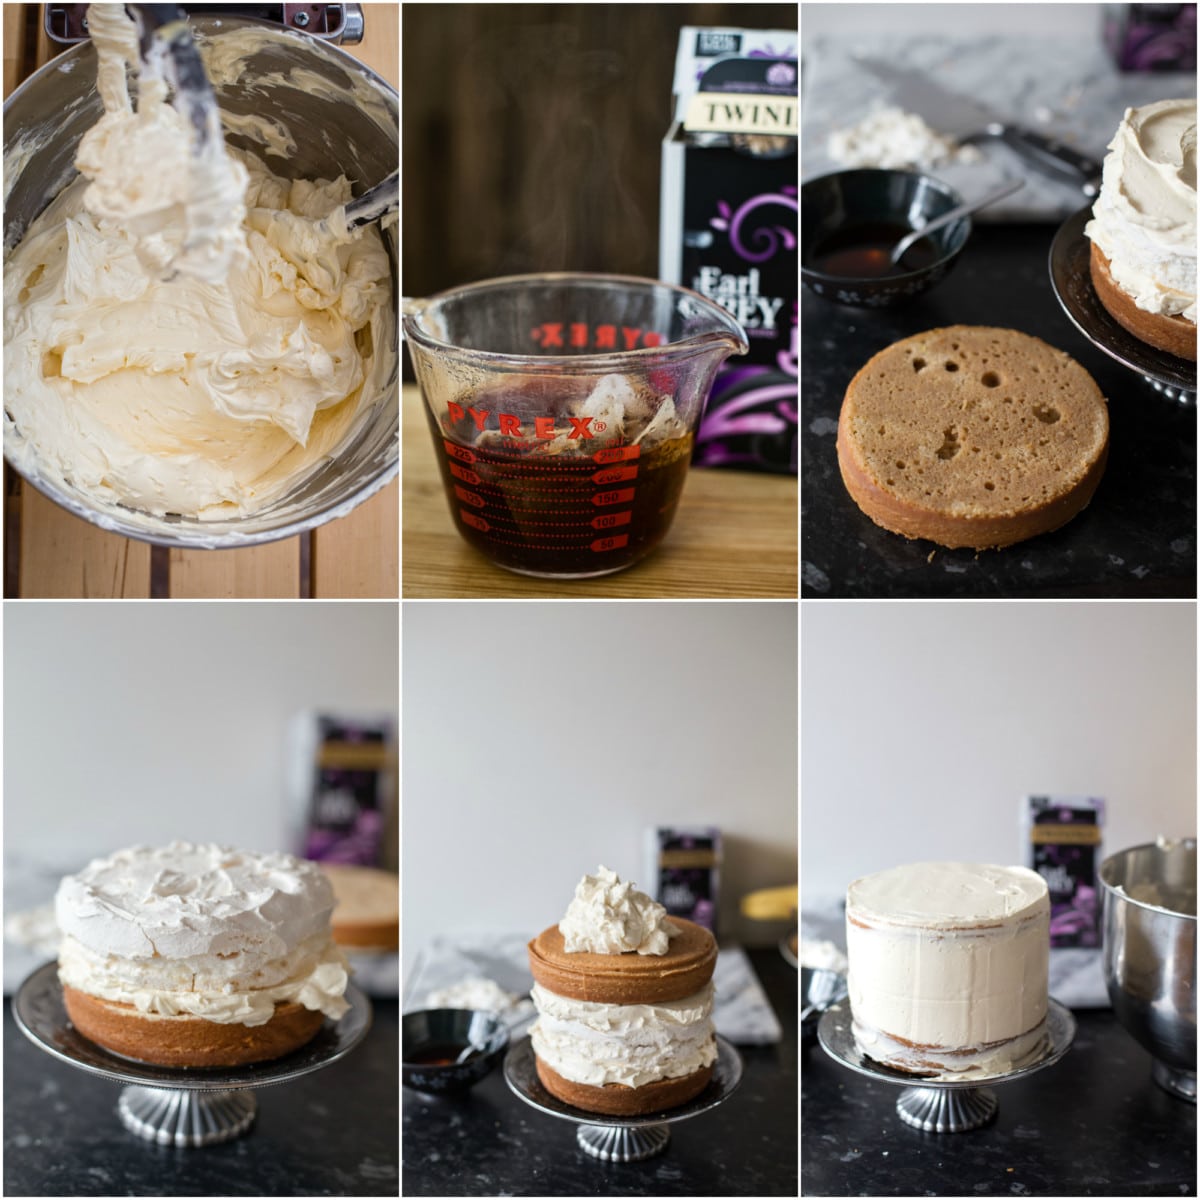
The Earl Grey flavour comes from seven tea bags – four for the sponge and three for the rum drizzle. Make sure you use water and milk that is as close to boiling as you can get it to make the tea. This is essential for getting as much of the tea taste as possible!
Making a meringue can be intimidating if you have never done it, but it is a recipe that is well worth mastering. I’ve given lots of instructions and advice to make sure you meringue layer is a success in my pavlova recipe.
This cake is a good opportunity to practice with meringue because it is hidden inside the cake. Don’t worry if you have any cracks in the meringue because you can always seal them with buttercream.
The Earl Grey Rum Drizzle is not essential to this cake so feel free to leave it out if you wish. I found that it enhanced the taste of the tea in the cake and gave it a bit more nuance. But even without the drizzle the cake will taste fantastic!
Recipe Tips and Notes
- Read the recipe instructions from the beginning till the end before you start making it to understand the process and timing. Give yourself plenty of time when you are baking it.
- I would recommend baking the meringues the day before and store them in an This is an affiliate link.airtight container to prevent from softening.
- The meringue kisses used for decoration can be baked at the same time as the meringue layer and on the same baking sheet.
- If Swiss Meringue Buttercream seems a bit too difficult to make try quick, easy and my personal favourite Mascarpone Cream instead.
Favourite cake recipes
- Russian Honey Cake Medovik
- Naked Cake with Mascarpone Cream and Crushed Strawberries
- Black Forest Cake
- Victoria Sponge Cake with Blackberry Compote
Earl Grey Meringue Cake
Ingredients
For the Meringue
- 2 egg whites
- 60g / 1/4 cup caster sugar
For the Cake
- 250ml / 1 cuup whole milk
- 4 bags Earl Grey tea
- 300g / 2½ cups flour
- 2 tsp baking powder
- 1/2 tsp salt
- 170g / 3/4 cup butter, softened
- 300g / 1½ cups caster sugar
- 2 tsp This is an affiliate link.vanilla
- 4 egg yolks, large
- zest of 1 lemon
For the Swiss Meringue Buttercream
- 6 egg whites, 150ml
- 250g / 1¼ cup caster sugar
- 340g / 1½ cups butter
- 2 tsp This is an affiliate link.vanilla
- 2 tbsp Earl Grey tea, strong
For the Earl Grey Rum Drizzle (optional)
- 100ml / 1/2 cup water
- 3 bags Earl Grey tea
- 4 tbsp caster sugar
- 2 tbsp rum
Instructions
For the Meringue
- Preheat the oven to 100C/200F.
- Carefully separate egg whites from the egg yolks. In a very clean, grease free mixer bowl begin whipping the egg whites on a low speed. First they will turn frothy and then will start forming soft peaks, at this stage turn the speed to high and start adding caster sugar one tablespoon at a time making sure the sugar is melting into the mix. Continue mixing until all sugar is dissolved and the meringue is thick, glossy and smooth. You can test whether the sugar is all dissolved by rubbing a small amount of meringue between your fingers, it shouldn’t be gritty.
- Fill a pastry bag fitted with a round nozzle with the meringue mixture and pipe 6-7 meringue kisses on small baking sheet lined with parchment paper, bake in the oven for 1 hour.
- Line a baking sheet with parchment paper and trace an 8″ pan on the paper. Fill the inside of the circle with the remaining meringue mixture but make sure it has about 1 cm space between the meringue and the edge of the traced circle. The meringue should be slightly smaller than your cake layers. Flatten the top and smooth out the sides of the meringue to form a shape similar to cake layers.
- Bake in the preheated oven for 1.5 hours, it might take longer if baking on a humid/rainy day.
- Remove from the oven, cool completely and store in an airtight container until ready to assemble the cake.
- PS You can bake both the meringue layer and the meringue kisses at the same time on the same baking sheet.
For the Cake
- Preheat the oven to 180C/350F.
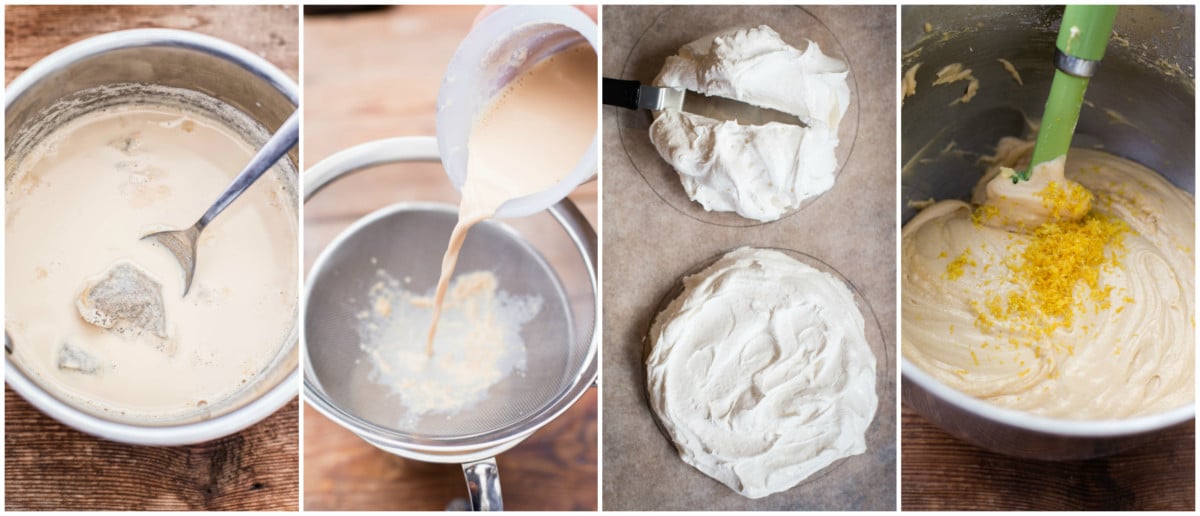
- Bring milk to a boil and add 4 bags of Earl Grey tea, let them steep for 5 minutes, then remove the bags and let the milk cool, then strain though a fine sieve.
- Grease 2 8″/20cm cake tins with some butter and sprinkle them with flour, set aside.
- In a medium bowl sift together flour, baking powder and salt.
- In the bowl of a stand mixer beat the softened butter until light and fluffy with a paddle attachment, add sugar and keep mixing until incorporated, about 3 minutes, then add egg yolks one at a time, giving them time to be completely mixed in before each addition, then add vanilla.
- While the motor of the stand mixer still running add half the flour mixture, then half of the tea infused milk, then the remainder of the flour mixture and finish with the second half of tea infused milk. Stop the mixer and scrape down the sides with a spatula, add zest of one lemon and mix for 1 more minute.
- Divide the batter among two prepared pans and bake in the oven for 25-30 minutes or until a cake tester inserted in cakes comes out clean.
- Remove on a wire rack to cool, when cool to the touch remove from the pans and cool completely on a wire rack.
For the Swiss Meringue Buttercream
- Cut the butter into cubes and set aside. Clean your mixing bowl very well making sure there are no traces of grease left on it from previous use, you can also wipe it and the beater with a bit of lemon juice.
- Separate the egg whites from the egg yolks. Set a large pot about 1/3 full of water on the stove on medium heat. Combine egg whites and sugar in a mixing bowl with a whisk and set the bowl inside the pot of simmering water to create a double boiler. Heat the mixture while constantly whisking it. Continue whisking until the sugar is dissolved and the mixture is hot.
- Take the bowl out of the pot and start whisking the eggs whites with a whisk attachment until the mixture is no longer warm and looks thick and glossy. It will take about 10 minutes. The next step is combining the meringue with butter but don’t start putting butter yet if your bowl is still warm to the touch.
- Switch to a paddle attachment and start adding the cubes of butter one at a time and continue beating until each cube is fully incorporated. Add vanilla and Earl Grey tea last. If at any point your buttercream separates don’t give up and keep beating until it’s back to smooth and silky.
For the Earl Grey Rum Drizzle
- Steep 3 Earl Grey tea bags in boiling water for 5 minutes, add sugar until it completely dissolves, then cool and add rum.
To Assemble the Cake
- Place the first cake layer on a cake stand or a plate and lightly drizzle with the tea and rum drizzle if using. Spread 1/4 of the buttercream and smooth it out with an offset spatula, place the meringue layer on top (trim it with a sharp knife if the sides are sticking out, don’t worry if it cracks you can seal it with buttercream!) and repeat filling the cake with 1/4 of the buttercream, finally finish the cake off with the final cake layer, add more buttercream to the top and sides to fully cover them. At this point we are working on a crumb coating, which shouldn’t be thicker than 1-2 cm. Place the cake in the fridge for 10 minutes for the crumb layer to firm up.
- Take the cake out of the fridge and cover it with more buttercream while making attractive swirls with an offset spatula.
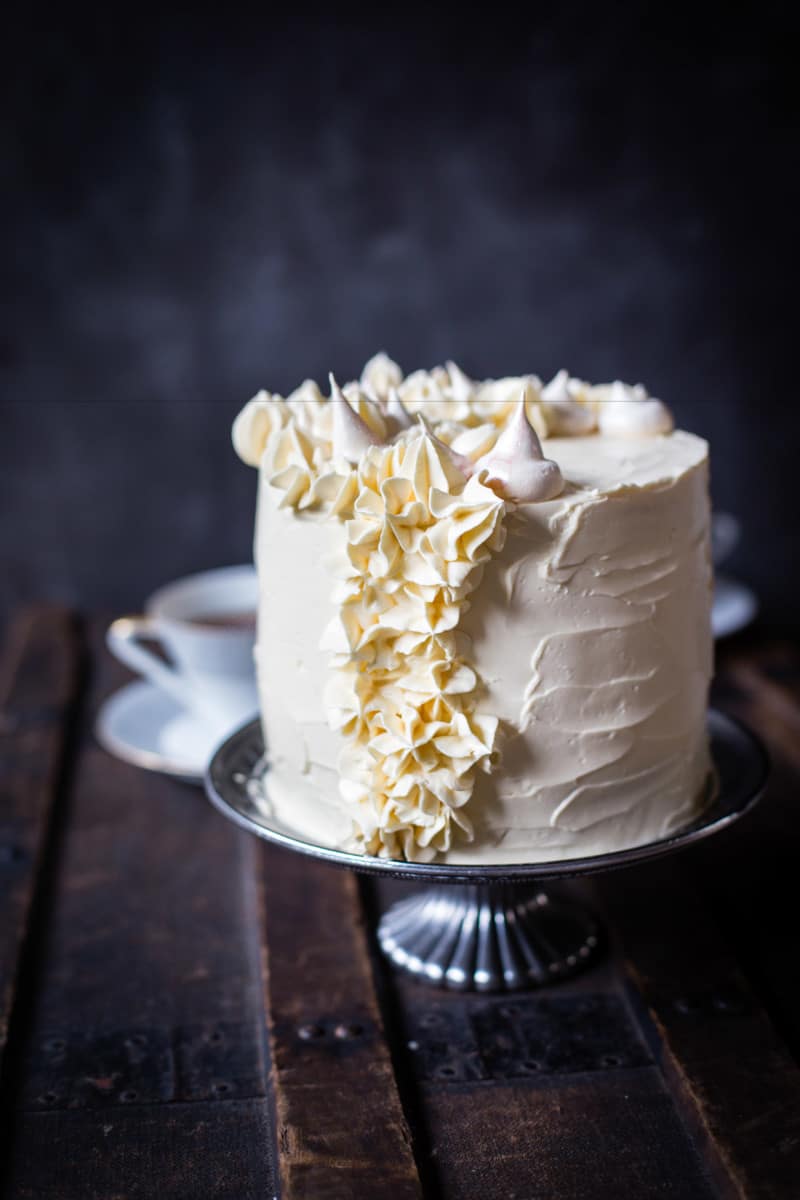
- Fill a pastry bag fitted with a closed star nozzle and pipe a few rosettes on one side of the cake, fill gaps with meringue kisses. (I brushed some of the kisses with edible paint, which is optional).
Nutrition
Nutrition information is automatically calculated, so should only be used as an approximation.


Hey!
I tried making the cake and everything other than the buttercream turned out fine. I thought I was doing everything correctly. The consistency before adding the butter was thick and glossy, but the moment I added the butter, it turned liquidy, and haven’t changed since. I have tried beating it for almost 20 minutes, yet it still remains cottage cheese-like and liquidy. What to do?
Thanks.
My guess is that butter was added when the meringue was still too warm. The bowl needs to be neutral to the touch before you add butter, so it needs to cool down. Refrigerate it for 20 minutes until it just hardens slightly arounds the edges, then beat it again. I hope this helps.
Hello!
I’ve been impressed by the look and the flavours of this cake for quite a while now and thought i would go for it and make it!
My meringue simply crashed after taking it out of the oven, the middle was still uncooked (i blame the oven for this one).
But the buttercream… I don’t get it. I’ve followed the instructions to the letter and i have some sort of buttery liquid that can’t be saved. It seems that there isn’t enough butter for the 1:2:3 rule… i have a gloppy eggy sugary water with butter blobs! I will try to throw in some more butter in the morning after a full night in the fridge. But i didn’t want to not follow your recipe… So now i am left with two sponges, no meringue, no buttercream and no cake 🙁 i so wanted this to work, and i am determined to try again and again until success! I will keep you posted!
Hi Sophe, it’s very frustrating when a cake doesn’t turn out. I know it too well. Have you ever made Swiss Meringue Buttercream before? It can be difficult and the success of it is in the technique. I can assure you this recipe ratio is not the problem. It’s the one I use all the time and many of my readers have used successfully. I am happy to troubleshoot with you. The mixture you add butter to should look similar to whipped meringue before it goes in the oven, it should be fluffy and not liquid. “Buttery liquid” might be due to a couple of things. Underbeating the egg whites and sugar mix and/or adding butter while the mixture is still warm. You can add more butter but it will only result in heavier buttercream and will not save it. You can also use the recipe for mascarpone frosting I linked to in the post itself as an easier buttercream version. I hope this helps.
Thank you for your response! I have tried the Swiss meringue buttercream with a rested mind the day after and it turned out great!
Tonight, i will work on the cooked meringue!
i think i struggled with the ‘hot’ in the ‘mixture is hot’ as I like to do by the ‘C. So i took my second buttercream to 70’C and it worked! I am not giving up yet!
I am for sure will make this cake again and again until I succeed, and the mascarpone option sounds just as good. I will keep you posted 🙂
Oh also, can I ask if I assemble it tonight for tomorrow night, will my meringue go soft in the middle?
Hi Sophie, it shouldn’t do but it will depend on how dry your meringue is to start with. Let me know how it goes!
It worked!
Thank you so much!
This cake was a success, i will make another one soon!
The flavours are amazing, the look is stunning!
Thank you so much for sharing and helping <3
So proud of you, Sophie!! Well done! 🙂
I made this cake last week to bring into a cafe where I volunteer. I have never had so many compliments on something I have brought in for the staff to enjoy.
The cake recipe itself is an absolute standout and I will for sure be making it again with Julia’s Marscapone icing recipe.
Best compliment ever! Thank you for sharing, Carmen!