This post contains affiliate links. When you purchase through our links, we may earn a commission.
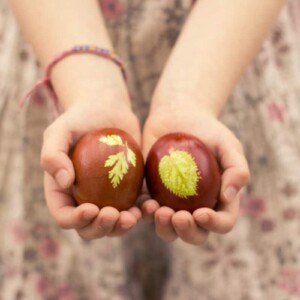
Colouring Easter eggs naturally using red and yellow onion peels is a tradition many families still follow.
It’s something I grew up with and am happy to pass on to my kids. Why? Because it’s really fun and brings the whole family together in a creative and meaningful activity.
You can also bake Easter Bread Kulich for a delicious and gorgeous Easter table centerpiece or make a traditional Russian cheesecake Paskha!
Russian Easter Traditions
Every Easter I am taken back to my childhood in Russia where the holiday is steeped in century-old traditions and memories. The holiday so loved and revered by people that even Communism wasn’t able to erase it from the nation’s’ psyche.
It seems like the early childhood memories are the strongest and what I remember is my babushka starting to collect onion peels in a plastic shopping bag weeks before the arrival of Easter, so there would be enough to colour dozens of eggs.

How could we possibly eat them all? We didn’t! With the rise of the dawn on Easter Sunday we would start hearing little knocks on our front door and my granny with a big bowl of beautifully coloured eggs at the ready opening the door to hear cheerful choir of the neighbourhood children, “Christ is risen!” to which she would reply with no fail, “Risen Indeed!” and give them each an egg.
That went on for hours. That is one of the Easter traditions that carried on through centuries and was carefully preserved during the tough years when God was not welcome anywhere in the country.
I still don’t understand how it was possible but one thing I do know there was not one family that didn’t celebrate Easter in one way or another. Miracle.
Having moved away from Russia many years ago, I’ve lost many traditions but I was not about to lose the joy and anticipation of Easter by not colouring eggs with my own children!
We colour eggs each Easter to remind us of what Christ has done, paving the way to new life, new birth and new beginning.
What do I need to colour eggs with onions peels?
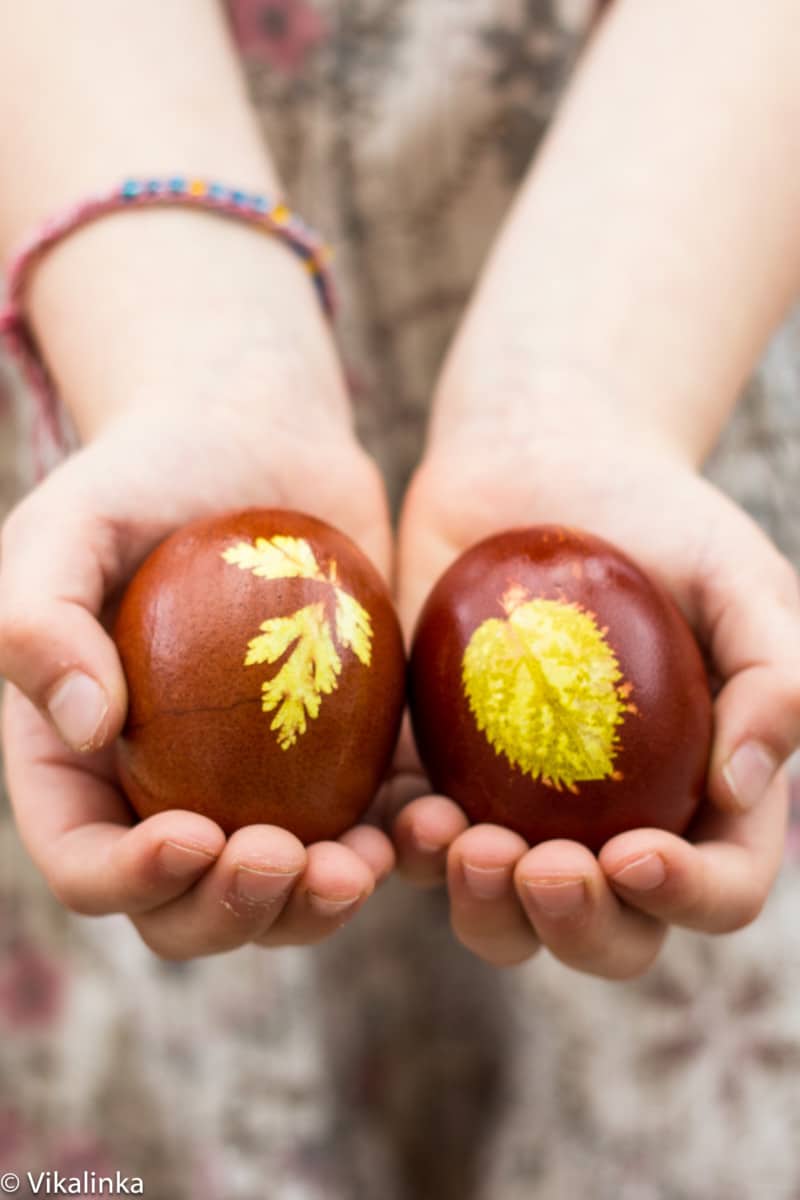
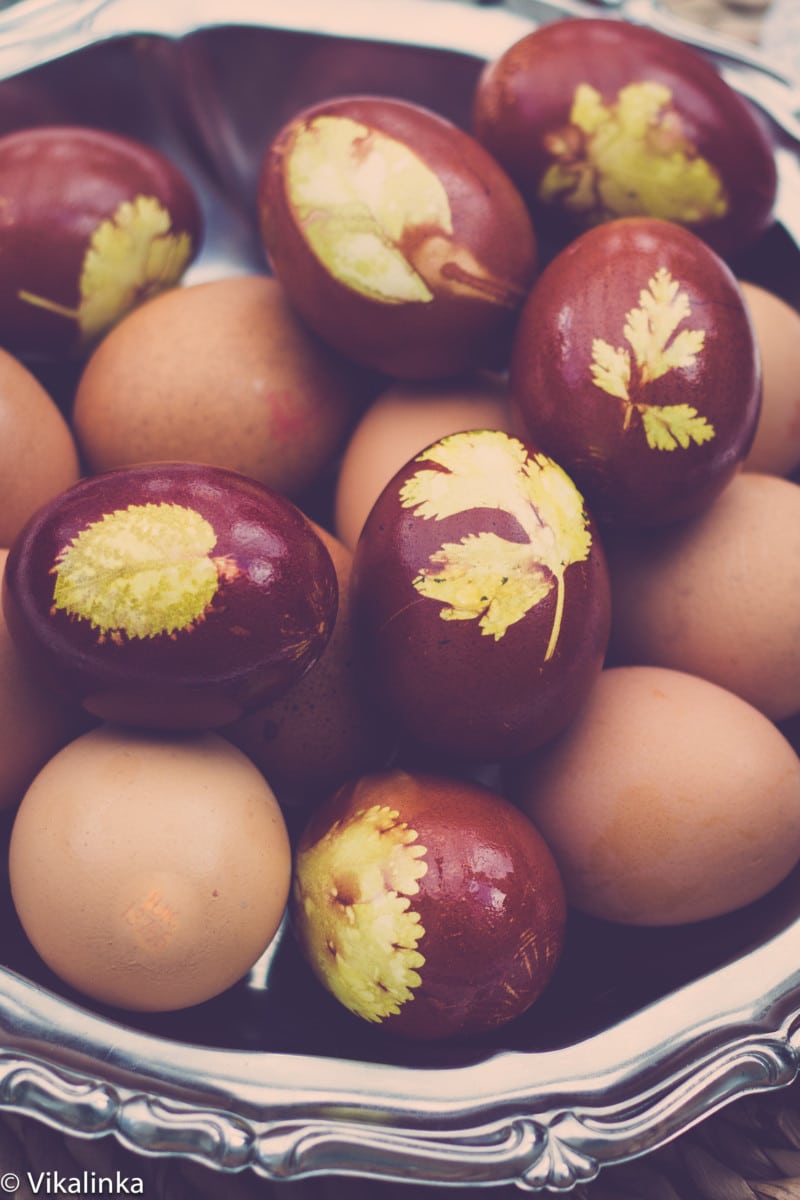
The design on the eggs I have here is so beautiful yet so simple to achieve and what is even better is completely natural, no chemicals involved! Here is what you will need:
- Onion peels(red or yellow) from about 10 onions
- White Eggs
- Any leaves you like e.g. rose leaves, parsley, dill, anything interesting you can find in your backyard!
- Salt -1 tsp.
- Pantyhose
- Thread
How do I colour Easter Eggs naturally?
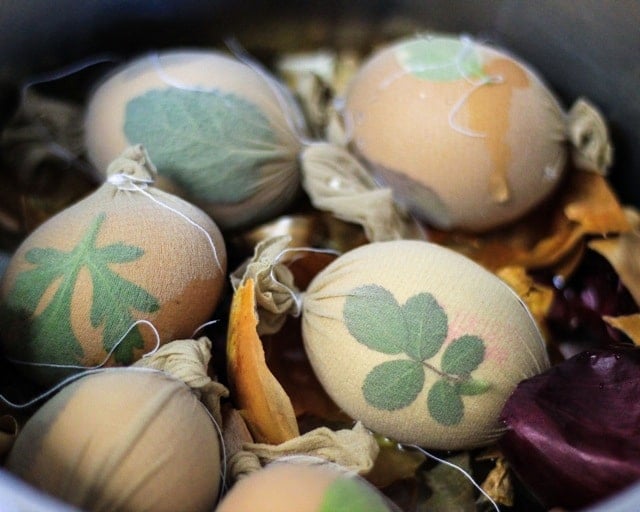
Take the onion peels and put them in a pot. The next step is quite simple but a teensy bit fiddly. Place a leaf of your choice on the egg and slide it inside a pantyhose, tie a thread on each side of the egg to prevent the leaf from sliding.
Repeat the process until all the eggs are “dressed” in pantyhose. I learned that very stiff leaves don’t work as well because they don’t “hug” the egg too tightly and produce an unclear print.
Fill your pot with water and boil the eggs for 15-20 minutes. Make sure the heat is not set on very high as you don’t want your eggs knocking around in the pot and cracking.
Cool the eggs, remove the panty hose and the leaves, wipe any leaf remnants with a cloth. The last step is to make them shiny! Simply rub each egg with a little bit of oil.
You can use the same method and achieve different colours if you add beetroot to the water instead of onions peels. The colours will range from pink to red depending on the length of time and beetroot concentration level. Or use red cabbage to get a pretty blue and purple!
I am sure I don’t have to tell you how much fun you will have with your children colouring eggs!
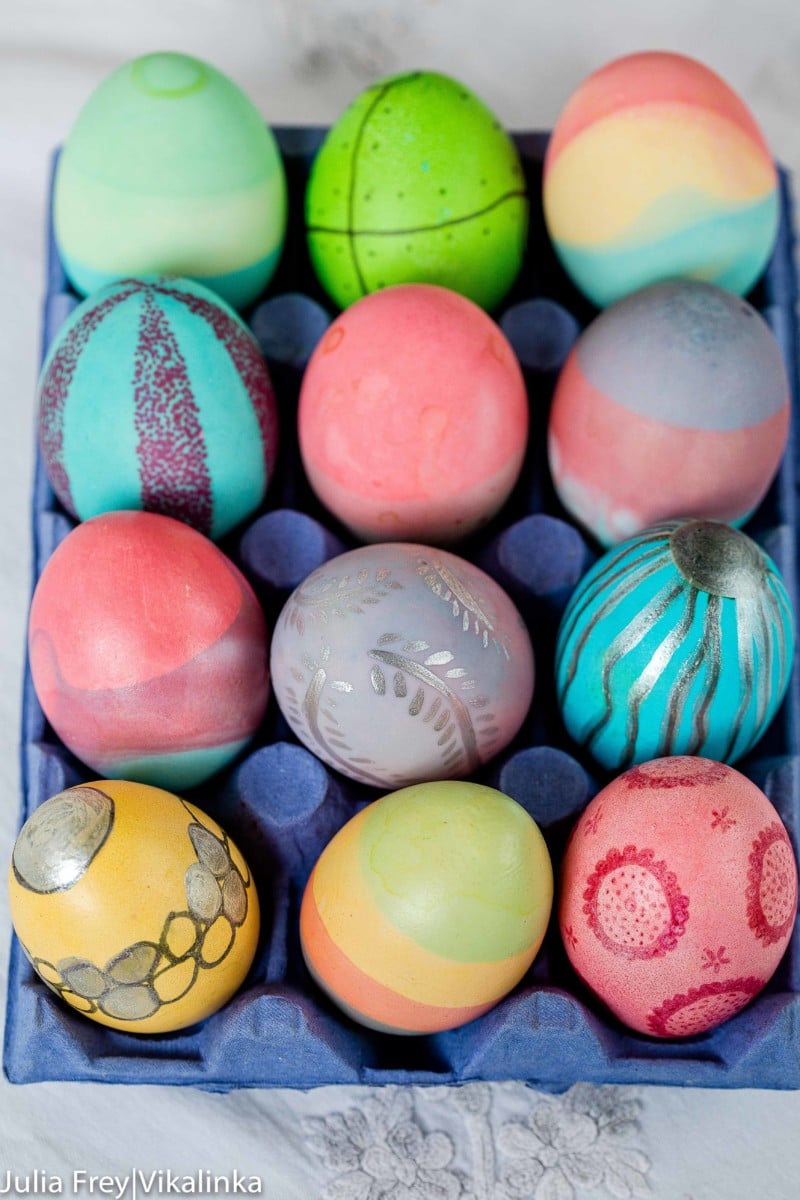
Dying Easter Eggs with Food Colouring
However, if you have very young children the above method might be a bit too intricate for their little fingers. Not to worry, this is what I did with mine.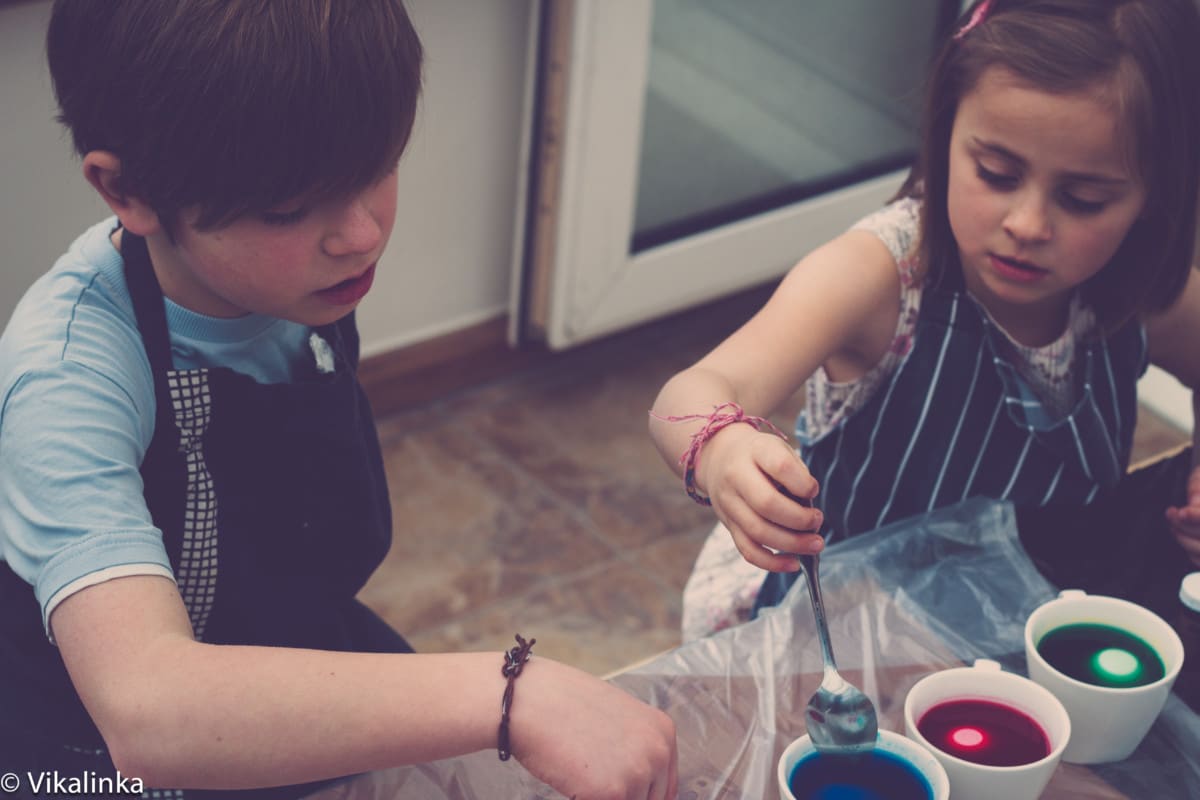
For this simple activity you will need 2 things.
- Food safe colouring gels of as many colours as you can find
- Any type of vinegar you
Add a drop of food colouring gels and a tablespoon of vinegar per each cup of colour. Top up with boiling water. Drop a cooked egg and let it sit for 5 minutes.
I recommend using gel colours as they produce more vivid hues than their liquid counterparts. If you are using liquid food dye, you might need to add 1-2 tbsp per cup to achieve bright colours.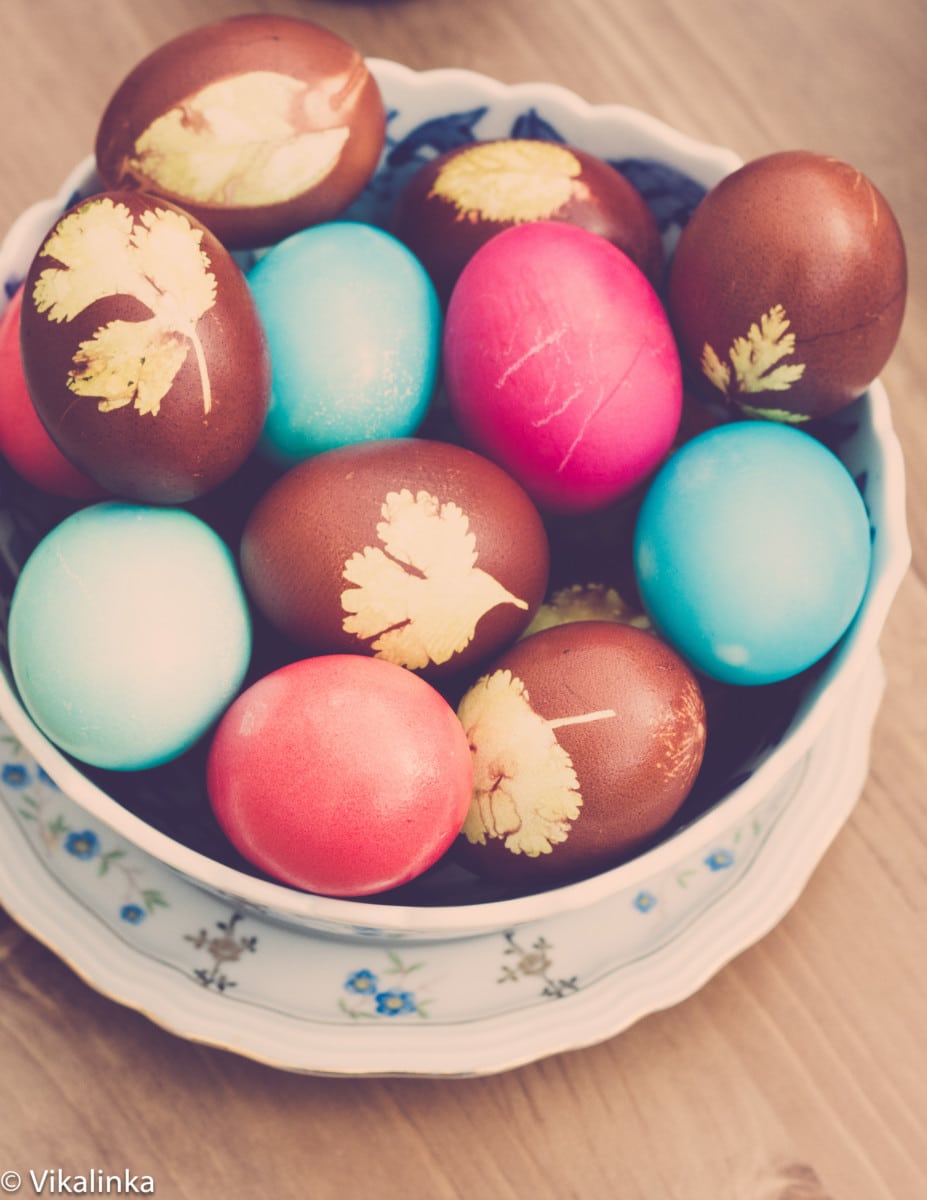
Once you dye your Easter eggs, you might want to give your little ones food safe pencils and encourage them to go CRAZY!
Easter eggs bellow are a joint effort of my children, myself and our friend. The funnest thing I’ve done in a while!
I hope I inspired you to get creative in the kitchen this Easter season!
Don’t worry if you get carried away and colour too many eggs. You can make my Devilled Eggs with them!
Naturally Coloured Easter Eggs
Ingredients
- Onion peels, red or yellow from about 10 onions
- 10-12 White Eggs
- Any leaves you like e.g. rose leaves, parsley, dill
- 1 tsp Salt
- 1 Pantyhose
- Thread
Instructions
- Take the onion peels and put them in a pot.
- Place a leaf of your choice on the egg and slide it inside a pantyhose, tie a thread on each side of the egg to prevent the leaf from sliding. Repeat the process until all the eggs are “dressed” in pantyhose. (Thick and stiff leaves don’t work as well as they don’t cling to the egg enough to produce a clear print.)
- Fill your pot with water and boil the eggs for 15-20 minutes. Make sure the heat is not set on very high as you don’t want your eggs knocking around in the pot and cracking.
- Cool the eggs, remove the panty hose and the leaves, wipe any leaf remnants with a cloth.
- Rub each egg with a little bit of oil for an attractive shiny finish.
Notes
- beetroot for pink and red
- red cabbage for blue and purple
Nutrition information is automatically calculated, so should only be used as an approximation.


I grew up in a Protestant/Evangelical area and my mother always made brightly colored egg shells- she would shake the eggs really well to scramble them, then poke small holes in each end to drain the egg out of the shell and then dye the shells so that they would last forever as decorations and made pretty Easter gifts. My husband and I are now Orthodox and 3 Paschas ago was my first encounter with deep red hard boiled eggs. I’d like to do what my mom used to do so we can keep shells from past years. Do you think I could follow your method with empty shells? Have you tried it?
Hi Sara, I’ve never drained eggs when making these. They are edible and great to use in so many dishes afterwards like egg salad, devilled eggs or add to Ramen. Possibilities are endless.
That is so much fun!! My kids loved it!
SO glad to hear it, Toni!
This is such a great idea! They look so pretty.
These turned out so lovely! Love them!
Amazing, Rachael!
We loved these!! They were so fun to make and using natural ingredients was awesome. My kids loved them!
So cool, Eden!!
Love this!! we used to do the same thing with our Easter eggs! Except mom made her “food coloring” by boiling red and yellow onion peels – time-consuming process.
That’s what I do every year as well but also some fun colours for the kids as well.
I grew up in Germany and we did this with my Grandmother.