This post contains affiliate links. When you purchase through our links, we may earn a commission.
Gingerbread making is an annual tradition in our house that I wouldn’t miss for anything. Usually we build one on Christmas Eve.
Looking at photos from previous years inevitably brings a huge smile to my face-sneaky children popping sweets into their mouths instead of on the house while thinking they are being so discreet! All caught on camera, of course.
Although we’ve been making gingerbread houses for years, we’ve always bought kits and just assembled and decorated them. This year I decided on something with my own flair.
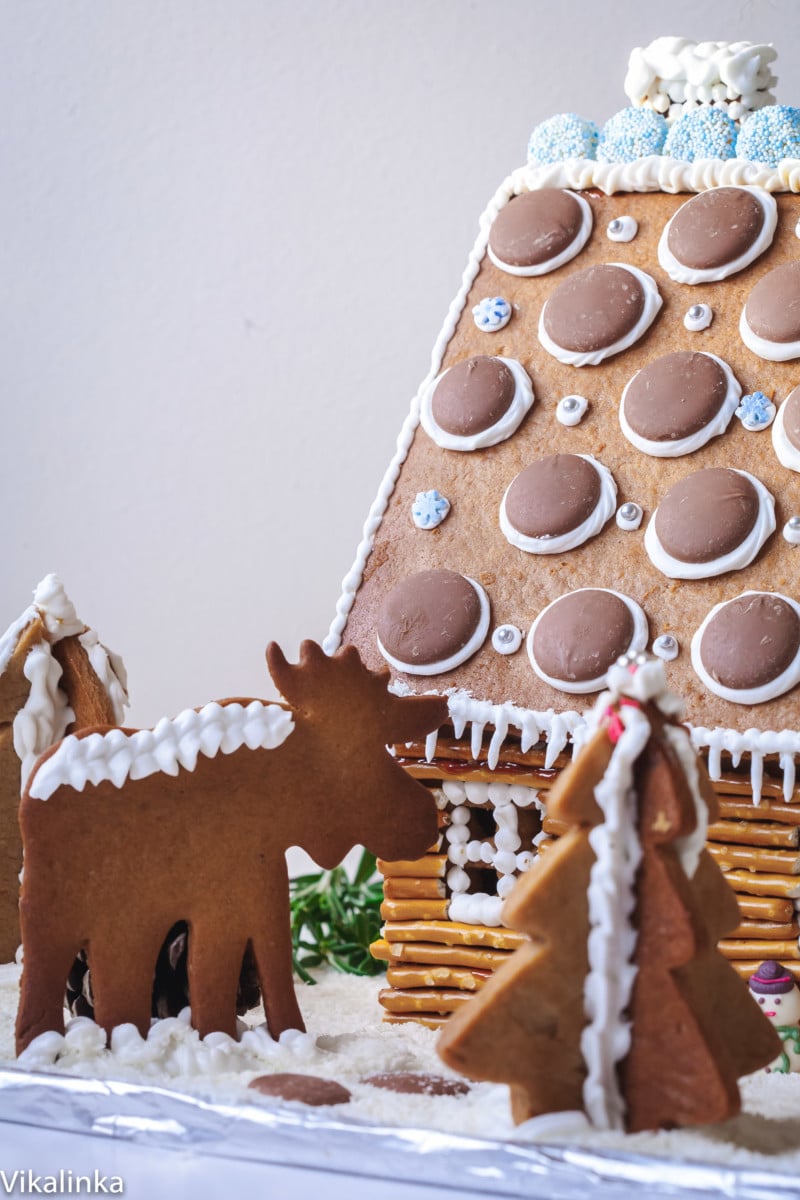
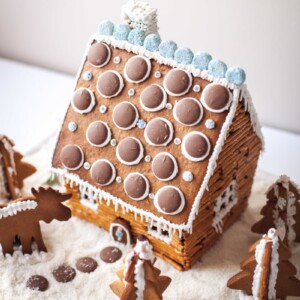
I was so excited just thinking about what kind of gingerbread house I would make. Naturally my choices fell between a rustic Canadian log cabin and an intricate Russian palace.
After careful consideration I decided to pace myself and stick to something simple, seeing that it was my first attempt to bake a gingerbread house from scratch.

Once I decided on the concept I had to figure out how to achieve it.
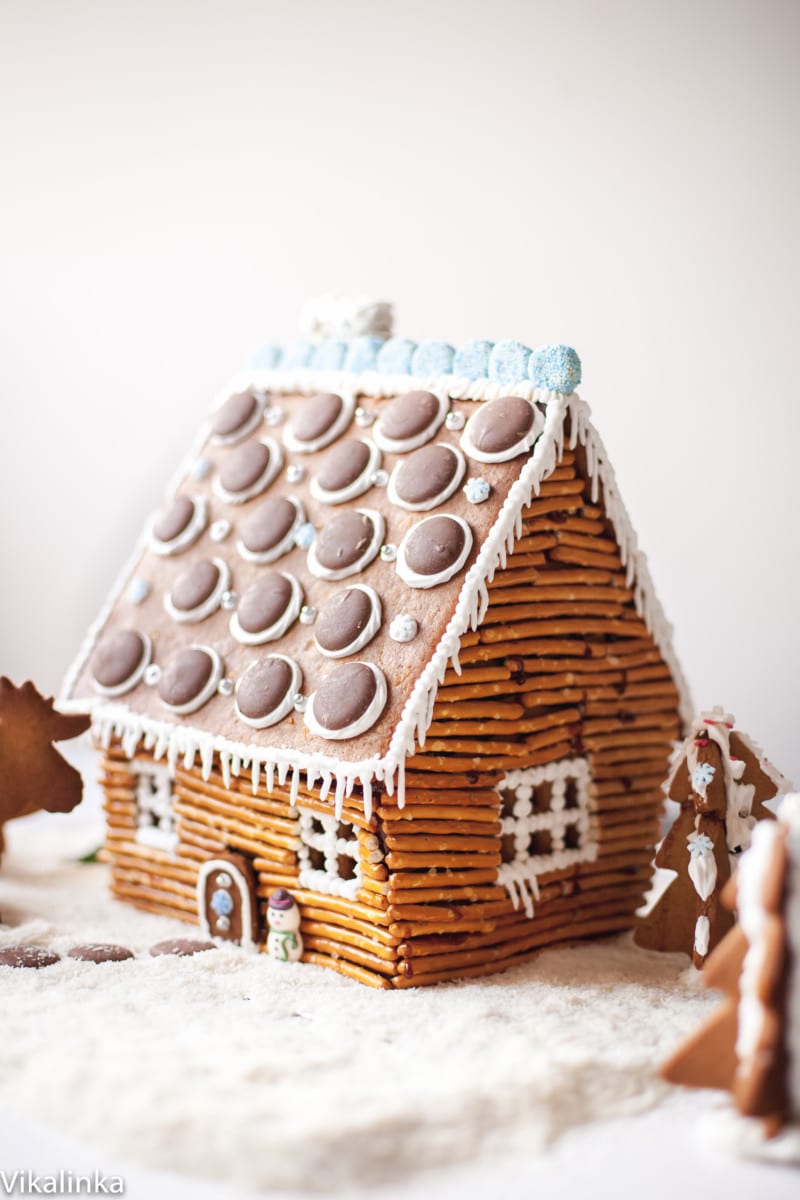
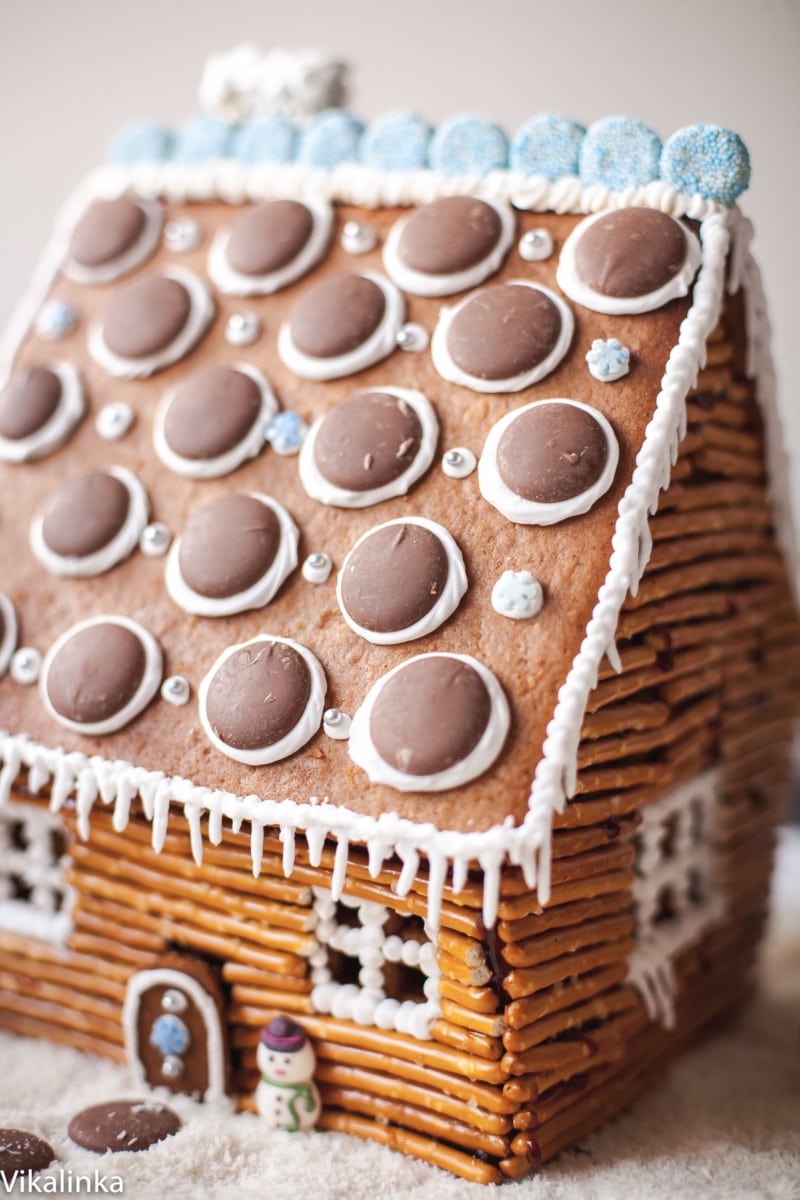
I needed logs, forest and a MOOSE. Thankfully, after a few minutes of internet research and a careful inspection of my cookie cutters I had all three.
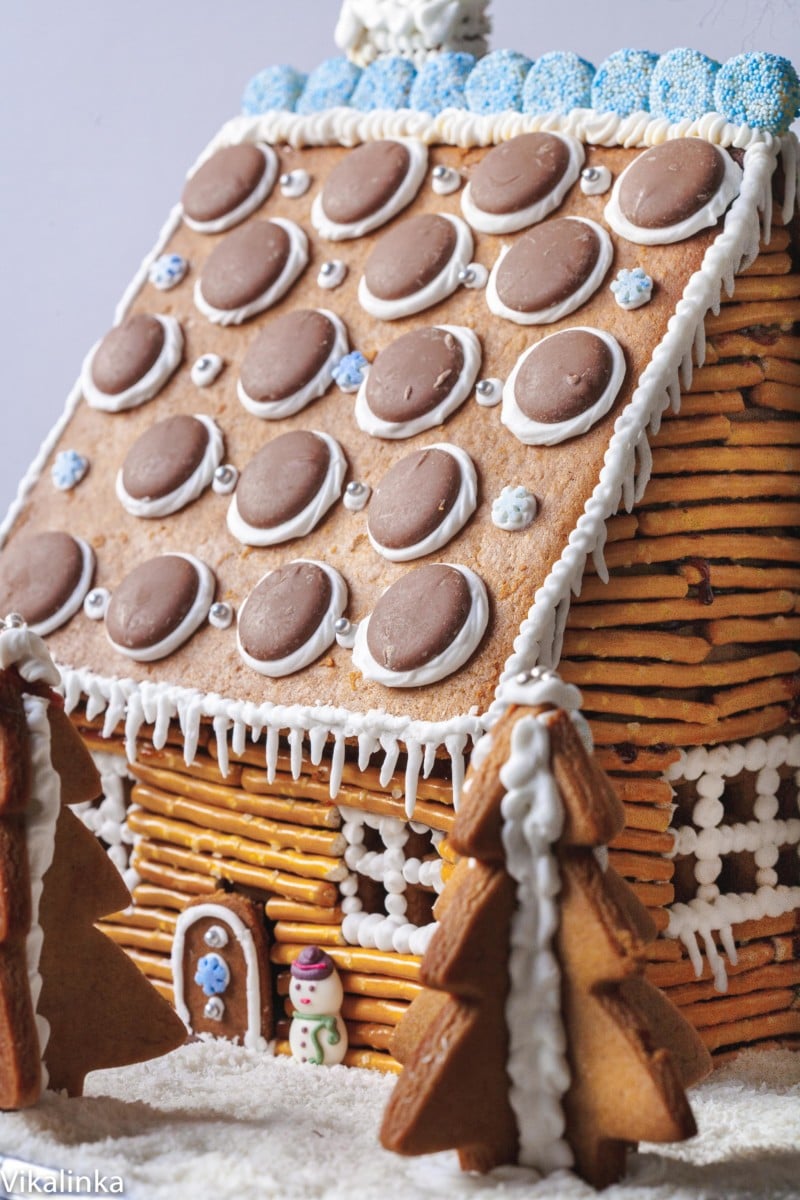
I decided that the house had to be made with treacle instead of molasses. The result was delicious not to mention STURDY.
Traditionally gingerbread house is “glued” together with royal icing but it takes forever to dry out and in humid English weather it’s even trickier. I wanted something less fragile and more stable. I wanted something fail-proof.
What I found worked brilliantly was hot caramel. Just melt a cup of sugar with juice of half a lemon and voila! But under no circumstances touch hot caramel.
Just DON’T DO IT unless you want a career as a spy with erasing your fingerprints is your first step. Trust me I know…I am half-way there. My burned-to-blisters fingertips are still healing. Don’t get me wrong, it’s not dangerous but don’t be stupid…don’t be me!
What is really sad is that I reminded myself (out loud like a crazy person) not to touch the caramel but got so into the process of gingerbread making that forgot and did it anyway!
Truth is this post wouldn’t happen if not for my friend Carmen who was coming over to decorate it with me. The girl is so artistic that I asked her to come and do with me.
She was on her way to my house when I texted her in panic that I am badly burned! She rescued me and finished putting this house together as I was hovering over not letting go of my ice pack for 2 hours!
Luckily, the pain got better and I was able to take part in decorating it. The funnest part of all!
The advantages of using hot caramel by far outweigh “the danger”. The house is permanently “glued” and it literally takes minutes!
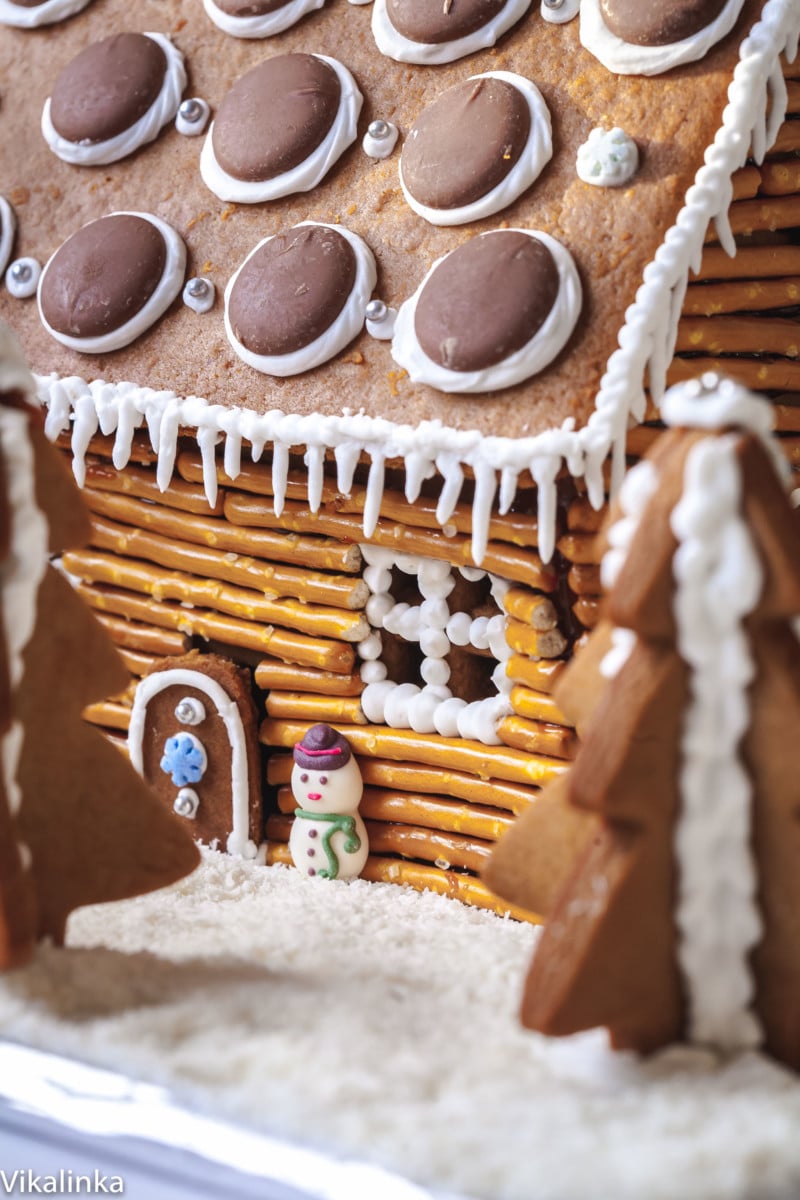
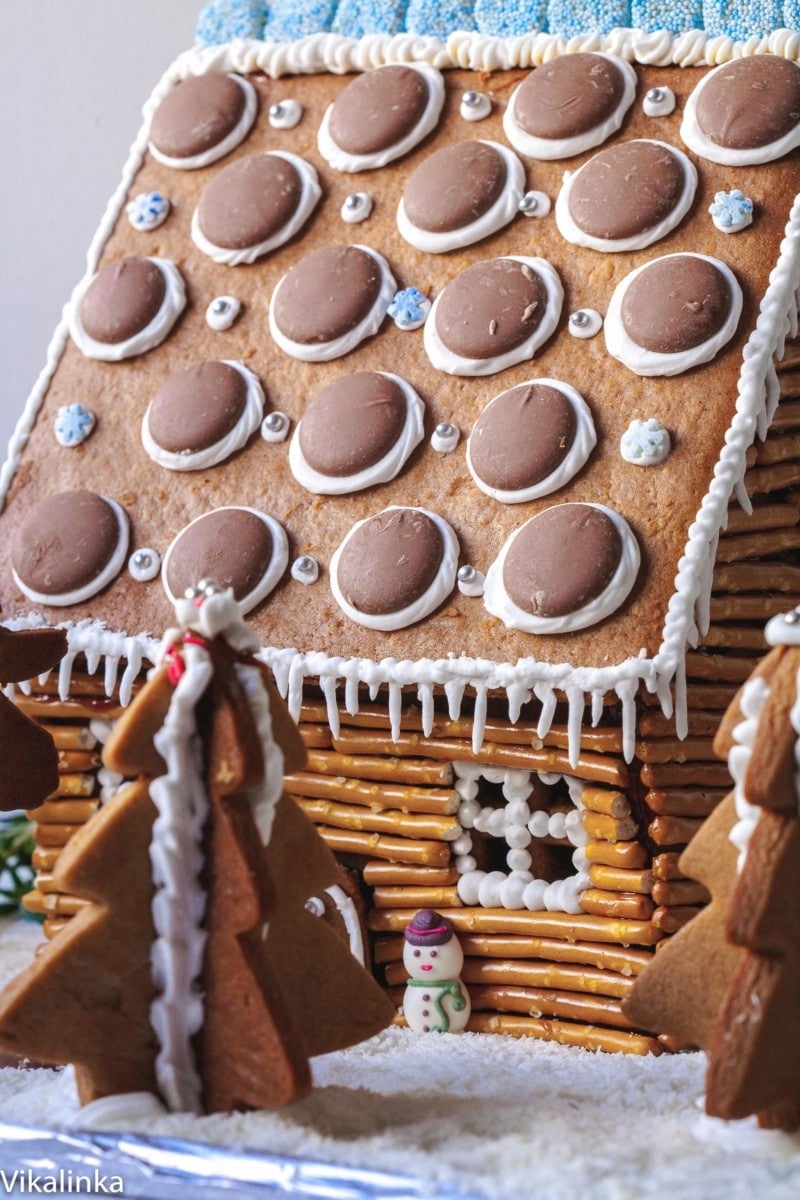
I used hot caramel to put the house together and to attach pretzel sticks to the walls. Use a brush and wear gloves if you don’t trust yourself. This job is definitely for adults only!
How to Make a Gingerbread House at Home {Rustic Log Cabin}
Ingredients
For the gingerbread house
- 250 g margarine like Stork
- 200 g demerara sugar
- 7 tbsp golden syrup
- 600 g plain flour
- 2 tsp bicarbonate of soda
- 4 tsp ground ginger
- 2 tsp cinnamon
- 1 tsp mixed spice
For the royal icing
- 3 egg whites
- 1/2 tsp cream of tartar
- 500 gr icing sugar, sifted
For the hot caramel
- 225 gr-sugar
- 1/2 lemon, juice of
For the decorations
- Pretzel sticks
- Giant chocolate buttons
- silver balls
- liquorice
- any sweets of your choice
- desiccated coconut
Instructions
For the gingerbread house
- Heat oven to 350F/180C/gas 6.
- Melt the margarine, sugar and syrup in a pan.
- Mix the flour, bicarbonate of soda and ground ginger into a large bowl, then stir in the margarine mixture to make a dough.
- Wrap in a cling film and chill in the fridge for 1 hour.
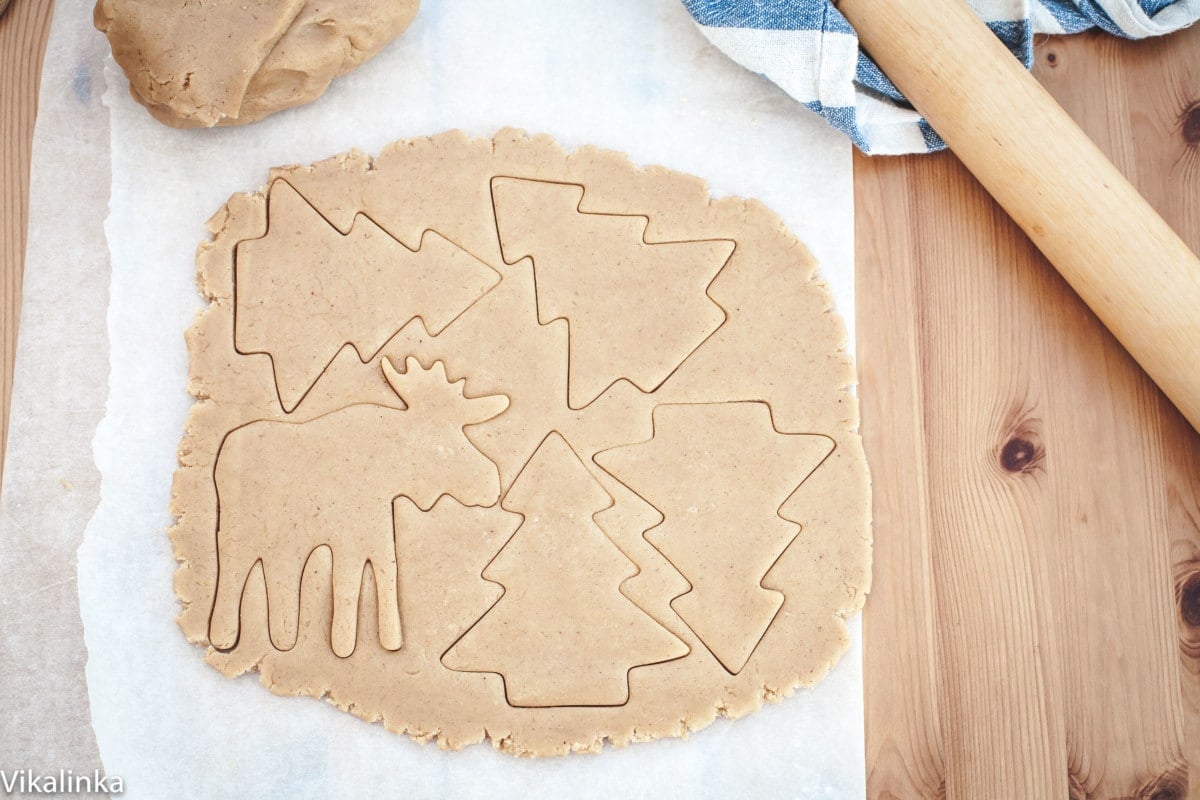
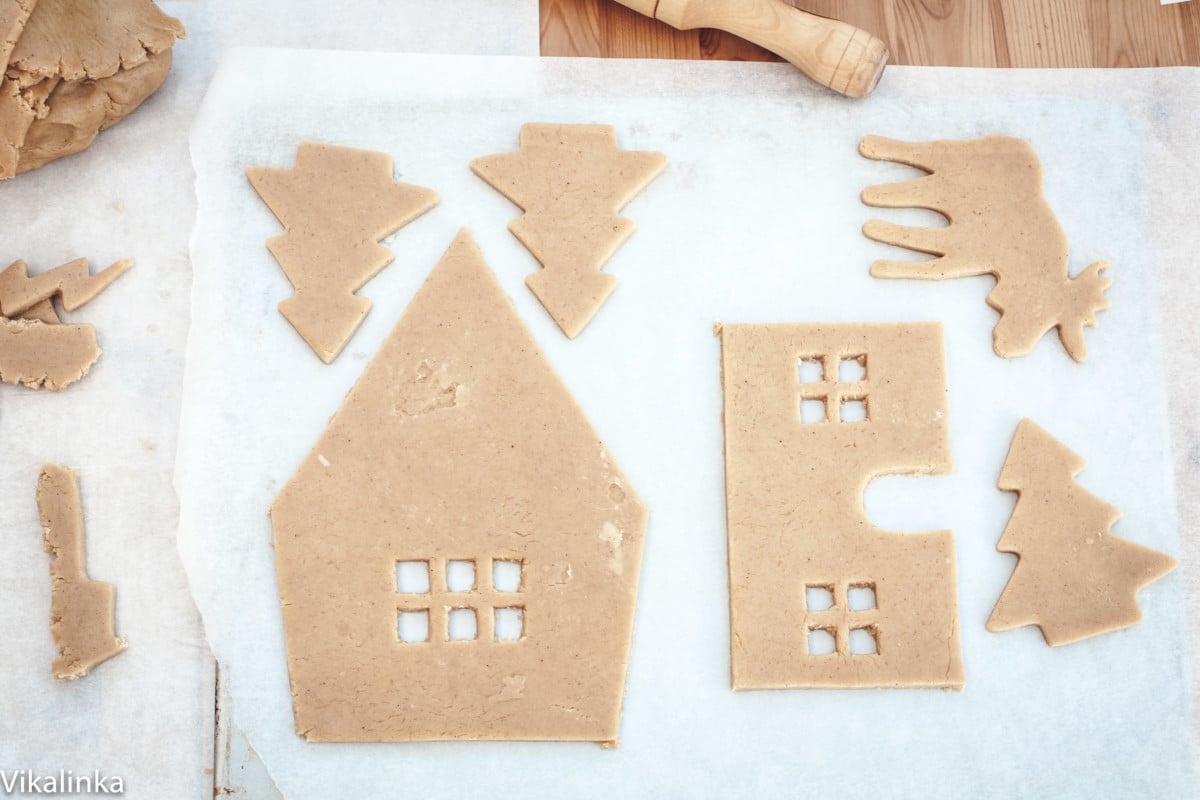
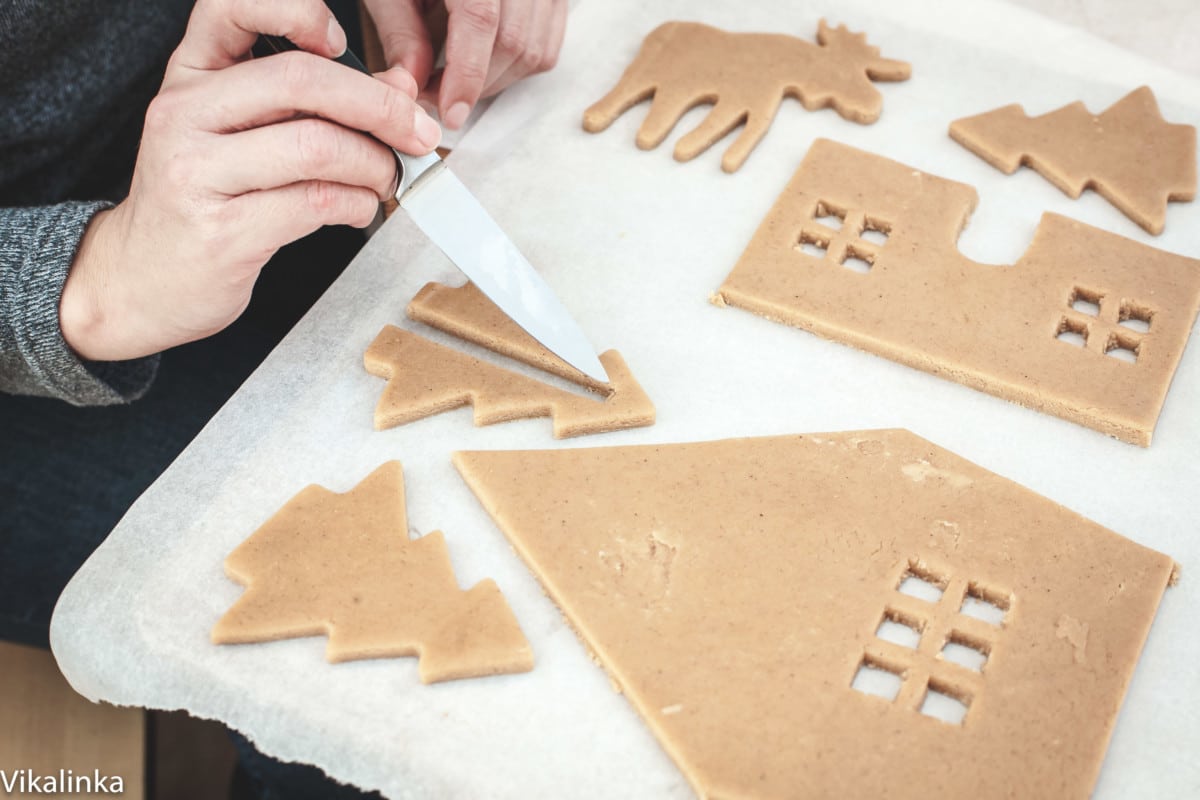
- Cut out the template.
- Put a sheet of parchment paper on your work surface and roll about one quarter of the dough to a 1/4″ thickness.
- Cut out one of the sections, then slide the gingerbread, still on its baking paper, onto a baking sheet. Repeat with remaining dough, re-rolling the trimmings, until you have two side walls, a front and back wall, two roof panels and the chimney pieces.
- Any leftover dough can be cut into Christmas trees.
- Bake in the preheated oven for 15 minutes.
- When the gingerbread parts are baked, take them out of the oven, place a template over them while still hot and trim the expanded pieces so they are exactly the original size with a sharp knife.
- Cool on a wire rack until hard.
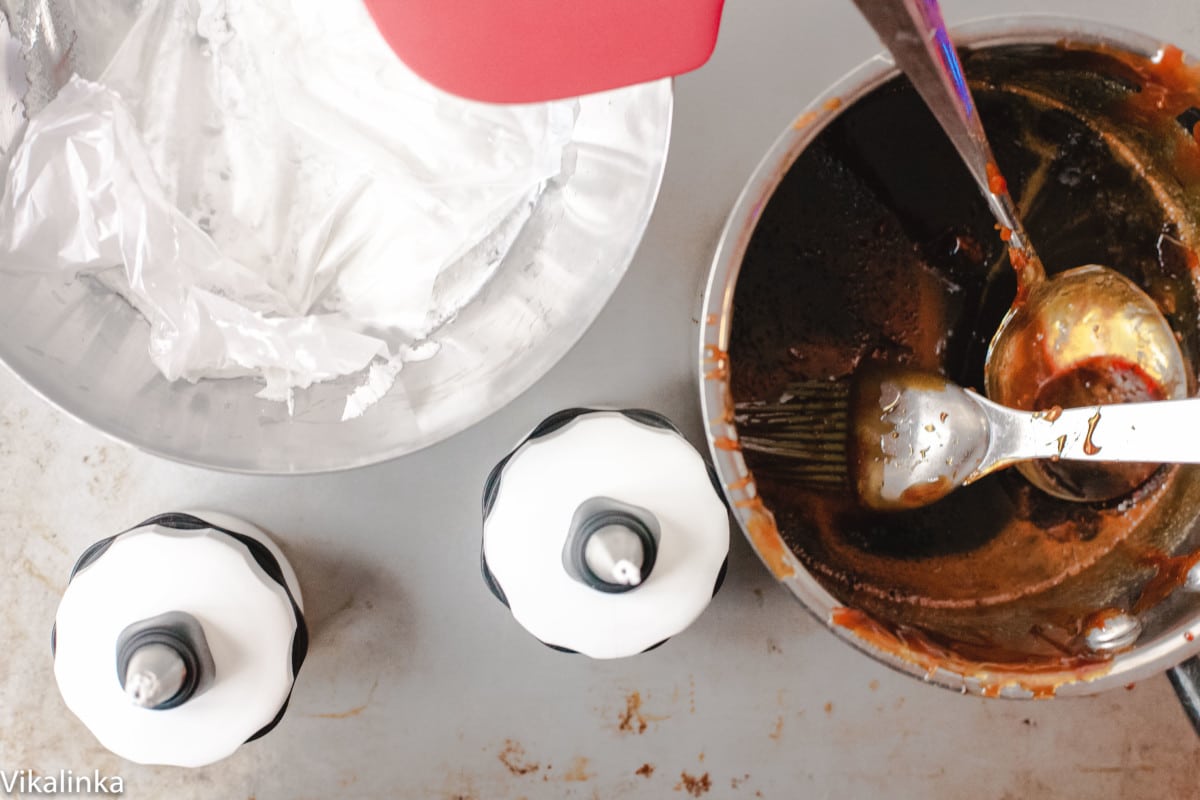
For the hot caramel
- Pour sugar and juice of 1/2 lemon into a small saucepan and set over medium heat. Don’t stir until you see sugar start bubbling around the edges, then stir until sugar is completely dissolved.
- Continue cooking until caramel is amber colour.
- Take off the heat.
- Assemble the house by brushing the seams with hot caramel and holding the pieces together for 1 minutes or so until caramel cools and hardens.
- Start with the walls, then move onto the roof and finish with the chimney.
- When the house is finished set it on a cookie sheet covered with aluminium.
For the royal icing
- Next make the royal icing.
- In a large bowl combine egg whites with cream of tartar, mix with a hand mixer or in a stand mixer until frothy.
- With the motor of a stand mixer still running gradually start adding icing sugar 1/2 cup at a time. Continue whipping until all sugar is incorporated and the icing is very stiff.
- Load up your pastry bag and cover the rest with a cling film directly on the icing to prevent drying out.
- Keep the tip of pastry bag in a glass with a little bit of water to keep it from hardening.
- Use your imagination to decorate your house in any way you fancy!
- Sprinkle coconut all around the house. Use royal icing to set trees and any other object around the house to create a scene you like.
Nutrition information is automatically calculated, so should only be used as an approximation.


It’s gorgeous – pretzel sticks decorations is amazing 🙂 I’m going to make one this year, thanks for the inspiration!
I love your log cabin! So creative and absolutely beautiful! I love making a gingerbread house every year, and love this idea! Just another 12 months to go…. 😉 Your blog is beautiful!
Thank you, Maria! It was such a fun project but I was lucky to have my friend helping, she is the creative force behind the house! 🙂
BRILLIANT! My children cannot eat frosting or icing so we are always deprived of the pleasure of making these…. because, let’s be real: making it and NOT eating it?!?! It’s not going to happen very frequently… But, there you are, with the BRILLIANTEST solution (I wih I had thought of it before!) of all: caramel! I might give it a shot next year! And the fact that the trees are edible, and not full of gunk, as well as the logs…. Ah! Splendid!
Exactly, I feel the same, Jessica. Every year I bought those pre-made kits but never thought of eating the house because they just didn’t look like food more of a craft. This house, however, has been eaten by my kids! Thank you for stopping by and your lovely comment!
This looks so cute Julia! I have to say I find gingerbread houses too much work but the kids enjoy making them so I usually give in. The Oxo stuff must have helped! Your house looks entirely perfect but I would expect nothing less : ) Hope you had a wonderful Christmas in Canada and a very happy 2015 to you and yours… We must have that outing soon!
Wow! Gorgeous work of art! Absolutely beautiful!
This is seriously a piece of art! I am SO inspired now to make a gingerbread log cabin, hopefully mine turns out as beautifully and perfect as yours.
Thank you so much, Thalia. My friend Carmen helped me with this project, so if you have a creative friend, invite her over. It’s more fun this way!
Too cute, I love your log cabin!
Wow! This is the most awesome gingerbread house. I have a soft-spot for log cabins, since I live in one 🙂 Great work.
Oh Jennifer, you live in a log cabin?!! 🙂 I am so jealous. Just landed in Canada yesterday and enjoying all the food and scenery we missed so much!
This is seriously the cutest house ever! So neat and tidy. How in the world did you manage?! You should see mine…but then again I probably don’t have the patience 🙂
Thank you, Katya! I have so many photos of our past houses and they are hilarious to look at…probably similar to yours! This one took A LOT of patience but I was pretty pleased with the result and it was tasty enough to eat, which my kids did. 🙂